Week 17:
Day 4

Understanding Letters

Language / Literacy

Small Group

Skill and Goal

Phonological awareness, Letter knowledge
Children will identify the initial sound of three words that begin with the same sound. Children will also understand the name and sound of the letter E.

Materials
Needed

  • *Letter E card
  • *4 letter E picture cards
  • Chart from Day 2
  • Children’s letter journals
  • Writing tools—1 per child
  • List of children’s first names for display to children
    *Printables provided

Key
Concepts

Review:

  • Beginning sound

Be Prepared: Today’s activity focuses on the initial sound in each child’s name offered with two other words that have the same initial sound. To help the activity move along easily, you may wish to prepare in advance of the activity a list of each child’s first name and two other words with the same beginning sound. The list would be for your use only, not for display to children.

BEGIN:

[Arrange children in a circle on the floor.]

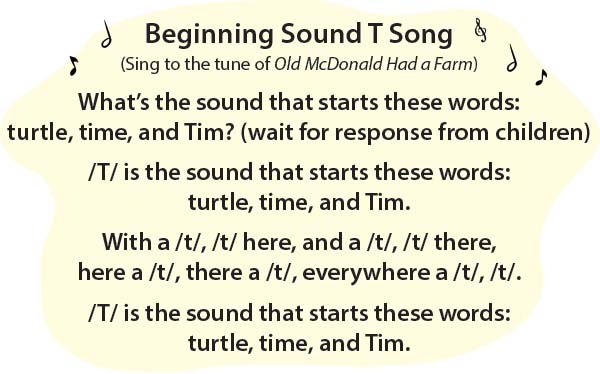
Today we are going to learn more about the beginning sound of our name by singing a song using our names. Remember, we call the first sound we hear the beginning sound of a word.

ACT:

Listen carefully as I sing the song.

EXPLAIN:

Let’s begin with the person to my right in our circle. I will sing the song using (child)’s name and the sound his/her name begins with.

ACT:

[Sing the song as you go around the circle using each child’s name one at a time. For each child, offer two additional words that begin with the same initial sound as the child’s name. Example: For the name “Charlie,” you could use the additional words “change” and “chew” for the song. Begin by singing the first sentence of the song for a child’s name. Then invite children to say the sound that starts the three words. Encourage children to sing the remainder of the song with you after figuring out the sound that begins the three words. Continue until you’ve sung the song for each child’s name.]

EXPLAIN:

Large Letter E CardLet’s learn more about the letter E.

[Display letter E card.

If a child(ren) whose name begins with the letter E was identified on Day 2, invite the child(ren) again pop up. Say the first name of the child(ren). Emphasize the sound of the letter E when you say the name.]

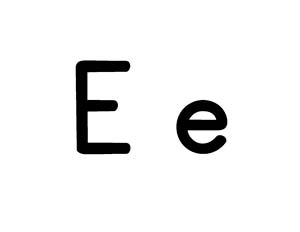
Maybe someone in our group has the letter e somewhere else in their name. The letter might be in the middle or at the end of their name. It will be a lowercase e and it will look like this.

[Point to the lowercase e on the letter card.]

Pop up if you have the letter e somewhere else in your name (not at beginning).

[If a child has the letter e somewhere else in his/her name, point to the name and to the letter e on the list of children’s first names so all children can see the name and the letter e.]

ASK:

What is our word that begins with the letter E? (exercise)

ACT:

The letter E says /e/, just like at the beginning of the word “exercise.” /e/, /e/, exercise. Let’s say that together: /e/, /e/, exercise.

I have two pictures of things that begin with the letter E. I wonder what they could be?

[Hold up one picture card and invite children to identify the animal/item in each picture. After children have an opportunity to guess or say the pictured animal/item, point to and say the word written at the bottom of the card. Example: “This word says elephants. The letter e is at the beginning of the word.” Repeat this procedure with a second picture card.]

Let’s think of some other words that begin with the letter E and write them on our chart. Remember, the letter E says /e/, /e/.

[Help children by suggesting other words that begin with e. Examples: edge, elevator, engine, empty.

Invite one or more volunteer children to find the letter e in words on the chart. Children may point to the letter at the top of the chart and then find it in one of the words below.

Demonstrate and describe how to mark the uppercase letter E on your chart paper.]

We use four lines to make an uppercase E. One line is straight and tall and the other three lines are short and go across.

[Give each child his/her letter journal.]

Now we are going to write the letter E in our letter journal. Please write the uppercase (big) letter E in your journal. Write as much of the letter as you can.

RECAP:

Today we learned more about sounds at the beginning of our names by singing a song!

We also learned that the letter E says /e/, just like at the beginning of the word exercise. We made the uppercase (big) letter E in our letter journal. Let’s say together the sound the letter E makes (/e/).

Scaffolding tips

Scaffolding Tips

Extra support

  • As you sing the song, clearly enunciate the beginning sound of each word to help children identify the initial sound similarities in the three words.
  • Use one or both of the remaining picture cards to help children understand and practice the sound of the target letter.

Enrichment

  • Invite a child to sing the beginning song using E words.
  • Some children may be interested in your demonstrating and describing how to make a lowercase e. Example: “A lowercase e is made with a curved line, and then a short straight line.”

Center Activity

Fill a basket with familiar classroom items. Encourage children to sort the items by initial letter sound. Examples of items to include: pencil, scissors, glue, book, paper, doll.

Family Child Care

Family Child Care

Sing the song from the activity using children’s family member names.

Week 17:
Day 4

Counting Things

Mathematics

Small Group

Skill and Goal

Number knowledge
Children will understand basic characteristics and uses of a number list.

Materials
Needed

  • *Large numeral cards 1–10
  • *Number lists—1 per child
  • 2 different-colored sticky notes
  • *Spinner (see Be Prepared)
    *Printables provided

Key
Concepts

New:

  • Detective
  • Number list

Review:

  • After
  • Next

Optional
Reading

  • 10 Little Rubber Ducks by Eric Carle

Be Prepared: Assemble the *provided spinner.

BEGIN:

We are learning about numbers 1–10. I am going to count to 10. I may make a mistake when I count.

[Begin counting. Repeat a number as you count. Example: 1, 2, 3, 3, 4, 5, 6, 7, 8, 9, 10.]

Did I make a mistake? What was the mistake?

[Encourage children to say how they know it was a mistake.]

You are becoming counting detectives! A detective finds information that others may not know.

EXPLAIN:

Today we will learn about a number list. A number list is a list of numbers from 1–10. Let’s take a look at a number list.

[Give each child a number list. If possible, display a number list on a board or projector screen so children can see another example of a number list.]

ASK:

What does the number list look like? (it has numbers on it, it starts at number one)

ACT:

We are going to say together each of the numbers on our number list. We will put our finger on each number we say together. Let’s begin by putting our finger on number one.

[Lead children in saying and pointing to numerals one through 10 as you demonstrate with your own number list.]

EXPLAIN:

We can use a number list to help us know which number comes after another number. Remember, after means something comes later than something else. It follows something else. We can look at our number list to know which number comes after another number.

[Point to and explain that numeral two comes after numeral one on our number list.]

We talk a lot about the “next number” when we talk about numbers. We know that next means something comes right (immediately) after something else. The next number on a number list comes right (immediately) after another number.

[Point to numeral two on the number list as you ask the following question:]

ASK:

I am pointing to number two on our number list. What is the next number? (three; number three comes after number two)

ACT:

We are going to play a game that uses a number list!

[Display large numeral cards in order from 1–10. Place them in an area where all children can see them and they are easy to point to.]

When we line up our numbers, they look like a giant number list! The game we will play today is called The Great Race. We will divide the class into two teams to play.

[Form two groups, with one group sitting next to the other group. Both teams use the same number list. Encourage children to take turns moving their team’s sticky note on the number list.]

Each team will begin the game with a different-colored sticky note that will be placed before the number one on the number list.

[Choose two different colors of sticky notes and place them before the numeral one. Tell each group which color represents their team.]

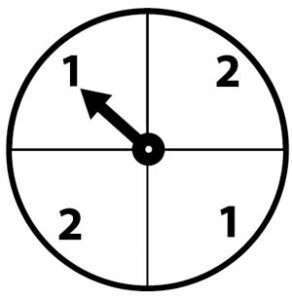
We will use a spinner that has numbers one and two on it. I will spin the spinner for the first team and see which number the arrow points to.

[Spin the spinner and show the numeral the arrow points to.]

Which number is the arrow pointing to?

It is pointing to the number __.

[Hold up __ fingers.]

The first team needs to move its sticky note (one or two) spaces on the number list. I will point as we count together.

The Great Race game spinner[Point to the numerals on the number list as you count together and move the sticky note. With the hand that is holding up the appropriate number of fingers, put one finger down each time you count.]

Now I will spin the spinner for the second team.

[Spin the spinner and show the numeral the arrow points to.]

Which number is the arrow pointing to? It is pointing to the number __.

[Hold up __ fingers.]

The second team needs to move its sticky note (one or two) spaces on the number list. I will point as we count together.

[Point to the numerals on the number list as you count together and move the sticky note. With the hand that is holding up the appropriate number of fingers, put one finger down each time you count.]

Now each team will have another turn. I will spin the spinner for the first team again.

[Spin the spinner and show the numeral the arrow points to.]

Which number is the arrow pointing to? It is pointing to the number __. This time when we move our sticky note, we will begin by saying the number we are on, and then we will count on from that number. Let me show you.

[Begin counting by saying the number the sticky note is currently on, and then counting forward from that number. Example: The sticky note is currently on number two and the arrow is pointing to number two. Hold up two fingers. Begin with number two, on the number list and count forward two more while putting down one finger each time you count, “2, 3, 4.” Continue the game until both teams reach the numeral 10. The goal of The Great Race is not to finish first, but for all children to finish.]

RECAP:

We are learning how to use a number list. A number list is a list of numbers from 1–10. We also played The Great Race game and moved our sticky note across the number list each time we spun a number.

Scaffolding tips

Scaffolding Tips

Extra support

  • In the opening segment, offer a second opportunity to identify your counting mistake. Example: 1, 2, 3, 4, 5, 6, 8, 9, 10.
  • Invite children to point to the numbers on the number list as you count as a group.
  • If children seem uncertain about “after” and/or “next,” use the Self- Regulation Week 1, Day 1 activity plan to help children remember what these concepts mean.

Enrichment

  • Ask children if they can show you where the sticky note would go if they spun a three.
Mathematics

Center Activity

Supply *number lists and magnetic numerals in a basket. Invite children to choose a numeral from the basket and tell each other what numeral comes next.
*Printables provided

Family Child Care

Family Child Care

Practice The Great Race game throughout the day. Invite pairs of children to play during outdoor time. Invite school-age children to practice working with numbers as they take turns rolling a pair of dice and subtracting one from the other. The child with the lowest difference gets a counter. The winner is the child with the most counters after 10 rolls of the dice.

Week 17:
Day 4

Exploring Where We Live

Social Studies

Large Group

Skill and Goal

Knowledge of social and physical environments
Children will understand characteristics of a big city, including a skyscraper.

Materials
Needed

  • *6 pictures as shown
    *Printables provided

Key
Concepts

New:

  • City
  • Skyscraper
  • Elevator
  • Cable

Review:

  • Community

Looking Ahead: Take or secure pictures of some geographic characteristics of your community, such as ponds, lakes, bridges, railroad tracks, and hills. These pictures will be used in Weeks 19 and 20.

BEGIN:

Last week we learned about the community where we live. We know that many neighborhoods together make a community. What are some places we might find in a community? (hospital, fire station, post office, etc.)

EXPLAIN:

There are many different kinds of communities. A city is a large community. Some cities are very big. Many people live in a big city.

Today we are going to learn about tall buildings in a big city. People live and work in these tall buildings.

[Display picture of a big city.]

Here is a picture of a very big city.

Aerial view of a city
Sam Valadi/flickr.com/(CC BY 2.0)
skyscraper
Barnyz/flickr.com/(CC BY-NC-ND 2.0)
ASK:

What do we see in this picture of a big city? (many tall buildings)

EXPLAIN:

A really tall building in a big city is called a skyscraper. A skyscraper has many floors. People live or work in a skyscraper. There is a very big skyscraper in our picture of a big city.

[Invite a volunteer child to point to the skyscraper in the picture of a big city.]

Let’s look at another picture of a skyscraper.

[Display picture of a skyscraper. Point out its height in comparison to the trees below.]

ASK:

Have you ever seen (or been in) a skyscraper? What was it like?

EXPLAIN:
elevator
Tate Johnson/flickr.com/(CC BY 2.0)

skyscraper

People use an elevator to get from one floor to another floor in a tall building.

[Display picture of an elevator door.]

An elevator goes up and down in a building. The elevator stops where people want to get on or off.

This picture shows us the floors of a skyscraper. There are many floors.

[Display picture of a skyscraper with cutout showing multiple floors. Point to and describe the floors and how an elevator travels from the bottom of the skyscraper to the top floor.]

Long cables move the elevator. A cable is a thick rope of wire. Cables are very strong. Let’s look at this picture of elevator cables.

[Display picture of elevator cables. Point out the long cables that move an elevator.]

We push a button in the elevator when we want to get to a different floor. Each floor has a different number.

[Display picture of elevator buttons. Point out floor numbers on buttons.]

ASK:

Have you ever been in an elevator? What was it like?

RECAP:

Today we learned that a city is a large community. Big cities have tall buildings called skyscrapers. What do people do in a skyscraper? (live, work) We also learned that people use an elevator to get from floor to floor in a skyscraper and other tall buildings.

Scaffolding tips

Scaffolding Tips

Extra support

  • To help children understand how more people could live or work in a really tall building than in a building of shorter height, use blocks to represent one floor of a building and stack different numbers of blocks in two contrasting structures.
  • Children may be familiar with a building in your community that has two or more floors. Remind children of what is located on the different floors of this building to support their understanding of floors in a building.

Enrichment

  • Put masking tape on the floor to show the floor size (standing room) of an elevator. Invite different numbers of children to step inside the imaginary elevator to pretend moving to a different floor in close quarters.
Social Studies

Center Activity

Invite children to build a city in the block center. Encourage them to include a skyscraper.

Family Child Care

Family Child Care

Encourage children throughout the day to continue to use the “elevator” marked with masking tape.

Week 17:
Day 4

Moving Our Bodies

Physical / Health

Small Group

Skill and Goal

Motor development
Children will understand and practice basic actions in catching.

Materials
Needed

  • *1 picture as shown
  • Large and small balls
    *Printables provided

Key
Concepts

New:

  • Catch

Also
Promotes

  • Self-Regulation

BEGIN:

Last week we practiced throwing a ball up into the air.

[Display picture of girl throwing a ball.]

Here is a picture of a child throwing a ball up into the air.

What can the girl in this picture do with her hands when the ball comes down? (catch the ball)

EXPLAIN:

Girl tossing ball
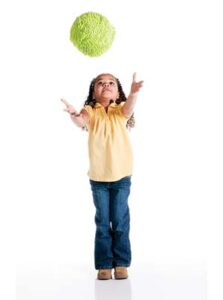
When we catch something, we use our hands to stop and then hold something that is moving through the air.

ASK:
  • What would happen if we used our hands to stop something that is moving through the air but did not hold it? (the item would fall to the floor/ground)
    [Demonstrate throwing a large ball up into the air, stopping the ball with your hands when it comes down, and not holding the ball so it falls to the floor.]
  • What did I not do after I stopped the ball? (hold it)
EXPLAIN:

We use our hands to do two things when we catch something. We stop something that is moving through the air, and then we hold it with our hands.

We also use our eyes when we catch something.

ASK:

[Point to your eyes as you ask the following:]

How do our eyes help us catch something? (watch what is moving through the air so we know where to put our hands to stop it)

EXPLAIN:

[Display picture of girl throwing a ball and point to her head.]

The girl in our picture is looking up. She is keeping her eyes on the ball. She is watching the ball carefully. This will help her know where to put her hands to stop the ball.

The girl in our picture will need to move her arms closer together to stop the ball as it comes down.

ASK:

What might the ball do if the girl keeps her arms far apart? (ball will fall to the floor/ground)

EXPLAIN:

[Use a large ball and a small ball to demonstrate as you describe the following:]

We put our arms and hands further apart to stop and then hold a larger ball. We put our arms and hands closer together to stop and then hold a smaller ball.

I will pass around some larger balls and some smaller balls for you to hold. Please pay attention to how far apart you put your arms and hands when you hold balls that are different sizes.

ACT:

[Pass around balls as described above. Encourage children to describe whether their arms and hands are closer together or further apart when they hold different balls.]

Let’s practice our catching skills. We can share our different balls, so each of us can try catching larger balls and smaller balls. Each of us will throw a ball up into the air and then practice catching it.

[If appropriate, remind children to watch their ball carefully and to move their arms and hands to stop the ball and then hold it.]

RECAP:

How do we use our eyes when we want to stop something that is moving through the air? (watch what we want to stop) What do we do with our hands after we stop something from moving in the air? (hold what was moving) What was easier to catch, a smaller ball or a larger ball? Why?

Scaffolding tips

Scaffolding Tips

Extra support

  • If a child has repeated difficulty catching a ball, hold a ball just above and in front of the child’s head and drop it into his/her hands.
  • If a child needs more practice following an object with his/her eyes, blow bubbles into the air and encourage the child to watch the bubble float down and then try to catch a bubble when it is in front of him/her.
  • If it is too challenging for a child to catch a ball falling through the air, invite the child to sit on the floor with legs spread apart, and then you roll a soft ball toward the child. Encourage the child to use his/her hands to stop and then hold the ball.
  • Review basic actions in throwing a ball up into the air (Week 16, Days 4 and 5) if it appears children need additional practice in this type of throwing.

Enrichment

  • Invite children to use one hand to throw a smaller and/or larger ball up into the air (one at a time) and then catch it. Ask children to describe their experience of using one hand with a smaller ball vs. a larger ball.
Physical / Health

Center Activity

In an outside area, designate a specific place for children to practice throwing and catching items. Use a variety of balls or other light items. As an indoor activity, create a “snowball” catch game with paper crumpled into balls. Encourage children to throw the “snowballs” up into the air and then catch them. Add challenge by inviting children to catch with one hand.

Family Child Care

Family Child Care

Provide stuffed animals or teddy bears for children to throw up into the air to catch. Consider providing larger toys for younger children and smaller stuffed toys for older children.