Week 16:
Day 5

Understanding Words

Language / Literacy

Large Group

Skill and Goal

Oral language, Letter knowledge
Children will interpret information presented in a book read aloud and increase the number of novel words they understand. Children will also identify the name of the letter P.

Materials
Needed

  • *Letter P card
  • Book of your choice for this week’s repeated reading
  • Words We Understand chart from Days 1 and 3
    *Printables provided

Key
Concepts

New:

  • 2–3 words (see Be Prepared)

Review:

  • All words introduced on Days 1 and 3

Be Prepared: This is the third of three repeated readings of a book with children. Today’s session focuses on children’s interpretation (explanations, reasoning) of information presented in the book. The session also will help children understand more novel words. From the list of novel words you identified prior to your first reading of the book, select 2–3 words to define for children today. See the Language/Literacy section of the ELM User Guide: 3–5 Years for additional information on how to select and define novel words.

BEGIN:

Large letter P card[Display letter P card.]

  • What is the name of this letter?
  • Pop up if you have the letter P in your name!
EXPLAIN:

Now let’s spend some time with our book.

[See Week 3, Day 5 of Language/Literacy for a description and examples of how to approach today’s book reading. Key aspects are summarized below:

  • Display book cover. Explain that we have read our book two times this week. Each time we read the book we learn something new. Point to and say title of book. Engage children in describing what they remember about the book:
    • What is our book about?
    • Who were the main characters in our book?
    • What happened first? What happened next?
  • Point to and say the names of author and illustrator. Point to where to begin reading.
  • During the reading, pause on pages that include a word defined in the prior two readings of the book. Ask or remind children what the word means. Also pause during the reading to define the 2–3 words identified for today’s session, using the following approach:
    • Read the sentence with the novel word. Identify the novel word.
    • Repeat the sentence in which the word is used.
    • Define the novel word and connect the definition to the book.
  • After the book reading, write the 2–3 words targeted for today on the chart and engage children in a discussion of each word, using one or more of the following strategies:
    • Ask children to describe a picture related to the word.
    • Define a word without naming it and ask children to identify the word.
    • Encourage children to think about a novel word or phrase in another context.
  • Explain that different types of things happened in our book. Facilitate a discussion of children’s interpretations of events and/or characters in the book, especially events or characters related to one or more words defined this week. See Week 3, Day 5 for examples.]
Week 16:
Day 5

Counting Things

Mathematics

Large Group

Skill and Goal

Number knowledge
Children will strengthen their understanding of how to compare groups of different quantities. Children will recognize numerals one through eight.

Materials
Needed

  • *Large numeral cards 1–8
  • 12 identical blocks
    *Printables provided

Key
Concepts

Review:

  • Equal
  • More
  • Fewer

Optional
Reading

  • Caps for Sale by Esphyr Slobodkina

BEGIN:

We are learning how to compare the number of items in two groups. Some of our groups have been equal. What does equal mean? (the same amount)

ACT:

Let’s practice comparing some groups of fingers.

  • What does it mean when something has more? (it has a larger amount of items)
  • What does it mean when something has fewer? (it has a smaller amount of items)

Please hold up one finger on one hand and five fingers on your other hand.

Which hand has more fingers up? How do we know?

Now let’s hold up two fingers on one hand and four fingers on our other hand.

Which hand has fewer fingers up? How do we know?

Let’s try one more. Please hold up three fingers on one hand and four fingers on your other hand.

Which hand has more fingers up?

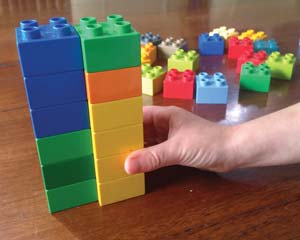
Now let’s compare two groups of blocks.

[Display two groups of six blocks.]

Which group of blocks has more? (neither)

Both groups have six blocks. They are equal!

EXPLAIN:

We also are learning what numbers 1–8 look like.

ACT:

[Display numeral cards 1–8 in random order. Invite children to name each numeral. Then invite a volunteer child to point to and lead all children in counting the number of dots on each card. Invite a different child for each card.

Encourage children to also hold up the corresponding number of fingers.]

RECAP:

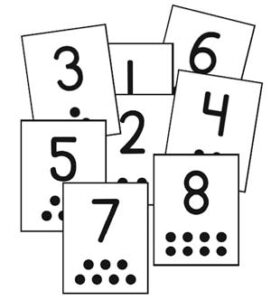
We are learning how to compare groups. We can tell which group has more things and which group has fewer things. We know that equal groups have the same amount. We are also learning what numbers 1–8 look like. We are becoming number experts!

Scaffolding tips

Scaffolding Tips

Extra support

  • If children need help in determining how many fingers to hold up for a given numeral, hold up the correct number of fingers and count them aloud as you point to each one.

Enrichment

  • Invite children to say the numeral that comes after numeral eight. Encourage children to hold up nine fingers.
Mathematics

Center Activity

Provide several counting books that include numerals 1–10. Invite children to look at the books and identify the numerals they find. As children identify numerals, ask them to hold up the corresponding number of fingers.

Family Child Care

Family Child Care

Encourage school-age children to compare numbers by playing More or Less. Invite children to think of a number between one and twenty. Try to guess the child’s number by asking the child questions using the terms “more” and “less.” Example: “Is your number more than 10? Is your number less than 17?” After children have a good understanding of the game, invite them to be the person who guesses.

Week 16:
Day 5

Exploring Where We Live

Social Studies

Large/Small Group

Skill and Goal

Knowledge of physical environments
Children will strengthen their understanding that a community is made up of different neighborhoods.

Materials
Needed

  • Neighborhood drawings from Day 4
  • Blocks and other building manipulatives (see Be Prepared)

Key
Concepts

Review:

  • Community

Be Prepared: Children will break into small groups today to build things that may be found in different neighborhoods in your community represented on Day 4. Place a selection of blocks and other building manipulatives in each of 3–4 areas in your classroom.

BEGIN:

Today we will learn more about the community where we live. Our community is called (city, town, base, post, camp). A community is bigger than a neighborhood. There can be many neighborhoods in a community.

EXPLAIN:

Let’s look at the drawings of neighborhoods in our community we discussed yesterday. We have drawings of ___ neighborhoods in our community.

[Display neighborhood drawings from yesterday. Briefly remind children of the structures or other items represented in each neighborhood drawing.]

Today we are going to pretend our classroom is the community where we live. We know that there are different neighborhoods in a community. I am going to place each one of our neighborhood drawings in a different part of our pretend community.

ACT:

[Place each drawing on a separate table or visible area in your classroom. Explain that each area represents a neighborhood in your community. Example: “This is a picture of our center neighborhood. I am going to place it on this table. We will pretend that this table is our center neighborhood in our community. Remember, we are pretending our classroom is our community.”]

EXPLAIN:

We are going to work in groups to make something that might be found in each neighborhood in our pretend community. We can use blocks and other items to make places or things that might be found in each neighborhood. If you are in the group that is working in the center neighborhood area, you might want to build our center or some of the things around our center.

When we are finished building, we will take a walk around our pretend community to see the items in each of our pretend neighborhoods!

ACT:

[Divide children into 3–4 groups. Each group will work in a different “neighborhood.”

Children may work together or independently when building items in each neighborhood.

Gather children together after they have created items that can be found in each neighborhood. Lead children as you “take a walk” around your pretend community to look at each pretend neighborhood. Encourage children to describe what they see in each pretend neighborhood.]

RECAP:

Today we pretended our classroom was the community where we live. There can be different neighborhoods in a community. We each built things in a different pretend neighborhood in our pretend community.

Scaffolding tips

Scaffolding Tips

Extra support

  • As children build in their “neighborhood,” offer ideas of items that can be built. Point to items in the neighborhood drawing to help children remember some of the things that can be found in the neighborhood.
  • If children wish to work in pairs or small groups to build something together, it may be helpful to describe and demonstrate how groups should try to work together (Week 14, Day 4).

Enrichment

  • Encourage children to describe to others the items built in their “neighborhood.”
Social Studies

Center Activity

Provide several large appliance boxes. Encourage children to pretend the boxes are places in a neighborhood or community. Supply markers and crayons for children to use to decorate the boxes.

Family Child Care

Family Child Care

Provide older children in your setting with a map of your community. Encourage them to look for familiar places.

Week 16:
Day 5

Moving Our Bodies

Physical / Health

Small Group

Skill and Goal

Motor development
Children will understand how different parts of their body help them throw a ball up in the air.

Materials
Needed

  • Large soft balls (punch balls)—1 per child

Key
Concepts

Review:

  • Throw

Also
Promotes

  • Self-Regulation

Be Prepared: Gather children in their personal space farther apart than normal so there is more space for children to catch balls.

BEGIN:

[Display ball.]

What did we do with a ball like this yesterday? (threw straight up in the air)

ASK:

[Demonstrate children’s correct responses to the following questions:]

  • How do we hold the ball to throw it? (in front of us, one hand on each side)
  • What do we do next? (move ball with both hands/arms below our waist, then move up)
  • When do we let go of the ball? (when it gets near our nose)
ACT:

[Provide each child with a ball.]

Let’s practice what we learned yesterday. Please hold your ball with both hands and do what we learned yesterday.

[Lead children in 2–3 practices in throwing the ball straight up.]

EXPLAIN:

Now let’s practice throwing in different ways. I will say some ways we can throw the ball. Try to throw the ball in the way I suggest. Remember, we will stay in our personal space to throw our ball. If we are not able to catch the ball when it comes down, wait to get it after all of the balls have landed.

ACT:

[Offer a series of requests, using suggestions below. Demonstrate each request as appropriate.

  • Close your eyes and throw the ball straight up in the air.
  • Stand on your tiptoes and throw the ball straight up in the air.
  • Get on your knees and throw the ball straight up in the air.
  • Sit down and throw the ball up in the air.]
ASK:
  • Which was the most difficult way to throw a ball up in the air? Why?
  • Which was the easiest way to throw a ball up in the air? Why?
RECAP:

Today we practiced throwing a ball in the air in different ways. We learned how different parts of our body (eyes, legs, feet) can help us throw a ball into the air.

Scaffolding tips

Scaffolding Tips

Extra support

  • If a child has difficulty throwing the ball in the air while in one or more of the different body positions, explain that we are trying different ways to find out how our body helps us throw a ball in the air. It is okay if we cannot throw the ball sometimes. We are exploring and learning.

Enrichment

  • Encourage children to talk about how limiting uses of different parts of their body (eyes, legs, feet flat on the floor) changed how they threw the ball up in the air.
  • After the throwing attempt while on knees and/or sitting, encourage children to talk about how not being able to move the ball below their waist (as part of moving the ball) may have affected how high they could throw the ball in the air.
Physical / Health

Center Activity

Continue the Day 4 option of providing a designated space for children to practice throwing balls up in the air. Remind children of steps in throwing the ball straight up in the air.

Family Child Care

Family Child Care

Older children in your setting may like to demonstrate the different positions for throwing a ball straight up in the air.