Week 9:
Day 4

Understanding Letters

Language / Literacy

Large Group

Skill and Goal

Phonological awareness, Letter knowledge
Children will broaden their understanding of a compound word. Children also will understand the name and sound of the letter O.

Materials
Needed

  • *Compound and component word cards (see Be Prepared)
  • Chart paper
  • Marker
  • *Letter O card
  • Chart from Day 2
  • *4 letter O picture cards
  • Children’s letter journals
  • Writing tools—1 per child
  • List of children’s first names
    *Printables provided

Key
Concepts

Review:

  • Compound word

Be Prepared: For today’s activity each child will need one component word card of a compound word. Example: Landon will get the card that says “fire” and Tyler will get the card that says “man.”

BEGIN:

[Arrange children sitting in a circle.]

Today we are going to make compound words by working with someone else in our classroom. Who can tell us what a compound word is? (when two words are put together to make a new word) I am going to give each of you one word card.

[Give each child one component word card.]

EXPLAIN:

Please take a look at your card. The word on your card will make a compound word when it is put with the card of someone else in our room. I am going to invite two of you to come to the front of the room to show us your cards. Each of you can tell us the name of the picture on your card. We will help you if you aren’t sure about the word or picture on your card. Then we will put the two words together to make a new word. Let me show you first.

ACT:

[Give an adult helper the word card “man” and you take word card “snow.”]

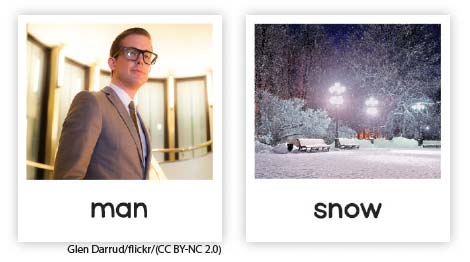
I would like to make a compound word. I have the word card that says “snow.” Who has the word card that says “man”?

[Invite the adult helper with the component word card “man” to stand next to you at the front of the room. Hold both component word cards together.]

The name of the picture on my card is “snow.” (Adult helper)’s card says “man.”

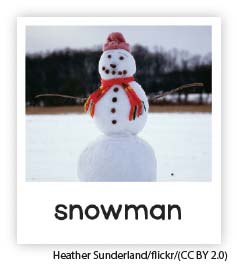
What compound word do we have when we put together the words “snow” and “man”? (snowman) Yes! We have snowman.

What can you tell us about the word “snowman”?

[Offer a brief description or definition of a snowman that draws attention to the compound word card picture. Be sure all children are able to see the compound word card.]

I will write snowman on our chart paper.

[Write the word “snowman” as you say the word.]

Let’s clap for each part of the compound word.

[Lead children in clapping two times, once for each part of the compound word, as you say the word together.]

I wonder what would happen if we switched our words around? Let’s try it!

[Switch places with the adult helper and hold your cards together to make the word “mansnow.”]

Now our new word is “mansnow.” That is a silly compound word! Have you ever heard the word “mansnow”? No! It’s not a real word. “Mansnow” does not mean the same thing as “snowman.” When we make compound words we need to put the words in the correct order.

Now it is your turn to make compound words!

[Do the activity demonstrated above for each pair of word cards. Example: “If you have the word “corn” or the word “bread” please come to the front of the room.” If children are unsure if they hold one of the designated cards, help if necessary (see Extra Support tip). For each pair of cards, invite children to make the new compound word and write it on the chart. Then invite children to switch places to make the new “silly” compound word. Continue until all children have had a turn.]

EXPLAIN:

Large Letter O CardLet’s learn more about the letter O.

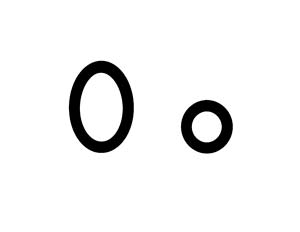
[Display letter O card.

If a child(ren) whose name begins with the letter O was identified on Day 2, invite the child(ren) to again pop up. Say the first name of the child(ren). Emphasize the sound of the letter O when you say the name.]

Maybe someone in our group has the letter o somewhere else in their name. The letter might be in the middle or at the end of their name. It will be a lowercase o and it will look like this.

[Point to the lowercase o on the letter card.]

Pop up if you have the letter o somewhere else in your name (not at beginning).

[If a child has the letter o somewhere else in his/her name, point to the name and to the letter o on the list of children’s first names so all children can see the name and the letter o.]

ASK:

Who remembers our word that begins with the letter O? (observe)

ACT:

The letter O says /o/, just like in the word “observe.” /o/, /o/, observe. Let’s say that together: /o/, /o/, observe.

I have two pictures of things that begin with the letter o. I wonder what they could be.

[Hold up one picture card and invite children to identify the animal/item in each picture. After children have an opportunity to guess or say the pictured animal/item, point to and say the word written at the bottom of the card. Example: “This word says octopus. The letter o is at the beginning of the word.” Repeat this procedure with a second picture card.]

Let’s think of some other words that start with the letter O and write them on our chart. Remember, the letter O says /o/, /o/.

[Help children by suggesting other words that start with o. Examples: otter, on, off, opposite, omelet.

Invite one or more volunteer children to find the letter o in words on the chart. Children may point to the letter at the top of the chart and then find it in one of the words below.

Demonstrate and describe how to mark the uppercase letter O on your chart paper.]

We use one line to make an uppercase O. The line curves around like this.

[Give each child his/her letter journal.]

Now we are going to write the letter O in our letter journal. Please write the uppercase (big) letter O in your journal. Write as much of the letter as you can.

RECAP:

Today we practiced putting two words together to make a new word. Who can tell us what the new word is called? (compound word) We made some silly compound words. How did we make silly words? (putting two words in the wrong order)

We also learned that the letter O says /o/, just like at the beginning of the word “observe.” We made the uppercase (big) letter O in our letter journal. Let’s say together the sound the letter O makes. (/o/)

Scaffolding tips

Scaffolding Tips

Extra support

  • If children have difficulty determining the new word made by two component words, point to each word as you say it. Begin by saying each component word with a pause between them and then say both words one after the other. Example: paint . . . brush, paintbrush.
  • Some children may not know if they are holding the designated card when you call for it. In this instance ask an adult helper to offer help if needed by watching children as you call for a card. Alternatively, children may place cards in front of them so you can better see who holds each card.
  • Use one or both of the picture cards not selected for inclusion in the main activity to help children understand the first letter of the pictured animal or item.
  • Use one or both of the remaining picture cards to help children understand and practice the sound of the target letter.

Enrichment

  • Ask children to think of compound words not used in today’s activity. What would the new “silly” compound word be if the two component words were switched?
  • Some children may be interested in your demonstrating and describing how to make a lowercase o. Example: “We use one line to make a lowercase o. The line curves around like this. A lowercase o looks like an uppercase O, but it’s smaller.”

Center Activity

Provide *component and *compound word cards used in today’s activity. Encourage children to match component word cards to make new compound words. Then invite children to switch the two cards to make a new “silly” compound word.
*Printables provided

Family Child Care

Family Child Care

Provide *component word cards and invite children to randomly match two component word cards to make a new compound word. Invite school-age children to ask younger children if the word makes sense or is a “silly” compound word.
*Printables provided

Week 9:
Day 4

Working with Shapes

Mathematics

Small Group

Skill and Goal

Geometric and spatial knowledge
Children will identify and sort basic shapes of selected items.

Materials
Needed

  • 4 trays
  • Basket
  • Classroom items of various shapes (see Be Prepared)
  • 4 pieces of paper with one of the 4 basic shapes drawn on each

Key
Concepts

New:

  • Sort

Review:

  • Circle
  • Square
  • Triangle
  • Rectangle

Optional
Reading

  • My Heart is Like a Zoo by Michael Hall

Be Prepared: Fill a basket with small items that represent a circle, square, triangle, or rectangle shape. Examples: blocks, books, shapes (pattern blocks), crayon boxes, napkins, play food items. Create a separate collection of four classroom items that do not represent one of the four shapes emphasized in the activity. Examples: doll, pencil, scissors, bottle of glue. On each tray, place a paper with one of the four basic shapes drawn on it.

BEGIN:

[Display appropriate shape drawn on paper as you ask questions below:]

  • What is something special about a circle?
  • How about a square?
  • How do we describe a triangle?
  • How about a rectangle?
EXPLAIN:

Today we are going to sort some items by shape.

ASK:

What do you think it means to sort things?

EXPLAIN:

When we sort, we put things into certain groups. Today we will look at some items in our classroom and decide which shape they are. Then we will put the item into a group with other items that have the same shape.

I have four trays. One tray is for circles. One tray is for squares. One tray is for rectangles. And one tray is for triangles. We will put each item on the correct tray.

After we decide the shape of each item, I would like you to tell us how you know.

ACT:

[Invite each child to take a turn choosing an item from the basket, saying its shape, and putting it on the correct tray. Encourage children to describe the shape.]

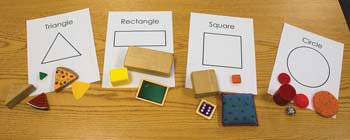
Let’s look at some other items from our classroom and decide if their shape is a circle, square, triangle, or rectangle.

[Hold up one of the four items that does not represent one of the four basic shapes shown in the trays.]

  • Item 1: Is this a circle? Why not?
  • Item 2: Is this a square? Why not?
  • Item 3: Is this a triangle? Why not?
  • Item 4: Is this a rectangle? Why not?
RECAP:

Today we sorted items in our classroom by shape. We looked at each item and decided which shape it was by looking at its outline, sides, and corners.

Scaffolding tips

Scaffolding Tips

Extra support

  • Encourage children who seem uncertain about characteristics of some of the four basic shapes to choose shapes with which they are familiar. Ask them to use their finger to trace a shape on the tray paper as it is described or named.

Enrichment

  • Put all the objects into a bag or big box and have each child close his/her eyes and describe what he/she pulls out. Invite the child to identify the shape without looking. The child can then look to check, and place the item on the correct tray.
Mathematics

Center Activity

Supply the sorting items used during today’s math activity. Encourage children to sort the items again.

Family Child Care

Family Child Care

Assign each child to a shape that the child is still learning (has limited or no familiarity with) and to a shape the child has mastered (able to name, describe). Ask the children to bring from home one item for each of the two assigned shapes that is in the form of the shape. Review the shape name and characteristics before and after the shapes are found at home.

Week 9:
Day 4

Appreciating Our Families

Social Studies

Large Group

Skill and Goal

Appreciation of individual and family diversity
Children will understand the concept of cultural differences across families.

Materials
Needed

  • Items to support today’s visitors (examples: plates, napkins)
  • Camera

Key
Concepts

New:

  • Culture

Optional
Reading

  • Families in Many Cultures by Heather Adamson

Be Prepared: There are special guests today (see Week 7, Day 4). Choose an area in the room to be used as the Family Culture Shelf for the remainder of the year. You may wish for the shelf to be a display case, if available in your classroom. The shelf will be “launched” today! Send a note to families explaining the Family Culture Shelf. Encourage children to share special items from their family culture throughout the year. If today’s guests bring special foods, make sure you are aware of any allergies. Encourage children to try new foods or politely decline. Take several pictures of today’s visit to display in the classroom after the event. Also, be sure to finalize arrangements for family visits tomorrow (see Week 7, Day 4). Suggest that families unable to attend may wish to read a book with their child about family cultures. One possibility is: Families in Many Cultures by Heather Adamson.

Looking Ahead: Send a note home asking parents to send a shoebox or tissue box or some other small box that does not have a glossy finish. Children will use the box in Week 11 to create a miniature home.

BEGIN:

Today is a very special day! We have guests who are going to help us learn more about how families are unique. Remember, no two families are exactly the same.

EXPLAIN:

Families live all over the world in many different countries. Families from different countries may do things differently. Or, families from different countries may do things the same way.

Today our guests will help us learn about families in different cultures. A culture is a group of people who have a similar way of thinking and doing things. There are many cultures within countries and all over the world.

ACT:

[Introduce each guest. Follow the plan agreed upon in advance with each guest. Discussion questions might include the following:

  • Where were the older members of your family born?
  • How does your family celebrate special holidays or other events?
  • What do you remember that was special about growing up in your family?
  • Tell us about your family’s favorite thing to eat.]
EXPLAIN:

We are going to start a Family Culture Shelf in our classroom. Our Family Culture Shelf will be an area where you can share something from your home that is special to your family’s culture. For example, in many cultures, people use chopsticks to eat. This is different from the spoon, fork, and knife used in many other cultures. Chopsticks would be an interesting thing to share.

We will use our Family Culture Shelf throughout the year. We can place something in this area that is special to our family’s culture. Then during a special time each day, we will share our items.

The items on our shelf are very special and will belong to our families. We should not touch the items unless an adult is helping us.

ACT:

Today I am going to invite our guests to describe an item they brought to our classroom.

[If guests do not wish to contribute their item to the Family Culture Shelf, please take a picture of it and place the picture on the shelf.]

RECAP:

Today we learned about families from different cultures (or a different culture). Please join me in clapping as a way of thanking our guests for sharing with us today!

Scaffolding tips

Scaffolding Tips

Extra support

  • As children listen to each visitor share, help keep them focused by sitting with them and guiding interactions as appropriate.

Enrichment

  • Can children think of other questions to ask that are more specific to what is being shared? Example: “How do you make your favorite food?”
Social Studies

Center Activity

Provide music from different cultures. Invite children to dance along to the music. Provide cultural clothing to wear while dancing, if possible.

Family Child Care

Family Child Care

Prepare a lunch item or snack from a different culture. Look for the following or other cultural cookbooks for children at your local library: The 2nd International Cookbook for Kids by Matthew Locricchio. Also, invite children to bring from home a favorite recipe for a snack or lunch item. Invite all children in your setting to help prepare the snack or lunch item.

Week 9:
Day 4

Moving Our Bodies

Physical / Health

Large Group

Skill and Goal

Motor development
Children will practice turning different parts of their body.

Materials
Needed

None

Key
Concepts

New:

  • Turn

Review:

  • Balance

Also
Promotes

  • Self-Regulation

BEGIN:

We are learning how to balance our bodies. Remember, when we balance something we keep it steady.

EXPLAIN:

Today we will try to balance our bodies while we turn part of our bodies. When we turn something, we move it into a new position.

ASK:

What parts of our body could we turn without hurting ourselves? (head, waist, legs)

ACT:

[Demonstrate turning each of the following body parts. Point to the body part before you turn it. Encourage children to follow your lead.]

  • Let’s practice turning our head.
  • Let’s practice turning our waist.

What else moves when we turn our waist? (shoulders, arms, maybe head)

  • Let’s practice turning one of our legs. We can lift our foot or move our foot when we turn our leg.
EXPLAIN:

Now I will say some ways we could turn our bodies. Try to move your body in the way I suggest. Please pay attention to keeping your balance. Remember, we can hold our arms to the side to help us keep our balance. Let’s stay in our own personal space so we do not bump into others.

ACT:

[Offer as many of the following requests as time permits. Provide experience in turning each of the following: head, waist, a leg. The first part of the request is how to place our bodies and the second part is what to turn.]

  • Legs wide apart: turn head, waist, or a leg
  • Legs close together: turn head, waist, or a leg
  • On our tiptoes: turn head, waist, or a leg
  • On our bottom: turn head, waist, or a leg

ASK:
  • What was the easiest way for you to turn a part of your body? (legs wide apart, legs close together, on our tiptoes, on our bottom)
  • What was the hardest way for you to turn a part of your body?
  • Was it easy or hard to keep your balance? Why?
RECAP:

Today we practiced turning parts of our bodies. We turned our heads, waists, and legs. We did this while standing on our feet and our tiptoes, and sitting on our bottoms! We are learning how our body works when we move parts of our body.

Scaffolding tips

Scaffolding Tips

Extra support

  • Provide demonstrations of turning a part of your body during the second segment of the activity.
  • If some children seem unclear about the request, break the request into its two parts. Example: “First let’s put our legs far apart. Next let’s turn our head.”

Enrichment

  • When you lead children in turning their heads, explain that our neck is what actually turns our head. Point to your neck and show how it moves your head.
  • Children may turn a leg of their choice. Some may wish to practice turning each leg (one at a time).
  • Encourage children to offer ideas on what body parts to turn and/or sequence of combinations.
Physical / Health

Center Activity

Invite children to take turns being the person who requests different ways to place our body and turn part of our body.

Family Child Care

Family Child Care

School-age children who participate in organized or informal sports may enjoy demonstrating how they keep their balance while turning a part of their body during a sport.