Week 45:
Day 4

Understanding Words

Language / Literacy

Large/Small Group

Skill and Goal

Oral language, Print knowledge
Children will understand how changes in an illustration can help tell a story.

Materials
Needed

  • Pinduli by Janell Cannon (2 copies)
  • *Our Feelings poster (for Extra Support tip)
    *Printables provided

Key
Concepts

Review:

  • Illustration

Also
Promotes

  • Social-Emotional
  • Creative Expression

BEGIN:

We are learning about Janell Cannon and the books she writes.

EXPLAIN:

Pinduli Book CoverWe know that pictures drawn by Ms. Cannon are an important part of her books. Let’s look more carefully at how different pictures of Pinduli helped us understand the story.

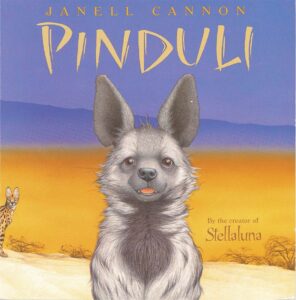
[Display book cover.]

This is the first illustration of Pinduli that we see. We know that an illustration is art found in a book. We meet Pinduli with this picture on the cover of our book.

ASK:

What does Pinduli’s face look like? (eyes wide open, ears up, mouth slightly open)

EXPLAIN:

Pinduli Inside Page 1
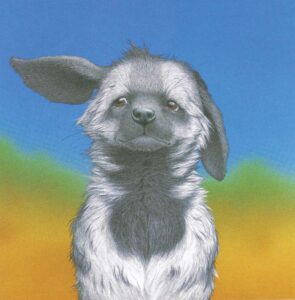
[Display illustration that is next to the page that begins: “Pinduli had never given a thought to her ears.”]

Here is the next drawing of Pinduli that we see in the book.

[Pause so children have time to look closely at the second illustration. Then use second copy of book to display this illustration next to the illustration on the book cover.]

ASK:

How are these two pictures of Pinduli different from one another? (first illustration has more color in it; facial expressions are different)

EXPLAIN:

Ms. Cannon changed how Pinduli looks to help us understand how she felt. Remember, the animals said mean things to Pinduli. She felt sad and bad. Ms. Cannon used different colors in the two illustrations. She changed the expression on Pinduli’s face for the second illustration.

ASK:

What did Ms. Cannon do in the second illustration to help us understand how Pinduli felt when the animals made fun of her? (eyes are partly closed, ears are down, mouth is closed)

EXPLAIN:

PinduliLet’s look at one more picture of Pinduli.

[Display illustration that is next to the page that begins: “The terrified crowd tore through thorny brush, . . .”]

This is the illustration of Pinduli after she had rolled in mud and dust because she felt so bad about herself. She wanted to look different. But the animals thought she was a ghost. They did not know it was Pinduli.

ASK:

What did Ms. Cannon do in this picture to tell us that Pinduli was not happy and that she looked like a ghost? (ears flat against her head, eyes partly closed, mouth closed, smaller neck, all white)

[Display each of the three illustrations so children can compare.]

EXPLAIN:

Janell Cannon changed the look of Pinduli in each picture to help us understand the story. The pictures tell us how Pinduli felt in each situation. Ms. Cannon changed Pinduli’s ears and eyes and used different colors to tell how Pinduli felt.

Ms. Cannon uses both pictures and words to tell a story. She made changes to the pictures of Pinduli. When Pinduli’s ears were droopy, it helped us to understand that she felt bad. When her fur was white, then we knew the other animals thought Pinduli was a ghost.

RECAP:

The illustrations in a book can help tell a story. Today we looked closely at how Janell Cannon changed the look of Pinduli to help us understand how she felt in different parts of the story. Droopy ears helped us realize Pinduli felt bad. Her white fur helped us understand why other animals thought she was a ghost.

Scaffolding tips

Scaffolding Tips

Extra support

  • Our Feelings PosterRemind children that a picture and a drawing are illustrations. The activity plan text uses the words “picture,” “drawing,” and “illustration” interchangeably. Use the word(s) that is most helpful to children in your classroom.
  • Point to specific features of illustrations (such as the droopy ears) when you describe them.
  • Look at and discuss some of the facial expressions in the Our Feelings poster to remind children of how our faces can show how we may be feeling.
  • Review the basic messages of the curriculum’s Social-Emotional activities focused on being helpful (Week 7) and giving compliments (Week 9). Explain that giving compliments is the opposite of saying mean things to someone.

Enrichment

  • Invite children to describe what it would be like to read Pinduli without any pictures of Pinduli, or just the picture of Pinduli on the cover of the book. How much of the story would we understand?

Center Activity

Continue to provide other books written by Ms. Cannon for children to explore her illustrations. How are the illustrations in her other books similar to, or different from, the illustrations in the books we read this week?

Family Child Care

Family Child Care

School-age children in your setting may like to describe some of the illustrations in Ms. Cannon’s other books to preschool-age children.

Week 45:
Day 4

Counting Things

Mathematics

Small Group

Skill and Goal

Number knowledge
Children will practice comparing two groups of items.

Materials
Needed

  • 2 sound-making containers (see Be Prepared)
  • 2 sets of 10 sound‑making items (see Be Prepared)

Key
Concepts

Review:

  • More
  • Equal
  • Fewer
  • Listen

Also
Promotes

  • Self-Regulation

Option 1:

Offer the Week 13, Day 3 activity to review forming and comparing groups of varying amounts.

Option 2:

Engage children in listening to and comparing two sets of sounds to determine which set has fewer sounds.

Be Prepared: Use two containers, such as coffee cans, that will make a sound when an item is dropped in them. Select two different sets of 10 items (total: 20) that will make a distinct sound and not bounce when dropped in a container. Examples: one set of 10 Legos®, one set of 10 counters.

Explain that today we will use our ears to listen carefully to things that are dropped into a container. Display a container and one item that will be dropped into the container. Hold the item about six inches above the container, drop the item, and draw attention to the sound it makes. Drop one more of the same item and draw attention to the sound it makes when reaching the container. Ask children how many (name of item) you dropped into the container. (two)

Explain that we will listen to (name of one item) and (name of second item) being dropped into two different containers. First we will listen to (name of one item) being dropped into a container. Then we will listen to (name of second item) being dropped into a different container. Display the second item and the second container. Drop one of the second item into the container to provide experience in hearing the sound of the second item.

We will close our eyes to listen because we can pay better attention when our eyes are closed. After we listen to the (name of one item) and the (name of second item) drop into containers, we will decide which container has fewer items. The container with fewer items is a smaller group.

Invite children to close their eyes. Indicate you are now going to drop some (name of first item) into one of the containers. Drop 2–3 items. Then indicate you are going to drop some (name of second item) into the other container. Drop fewer items than you dropped into the first container.

Invite children to open their eyes. Without displaying the contents of each container, ask children which container—the one with (name of first item) or the container with (name of second item)—has fewer things. If children respond by reporting the number of items in each container, supportively respond by emphasizing the numbers tell us which container has fewer items. Show and lead children in counting the number of items in each container. Say again which container has fewer items.

Repeat the process described above, dropping different numbers of the two items into their respective containers. For one of the practices, drop equal numbers of items to remind children of the meaning of equal. Consistently emphasize the concept of fewer (the activity goal). The purpose of counting the number of items in each container is to determine which has fewer.

Week 45:
Day 4

Getting Along With Others

Social-Emotional

Large/Small Group

Skill and Goal

Relationship skills
Children will strengthen their understanding of how to cooperate with another person.

Materials
Needed

  • 2 traffic cones
  • 2 large baskets with 2 handles
  • Cardboard bricks or similar items—1 per pair of children

Key
Concepts

Review:

  • Cooperate

Also
Promotes

  • Self-Regulation

Option 1:

Offer the Week 4, Day 2 activity to review what it means to cooperate.

Option 2:

Support children in cooperating with a partner to move a cardboard brick from one area to another using a two-handled basket.

Be Prepared: A large area is needed for this activity. Consider offering this activity outside, weather permitting, if indoor space is limited. Place two strips of tape on the floor to designate two adjacent starting points. Place one cone about 10 feet directly across from each starting point. Place half of the cardboard bricks by one cone and half of the cardboard bricks by the other cone. Use of a larger (vs. smaller) basket, such as a clothes basket, is likely to support the idea that cooperating with another person can help us easily move the basket. If adult assistance, space, and material are available, increase the number of stations so more children can be actively involved at the same time.

Open the session by explaining we have an activity today that will help us practice cooperating. Remind children that we work together when we cooperate.

We will work with a partner to carry a pretend brick in a basket. Each of us will hold one end (handle) of the basket. We will hold the basket together, walk from the tape line to the cone, pick up our pretend brick, and walk back to the tape line with the basket. We will put our pretend brick near the tape line and give our basket to the next pair of children, who will do the same thing. Point to and display the key elements of the activity (line, basket, cone, pretend brick) as you describe this simple activity. Emphasize the two handles and how we will always move the basket by having both children carry it.

Organize children into two (or more) groups and form pairs. Provide guidance on where children wait for their turn and where they stand or sit after carrying the basket. It is useful for children to watch other children jointly carry a basket rather than leave the activity area to do something else. Continue this process until all children have had an opportunity to complete the activity in cooperation with a partner. At the conclusion of the activity, ask children to describe how we practiced cooperating today.

Week 45:
Day 4

Moving Our Bodies

Physical / Health

Small Group

Skill and Goal

Motor development
Children will practice balancing and shifting their body weight.

Materials
Needed

  • None

Key
Concepts

New:

  • Donkey kick

Review:

  • Shift
  • Weight
  • Opposite
  • Balance

Option 1:

Offer the Week 23, Day 4 activity to review shifting weight.

Option 2:

Engage children in shifting their body weight by practicing a set of donkey kicks.

Be Prepared: A large area is needed for today’s activity. Secure the assistance of another adult.

Invite children to stand with both feet flat on the floor and arms at their sides. Ask children what is holding the weight of their body. (both feet and legs) In asking this question, children may benefit from a reminder that weight means how heavy something is.

Invite children to slowly shift their weight from one leg/foot to another leg/foot several times. Ask children what we are doing with the weight of our body when we shift it. (moving our weight from one foot/leg to another) Remind children that we use other parts of our body to help us keep our balance (stay steady) when we shift our weight. When we shift our weight to one foot/leg, we use our opposite arm to keep balanced.

Explain that we can use our hands/arms to shift our weight. Children may recall using their hands/arms to get in a frog position (Physical/ Health Week 23, Day 4) or in a yoga position. Invite a volunteer child to demonstrate balancing his/her body with hands/arms in a frog, or similar position, if it seems children would benefit from a demonstration.

Introduce a way to shift our weight called a donkey kick. When we do a donkey kick, we put all of our weight on our hands and kick both feet up behind us. Invite a volunteer child to demonstrate a donkey kick. Encourage the child to put his/her feet about a hip’s width apart. Then encourage the volunteer child to place his/her hands on the ground so that his/her hands are in line with his/her head. The child’s bottom will be up in the air. Invite the child to kick his/her legs up behind him/her. Explain to children that in a donkey kick, our weight shifts from being held by our hands and feet, to being held on our hands only.

Invite all children to do some donkey kicks. Make sure there is adequate space between children so no one gets bumped. Some children may prefer to kick one leg at a time before attempting to kick up both legs. At the conclusion of donkey kicks, encourage children to describe what happened with their body weight and how they kept (or tried to keep) balanced.