Week 4:
Day 4

Understanding Sounds

Language / Literacy

Large Group

Skill and Goal

Phonological awareness
Children will strengthen their understanding of rhyming words.

Materials
Needed

  • *Humpty Dumpty poster
  • *Twinkle, Twinkle, Little Star poster
    *Printables provided

Key
Concepts

Review:

  • Diamond

Review:

  • Rhyme

BEGIN:

We are learning about words that rhyme. On Day 2 we said together a nursery rhyme that had rhyming words. Who can tell us what it means when words rhyme? (they sound alike at the end)

Let’s say the “Humpty Dumpty” nursery rhyme together.

ACT:

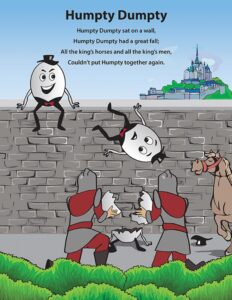
[Lead children in saying the nursery rhyme in unison 1–2 times. Emphasize the rhyming words when you say them. Display the provided nursery rhyme poster.]

Now let’s say the nursery rhyme a different way. This time, let’s say “Humpty Dumpty” in a whisper. When we get to the rhyming words we will say them in a louder voice. Please listen to me first.

[Say the nursery rhyme in a whisper as you say each rhyming word aloud: “Humpty Dumpty sat on a wall. Humpty Dumpty had a great fall. All the king’s horses and all the king’s men couldn’t put Humpty together again.”]

Let’s try it together!

[Lead children in whispering the nursery rhyme in unison. Encourage children to say each rhyming word aloud.]

EXPLAIN:

Now we will learn a new rhyme that many of you may know. It is called “Twinkle, Twinkle, Little Star.” Listen carefully as I read it.

[Read the rhyme slowly and emphasize its rhyming words. Display and describe the provided poster.]

Twinkle, twinkle, little star,

How I wonder what you are.

Up above the world so high,

Like a diamond in the sky.

In the nursery rhyme we learned that the star is like a diamond. A diamond is a type of shape. A diamond has four sides that are the same. A diamond is also the name of a stone that sparkles. You may have seen a ring with a diamond in it before.

ASK:

Did you hear the rhyming words? What rhyming words did you hear? (star, are; high, sky)

EXPLAIN:

I will read the first part of our nursery rhyme again. Listen carefully for the rhyming words.

[Say the first two lines slowly and exaggerate the rhyming words: “Twinkle, twinkle, little star. How I wonder what you are.”]

ASK:

What are the two rhyming words in what I just read? (star, are)

ACT:

Let’s say the words “star” and “are” together.

The words “star” and “are” sound the same. Both of these words end with “ar.” Let’s say “ar” together.

[Emphasize that these words rhyme because the ends of the words sound the same.]

Now let’s say together the first part of the “Twinkle, Twinkle, Little Star” rhyme. I will read the first two lines, and you can repeat the lines after me. Let’s say the rhyming words a little louder. Remember, our rhyming words are “star” and “are.”

[Say “Twinkle, twinkle, little star, how I wonder what you are” with a slightly louder voice for the words “star” and “are.” Then encourage children to repeat the phrase. Finally, lead children in saying together both lines, again with emphasis on “star” and “are.”]

Now I will read the next part of our nursery rhyme again. Listen carefully for the rhyming words.

[Say the second two lines slowly and exaggerate the rhyming words: “Up above the world so high, like a diamond in the sky.”]

What are the two rhyming words in what I just read? (high, sky)

Let’s say the words “high” and “sky” together.

The words “high” and “sky” sound the same. Both of these words end with the sound “I.” Let’s say “I” together.

[Emphasize that these words rhyme because the ends of the words sound the same.]

Now let’s say together the second part of the “Twinkle, Twinkle, Little Star” rhyme. I will read the second two lines. You can repeat the lines after me. Let’s say the rhyming words a little louder. Remember, our rhyming words are “high” and “sky.”

[Say “Up above the world so high, like a diamond in the sky” with a slightly louder voice for the words “high” and “sky.” Then encourage children to repeat the phrase. Finally, lead children in saying together both lines, again with emphasis on “high” and “sky.”]

RECAP:

Today we said “Humpty Dumpty” together. How did we say the nursery rhyme in a different way? (said only the rhyming words aloud) We also learned a new rhyme and found the rhyming words. Let’s say together again the “Twinkle, Twinkle, Little Star” nursery rhyme.

[Lead children in reciting “Twinkle, Twinkle, Little Star,” giving emphasis to the rhyming words.]

Scaffolding tips

Scaffolding Tips

Extra support

  • As children say “Humpty Dumpty” together, widen your eyes as you say the rhyming word in a regular voice. This may help children better understand which part of the rhyme to say differently.

Enrichment

  • As children master the new rhyme introduced, add another simple nursery rhyme such as “Little Boy Blue.” Use the teaching strategies employed with “Humpty Dumpty” and “Twinkle, Twinkle, Little Star.”
  • Invite children to say the rhyme as they whisper only the rhyming words.

Center Activity

Provide puppets for children to use as they recite the rhymes. Encourage children to say the rhyming words in a whisper or in a regular voice.

Family Child Care

Family Child Care

Preschool-age children may enjoy saying the rhymes and describing the provided *nursery rhyme posters. Another option is to write each rhyme on a large chart paper. Point to the words as children recite each rhyme. School-age children may enjoy acting out each rhyme as it is recited.
*Printables provided

Week 4:
Day 4

Working with Shapes

Mathematics

Small Group

Skill and Goal

Geometric and spatial knowledge
Children will match a three-dimensional item to its correct shape (circle or square).

Materials
Needed

  • Basket
  • *Large circle and large square shape cutouts
  • Classroom items in the shape of a circle or square (see Be Prepared)
    *Printables provided

Key
Concepts

New:

  • Match

Optional
Reading

  • Round is a Mooncake: A Book of Shapes by Roseanne Thong

Be Prepared: Gather and place in a basket different-sized classroom items that are in the shape of a circle or square. Examples: ball, plate, block, play food item, sticky notes.

BEGIN:

Let’s count the number of girls in our small group.

[Point to each girl as you say the number. When you finish, say the final number again.]

When we counted, we found out how many girls are in our small group. We have ___ girls in our small group today.

Now let’s count the number of boys in our small group.

[Point to each boy as you say the number. When you finish, say the final number again.]

When we counted, we found out how many boys are in our small group. We have ___ boys in our small group today.

EXPLAIN:

We are learning about circles and squares. On Day 3 we went on a shape hunt and found circles and squares all around us. Today we will practice matching circles and squares. When we match something we find another that is the same.

ACT:

[Display circle and square cutouts. Invite children to touch and feel each shape cutout. Lay circle and square cutouts on the table.]

EXPLAIN:

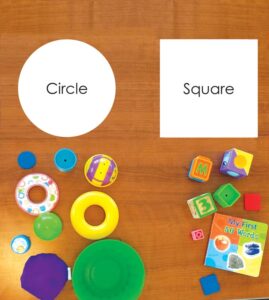
In our basket are lots of items from our classroom that are in the shape of a circle or a square. We will take turns picking out an item and matching it to the shape of a circle or a square. Remember, squares and circles come in different sizes.

ACT:

[Invite children to pick an item from the basket and match it to the circle or square on the table. Encourage children to do this one at a time so that the other children see and hear the reasoning for matching the item to a circle or square.]

ASK:
  • Can you describe the item’s shape?
  • How do you know the (item) is a circle (or square)? (because of its side(s)/corners)
EXPLAIN:

Now let’s put together some of our shapes.

[Select three circle items of different sizes from the items used in the matching activity.]

Let’s place three circle items of different sizes on the table. Let’s lay the largest on the bottom and the smallest on the top.

[Point to and describe how the circles are organized from smaller to larger.]

ASK:
  • When we put our circles together like this, what might it look like? (snowperson)
  • How can we arrange our shapes to make something new?
ACT:

[Encourage children to manipulate shape items to create something new. Example: A small square item, larger square item, and two small circular items can become a truck.]

RECAP:

Today we looked at some items and matched them to a circle or to a square. We described why we matched our items with a circle or a square. We also put shapes together to make something new.

Scaffolding tips

Scaffolding Tips

Extra support

  • Guide children to feel the outline of the item while you describe it to help them determine its shape. Some children may benefit from more focused, sensory attention to shape attributes.
  • Use the wordless picture book suggested in Optional Reading to engage children in identifying and describing circles and squares.

Enrichment

  • Can children find more than one shape on an item? Example: A truck may have circle tires and a square body.
Mathematics

Center Activity

Tape cutouts of a circle and square to a table. Provide a basket of shaped items from the room and invite children to match the item with its corresponding shape. Examples: dishes, blocks, books, play food items. Encourage children to explain why they matched the items the way they did. Ask children to describe how some items do not match a circle or square.

Family Child Care

Family Child Care

Encourage children in your setting to look for circles and squares. Encourage preschool-age children to find items with a basic shape outline, such as a square puzzle piece or a circle play food item. School-age children will enjoy looking for items that have both circles and squares. Examples: toy train car, square dollhouse with circle windows. Also, encourage school-age children to look for items in other shapes they know.

Week 4:
Day 4

Respecting Our Differences

Social Studies

Large Group

Skill and Goal

Individual diversity
Children will understand how children may use a wheelchair, crutches, walker, or braces.

Materials
Needed

  • When Charley Met Emma by Amy Webb
  • *6 pictures as shown
    *Printables provided

Key
Concepts

Review:

  • Wheelchair
  • Limbs

Be Prepared: During this activity, children will explore ways to move with a wheelchair. If a wheelchair is unavailable, adapt the activity for use with a walker or crutches.

BEGIN:

[Display book cover. Point to illustration of Emma in her wheelchair when children tell how she got around.]

Last week we read a book about Charley and Emma. Remember, Emma could not use her legs to move from place to place. How did Emma get around? (with a wheelchair)

We know that a wheelchair helps people who cannot walk or run move from place to place. Emma played tag with Charley by using her wheelchair!

ASK:
  • Have you ever seen someone use a wheelchair to move around?
  • How did the wheelchair help someone?
EXPLAIN:

[Display two pictures, one at a time, of children using wheelchairs.]

Here are two pictures of children using a wheelchair to do things.

Eric Neltzel/flicker.com/(CC BY-NC-ND 2.0)
EasyStand/flickr.com/(CC BY-NC-ND 2.0)
ASK:

What is happening in these pictures?

EXPLAIN:

Some people use their hands and arms to move their wheelchair from place to place. Remember, our arms and legs are called limbs.

ASK:

Emma could not use her hands and arms to move her wheelchair around. Why? (no hands)

EXPLAIN:

[Display book illustration of Emma playing tag with Charley.]

Emma’s wheelchair has a little motor that moves her chair from place to place. She uses her arm to move a small knob on her wheelchair to make the motor work. Here is Emma having fun playing tag with Charley.

[Show again the provided picture of child using arm to move his wheelchair.]

The way Emma uses her arm to move her wheelchair is different than the way the child in our other picture is using his arms to move his wheelchair.

EXPLAIN:

Some people use crutches, a walker, or braces to help them move from place to place. Let’s talk about some pictures of children using one of these ways to move around.

[Display pictures of children using crutches, a walker, and braces, one at a time.]

Wendell Phillips/CIDA/flickr/(CC BY-NC 2.0)
Larry Sillen/flickr/(CC BY-NC-ND 2.0)
Wendell Phillips/CIDA/flickr/(CC BY-NC 2.0)
Larry Sillen/flicker/(CC BY-NC-ND 2.0)
ASK:

What is happening in these pictures?

ACT:

Today we will find out what it’s like to use a wheelchair. We can take turns sitting in a wheelchair and talking about how we could use the wheelchair to do things.

[Use questions such as the following to extend children’s discussion of wheelchair use:]

  • How could someone in a wheelchair play soccer? (throw the ball instead of kick)
  • How could a child in a wheelchair play with Legos®? (play with Legos® at a table)
RECAP:

Today we learned that some people may use a wheelchair, walker, crutches, or braces to move from place to place. There are many different ways to move around.

[Please describe any available accommodations in your center for children with physical disabilities. Example: rails along the walls or in the bathrooms.]

Scaffolding tips

Scaffolding Tips

Extra support

  • Highlight differences in types of wheelchairs by displaying together the book illustration of Emma in her wheelchair and the provided picture of a child using his hand and arm to move his wheelchair. Point out the location of the knob (controller) on Emma’s chair.

Enrichment

  • Remind children that Emma said she had “limb differences.” Ask children to describe how her arms and legs were different. Emphasize how her wheelchair helped her do things she liked to do.
Social Studies

Center Activity

Borrow a set of child-size crutches, a walker, or an arm sling. Invite children to try the items while participating in other centers. As children play, ask them how they are doing things differently. Example: pretending to cook in housekeeping without the use of one arm, getting up and down off of the floor without the use of one leg.

Emphasize a positive image of accommodations for physical mobility. Focus on what children can do as they play. Example: “Malia, you did a great job of dressing the doll with your arm in a sling!”

Family Child Care

Family Child Care

Provide books such as Rolling Along: The Story of Taylor and His Wheelchair by Jamee Riggio Heelan for school-age children to read. Encourage school-age children to talk about the book’s pictures with preschool-age children.

Week 4:
Day 4

Moving Our Bodies

Physical / Health

Large Group

Skill and Goal

Motor development
Children will understand basic rules for movement activities.

Materials
Needed

  • Item for signals (see Be Prepared)
  • Carpet squares if used for immediate space
  • Children’s favorite dancing music

Key
Concepts

New:

  • Movement
  • Personal space
  • Activity space
  • Signal

Review:

  • Safe

Also
Promotes

  • Self-Regulation
  • Creative Expression

Be Prepared: There are two important tasks in setting the stage for safe and beneficial physical activities in your classroom:

(1) Identify an auditory signal you will use to communicate “stop” and “start” in physical activities throughout the year. Examples: whistle, bell. Use separate signals for “stop” and “start.” Example: one whistle sound for “start” and two whistle sounds for “stop.”

(2) Determine space boundaries. Considerations include personal space (examples: carpet square, “X” mark on floor made with masking tape, square on a patterned carpet) and the larger activity space in a classroom and outside (example: grassy area by the fence but not on the cushion surface by the swings).

BEGIN:

[Play children’s favorite dance music and invite children to join you in dancing as they wish.]

ASK:

What did we just do with our bodies? (dance, move to music)

EXPLAIN:

We moved our bodies. We will learn how to move our bodies in many different ways. We will do activities like marching, jumping, galloping, and running.

[Demonstrate the movements as you describe each below.]

Moving our body or part of our body from one place to another place is called a movement. Taking a step with our foot is a movement. Raising our arm from the side of our body to above our heads is a movement.

We want to move our bodies safely. Remember, we are safe when we do not get hurt or sick or get into danger.

ASK:

What might happen if we moved our bodies real fast and bumped into another person? (someone could get hurt)

EXPLAIN:

To help us stay safe, we need to stay in our personal space. Personal space is the area around our body that is empty and open for us to use. We need to stay in our own space when we do activities in the same spot. Let’s try it. We can dance in our own space.

ACT:

[Play dancing music again and encourage children to stay in their space. Provide gentle reminders, if needed.]

EXPLAIN:

There is another type of space we need to know about. It is the larger space we use for our physical activities. Sometimes we will need bigger space for walking or marching or doing other types of movement. We can call this our activity space. The activity space is the area of our classroom and the outside area we can use for physical activities.

[Describe and point to the activity space(s) in your classroom and outside.]

Let’s take a walk around our activity space. We’ll play follow the leader. I will be the leader.

ACT:

[Describe the boundaries of the space as you walk the perimeter. Point out adjacent areas (such as the bathroom) that are not activity space.]

EXPLAIN:

One last thing that we need to learn is our signal. Our signal for physical activities is a sound that helps us know when to start doing something and when to stop doing something. We need to listen carefully for two different signals.

[Provide the signals as you describe each.]

When we hear _____, we will start our activity. When we hear _____, we will stop our activity.

Let’s try it by gently moving our arms back and forth. Let’s spread out so our arms do not bump into each other.

Start moving your arms back and forth when you hear _____. Stop moving your arms when you hear _____.

ACT:

[Demonstrate moving your arms back and forth. Offer another practice with the start and stop signals, if appropriate.]

RECAP:

Today we learned some ways to keep safe when we do physical activities in our classroom and outside. We learned about staying in our personal space. We walked around the activity space in our classroom and outside. We also learned the signals that tell us when to start and when to stop an activity.

Scaffolding tips

Scaffolding Tips

Extra support

  • If a child has difficulty staying in his/her personal space, offer a verbal reminder and/or place the child closer to an adult for guidance or provide a little more space.

Enrichment

  • If time permits, engage children in another “follow the leader” walk around the perimeter of your activity space. Reverse the direction of the walk and use your start and stop signals several times during the walk.
Family Child Care

Family Child Care

Walk children around activity space you use in other areas such as a park. School-age children may wish to help you in leading children on a walk around the activity space.