Week 16:
Day 4

Understanding Words

Language / Literacy

Large Group

Skill and Goal

Phonological awareness
Children will segment a word into syllables.

Materials
Needed

  • Masking tape
  • *Animal syllable cards with 1–3 syllables
    *Printables provided

Key
Concepts

Review:

  • Syllable

Also
Promotes

  • Physical / Health

Be Prepared: Use the results of the Day 2 progress assessment to determine the focus of today’s activity. The activity offered for today’s session is a review of segmenting a word into syllables. If a majority of children are in the process of learning how to blend syllables into a word (blending assessment = Getting It), you may prefer to focus on the Review follow-up suggestions related to blending or add blending activities to the segmenting activity described below. The last two Reinforce suggestions could be added to today’s session (one as a transition activity). Use the Reintroduce suggestions today only if a majority of children’s assessments = Not Yet.

For the activity described below, create a row of three squares on the floor with masking tape. For larger groups, create two rows of squares so two children can participate at a time.

BEGIN:

[Divide children into two groups; one group in a line behind the first row of squares, and the second group in a row behind the second row of squares.]

We know how to say a word while dividing it into syllables. Remember, a syllable is a part of a word. We also know how to clap the syllables in a word.

EXPLAIN:

Today we are going to play a fun syllable game! We will divide words into syllables and then hop the syllables in the same word. Use your listening ears as I tell you how to play.

  • I will hold up an animal card and we will say the word together.
  • Then we will say each of the syllables in the word.
  • Next each pair of people standing at the squares will hop the syllables in the word as we say the word.
  • Then a new pair of children will have a turn to hop the syllables in a different word.
ACT:

Let me show you how to play.

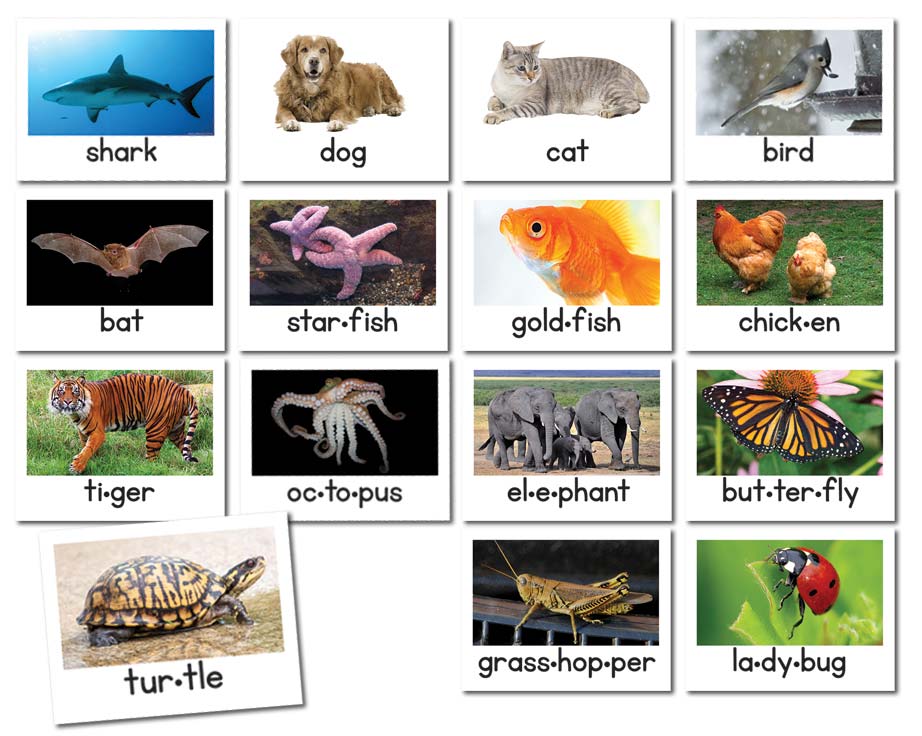
[Hold up the animal syllable card “turtle.”]

This is the word “turtle.” Let’s say the word together.

Now let’s say the word as we say each of its syllables: “tur-tle.”

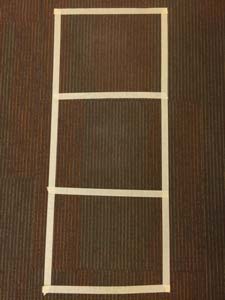
Now I will hop to the first box for “tur” and then into the second box for “tle.”

Now it is your turn to try!

[Continue the game as pairs of children follow the procedure outlined below:

  • Hold up a picture of an animal with 1–3 syllables.
  • Invite children to say the name of the pictured animal in unison.
  • Then invite children to say each of the syllables in the name of the pictured animal in unison. Example: tur-tle.
  • Finally, invite the first pair of children to hop the syllables as the other children say each of the syllables of the animal name. Then invite the next pair of children to take a turn with a different word. Continue until all children have had a turn to hop the syllables in a word.]
RECAP:

Today we played a fun syllable game. We divided words into syllables and then hopped the syllables in the same word.

Scaffolding tips

Scaffolding Tips

Extra support

  • Explain that hopping is not the same as jumping. We use both feet/legs when we jump. We use one foot/leg when we hop (Physical/Health Week 7).
  • If children have difficulty dividing a word into its syllables, encourage children to clap once for each syllable while saying the word. This can be an additional step prior to hopping.

Enrichment

  • Invite children to tell the number of syllables in the animal name.

Center Activity

Provide *animal syllable cards and taped boxes on the floor for syllable fun. Invite children to choose an animal card and hop the syllables as they say the animal name.
*Printables provided

Family Child Care

Family Child Care

Take a walk as children hop syllables. Point to an item and invite children to first say the name of the item together and then hop the syllables in the name of the item.

Week 16:
Day 4

Counting Things

Mathematics

Small Group

Skill and Goal

Number knowledge
Children will compare groups of seven or fewer items. Children will also recognize the numeral eight.

Materials
Needed

  • *Large numeral cards 1–8
  • 14 identical blocks
    *Printables provided

Key
Concepts

New:

  • Eight

BEGIN:

We are learning what seven different numbers look like.

[Display numeral cards 1–7 in random order. Invite children to name each numeral. For each card, invite a different volunteer child to point to and lead all children in counting the number of dots on the card.

Encourage children to also hold up the corresponding number of fingers.]

ACT:

Stack of number cards
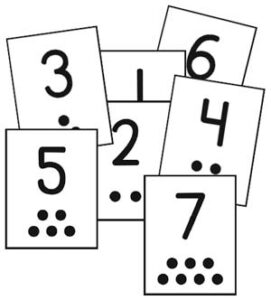
Today we will compare groups with our number cards. This time we’ll include number card seven.

[Place numeral cards 1–7 in a stack on the floor in random order. Invite two volunteer children to each choose a card. After each child has chosen a card, invite each child to make a group of blocks that corresponds to the numeral on the card he/she chose. Encourage all children to determine which group has more (or fewer).

Call on different pairs of volunteer children to each choose a card as time permits.

Hold up eight fingers.]

ASK:

How many fingers am I holding up?

EXPLAIN:

Numeral Eight CardI am holding up eight fingers. Let’s count them together.

[Point to each finger as you encourage children to count with you.]

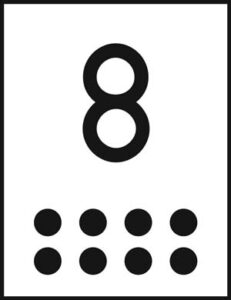
Number eight looks like this.

[Hold up a large numeral eight.]

The number eight means there are eight of something. Let’s count the dots on the number card.

[Point to each dot on the numeral card as you count the dots. Encourage children to count with you.]

The number eight means there are eight things! Please hold up eight fingers. Let’s count them together.

We are going to compare number eight to some other numbers we know. First let’s compare the number eight to number three.

[Display a large numeral three next to the numeral eight. Point to straight and curved lines on the numerals as they are described.]

ASK:
  • How are the numbers eight and three similar? (both have curved lines)
  • How are the numbers eight and three different? (the curved lines in number eight are closed)

Now let’s compare number eight to the number six.

[Display a large numeral six next to the numeral eight.]

  • How are the numbers eight and six similar? (both have curved lines)
  • How are the numbers eight and six different? (number six has only one closed curved line)
RECAP:

Today we compared numbers and made groups that matched the amount on a number card we chose. We determined which group had more (or fewer) blocks. We also learned what another number looks like. What number did we learn about today?

Scaffolding tips

Scaffolding Tips

Extra support

  • If children are unsure how many fingers to hold up to represent eight, count each finger aloud.
  • Display a group of eight blocks and invite children to count with you as you point to each block.

Enrichment

  • Invite children to arrange a collection of numeral cards 1–8 in numerical order beginning with numeral one and ending with numeral eight.
Mathematics

Center Activity

Make a hopscotch outline on the floor, with masking tape. Number squares from 1–8 with tape. Invite children to play by simply jumping from square to square, saying each number or playing with regular hopscotch rules.

Family Child Care

Family Child Care

Invite school-age children to practice the terms “greater than,” “less than,” and “equal” as they compare numeral cards in a deck of cards. Example: After choosing the eight of spades and the three of hearts; “Eight is greater than three.”

Week 16:
Day 4

Exploring Where We Live

Social Studies

Large Group

Skill and Goal

Knowledge of social and physical environments
Children will understand that a community is made up of different neighborhoods.

Materials
Needed

  • Drawings of neighborhoods in your area (see Be Prepared)

Key
Concepts

New:

  • Community

Review:

  • Neighborhood

Be Prepared: Prepare pieces of paper (preferably of different colors) to represent neighborhoods in your community. Do a simple drawing of your center on one piece of paper that represents your center’s neighborhood. Add drawings of other structures near your center that children made with boxes in Week 15. On several other pieces of paper, do simple drawings of other structures that would be found in other neighborhoods in your community. Example: Draw several homes or apartments on one or more pieces of paper to represent neighborhoods where some children in your classroom live.

BEGIN:

We are learning many things about where we live. We each live in a neighborhood that may include other homes and places near our home. We know that our child development center is part of a neighborhood. Last week we made places from boxes and put our places on a map of our center’s neighborhood.

EXPLAIN:

There are many different neighborhoods. Some of us may live in the same neighborhood, and some of us may live in a different neighborhood.

Let’s think about our different neighborhoods. I live in a neighborhood in (name of community).

[Discuss children’s neighborhoods and the community in which they are located. Compare 2–3 different neighborhoods children may live in. Example: “Adia lives in a neighborhood in (name of community), Cantrell lives in a neighborhood in (name of community), and Isabella lives in a neighborhood in (name of community). There are three different neighborhoods!”]

Many neighborhoods together make up a community. Our community is called (city, town, base, post, camp). A community is bigger than a neighborhood. There can be many neighborhoods in a community. (Name of your community) has different neighborhoods. Community is a big word. Let’s together say the word community: com-mu-ni-ty.

ACT:

[Display paper that shows a simple drawing of your center. Point to drawing of center when it is described.]

Let’s pretend this piece of paper is the neighborhood where our center is located. Here is a drawing of our child development center.

[Point to and describe drawings of other places included in your representation of your center’s neighborhood. Then affix the piece of paper to a board or other vertical flat surface so all children can see it.

Display a piece of paper that represents another neighborhood in your community.]

Now let’s pretend this other piece of paper is a different neighborhood in our community. Remember, a community is made up of different neighborhoods.

[Describe the neighborhood depicted in your simple drawings. Example: “Some children in our room live in the neighborhood shown on this piece of paper. Adia lives here. Cantrell lives here. Does anyone else live in the neighborhood where Adia and Cantrell live?” Affix the piece of paper adjacent to (touching) the paper that represents your center’s neighborhood.

Display a piece of paper that represents a third neighborhood in your community.]

Here is a third piece of paper. We can pretend this piece of paper shows a different neighborhood in our community.

[Describe the neighborhood depicted in your simple drawings. Example: “Look at the drawing of a library on this piece of paper. There also are some houses. Isabella lives in this neighborhood. Does anyone else in our classroom live near Isabella?”

Affix the piece of paper adjacent to (touching) one or both of the sheets of paper that represent other neighborhoods in your community.]

EXPLAIN:

There are ___ sheets of paper on our board that we are pretending are different neighborhoods in our community. Our center is in one neighborhood. Some of us live in the same neighborhood or in different neighborhoods. Our community has different neighborhoods.

RECAP:

Today we learned that neighborhoods make up a community. What is the name of our community?

Scaffolding tips

Scaffolding Tips

Extra support

  • Explain that the drawings on the pieces of paper are not pictures. They are drawings that help us remember what is in a neighborhood. We are pretending that the pieces of paper are a neighborhood.

  • Ask children what other places should be drawn on the paper that shows your center’s neighborhood (or a neighborhood with which they are familiar).

Enrichment

  • Some children may recall the name of a community where they lived previously or a community where relatives live. It is okay (and common) for children at this young age to confuse names of states and communities.
Social Studies

Center Activity

Invite children to build a community in the block center.

Family Child Care

Family Child Care

Provide additional neighborhood props in the block area. Invite children to use the blocks and props to create a neighborhood. Encourage children to use their own ideas about what they would like to include in their neighborhood. School-age children may enjoy using paper and markers to create roads, parking lots, and other additions to the block neighborhood. As children work, begin building an adjacent neighborhood to help illustrate that a community can have several different neighborhoods.

Week 16:
Day 4

Moving Our Bodies

Physical / Health

Small Group

Skill and Goal

Motor development
Children will use both hands and arms to throw a ball straight up into the air.

Materials
Needed

  • Large soft balls (punch balls)—1 per child
  • Smaller balls (Enrichment tip)
  • *1 picture as shown
    *Printables provided

Key
Concepts

New:

  • Throw

Also
Promotes

  • Self-Regulation

Be Prepared: Gather children in your activity space so they can watch you demonstrate how to throw a ball. Then space children sufficiently apart so each has room for throwing and catching a ball.

BEGIN:

We are learning ways to move our bodies. Today we will learn and practice how to throw a ball up in the air. The ball will go higher than our heads.

EXPLAIN:

Girl tossing ball
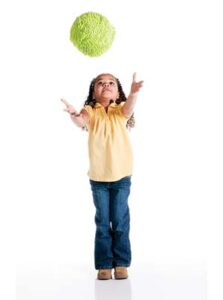
When we throw something, we use our hands and arms to move something through the air. Sometimes we use one hand and arm to throw something to someone else or to a specific place. People who play softball or baseball use one hand and arm to throw a ball.

Today we will use both of our hands and arms to throw a ball.

[Display picture of child throwing ball.]

ASK:
  • What is the child in this picture doing?
  • What is she doing with her arms? (moving ball up into the air)
EXPLAIN:

We are going to practice throwing a ball like the child in our picture. We will try to throw a ball straight up into the air.

ACT:

Please watch me show how to throw a ball up in the air.

[Describe each of the steps as you demonstrate each:

  • Hold the ball in front of you with one hand on each side of the ball.
  • Lower the ball below your waist so that the ball almost touches your knees.
  • Raise both hands/arms into the air and let go of the ball as it passes near your nose.]
ASK:

What happened after I raised the ball past my nose? (let go of the ball)

EXPLAIN:

It is time for you to try. Please stay in your personal space so we don’t bump into each other. We will throw our balls at the same time.

If your ball does not come down by you, stay in your personal space. You will be able to pick it up after all of the balls have come to the floor. Let’s try it together!

ACT:

[Hand each child a ball. Remind children of the steps you demonstrated. Once all balls have landed, invite children to retrieve their ball. Repeat the activity multiple times so children become familiar with the actions.]

RECAP:

Today we practiced throwing a ball straight up in the air. We learned how to hold the ball, move the ball, and to let go so the ball goes straight up in the air.

Scaffolding tips

Scaffolding Tips

Extra support

  • If children seem uncertain about when to release the ball, offer verbal guidance and/or demonstrate.
  • Encourage children to use both hands to catch or retrieve a ball.

Enrichment

  • If children demonstrate skill in throwing larger balls in the air, provide a variety of smaller balls for practice in throwing a ball in the air.
Physical / Health

Center Activity

In the outside area, designate a specific place for children to practice throwing the balls up in the air and catching them. Make sure space is not near the fence or roof. Remind children of steps in throwing the ball straight up in the air.

Family Child Care

Family Child Care

A variation of this game is the Teddy Bear Toss. Provide stuffed animals or teddy bears for children to gently toss in the air with both hands. Provide larger stuffed toys for younger preschoolers or toddlers and smaller stuffed toys for older children.