Week 9:
Day 3

Understanding Words

Language / Literacy

Large Group

Skill and Goal

Oral language, Letter knowledge
Children will strengthen their comprehension of information presented in a book read aloud and increase the number of novel words they understand. Children will also identify and name the letter O.

Materials
Needed

  • *Letter O card
  • Book of your choice for this week’s repeated reading
  • Words We Understand chart from Day 1
    *Printables provided

Key
Concepts

New:

  • 4–6 words (see Be Prepared)

Review:

  • 1–2 words in book introduced on Day 1

Be Prepared: This is the second of three repeated readings of a book with children. Today’s session focuses on children’s comprehension of information presented in the book, especially connections to children’s experiences. The session also helps children understand more novel words. From the list of novel words you identified prior to your first reading of the book, select 4–6 words to define for children today. Remember, it is okay to select words that a few children may know if you anticipate most children do not understand the word’s meaning. See the Language/Literacy section of the ELM User Guide: 3–5 Years for additional information on how to select and define novel words.

BEGIN:

Large Letter O Card[Display letter O card.]

What is the name of this letter?

[Point to the uppercase letter O on the letter card.]

Am I pointing to the uppercase or to the lowercase letter O?

EXPLAIN:

Now let’s spend some time with our book.

[See Week 3, Day 3 of Language/Literacy for a description and examples of how to approach today’s book reading. Key aspects are summarized below:

  • Display book cover and say book title. Engage children in describing what they remember about the book:
    • What is our book about?
    • Who were the main characters in our book?
    • What happened first? What happened next?
  • Remind children that reading a book is a good way to learn new words. Point to and say words introduced on Day 1 that are listed on the Words We Understand chart. Invite children to talk about what they recall about each of the words. Remind children of the meaning of each novel word.
  • Point to where to begin to read on the first text page of the book. Pause during reading to briefly define words identified for today’s session. Use the following approach:
    • Read the sentence with the novel word. Repeat the novel word.
    • Repeat the sentence in which the word is used.
    • Define the novel word and connect the definition to the book.
  • After the book reading, engage children in a discussion of each novel word targeted for today with one or more of the following strategies (plus writing the word on the chart):
    • Ask children to describe a picture related to the word.
    • Define a word without naming it and ask children to identify the word.
    • Encourage children to think about a novel word in another context.
  • Encourage children to connect the book information to their own experiences. Below are some examples:
    • “Our book today was about worms. Have you ever seen or touched a worm? What was it like?”
    • “Our book today talked about roots. Roots are part of a plant that grow into the dirt. Have you ever seen the root of a plant? What was it like?”
    • “Today we talked about the word squeeze. We squeeze something by pressing things very close together. What kinds of things have you squeezed? How about a tube of toothpaste? How about a package or bottle of ketchup? Show us how you squeeze something.”]
Week 9:
Day 3

Working with Shapes

Mathematics

Large Group

Skill and Goal

Geometric and spatial knowledge
Children will create a picture by combining basic shapes.

Materials
Needed

  • Shapes used on Day 2
  • Construction paper—1 large piece per child
  • Glue sticks—1 per child
  • Construction paper for *shape cutouts (see Be Prepared)
    *Printables provided

Key
Concepts

Review:

  • Circle
  • Square
  • Triangle
  • Rectangle

Also
Promotes

  • Creative Expression

Be Prepared: Use the provided printables to cut out basic shapes as follows: circle, rectangle, square, three different types of triangles. Provide 5–6 different shapes per child including three different types of triangles. Make two examples of a clown with a hat and two examples of a house with different types of triangles.

BEGIN:

Yesterday we made new shapes by putting together or taking apart other shapes. Let’s look at the shapes we made.

ASK:

[Display shapes, one at a time, made by combining or cutting apart shapes on Day 2.]

  • When we put together two squares, what new shape did we make? (rectangle)
  • What new shapes did we make when we cut a square across the middle? (rectangles)
  • When we cut on the diagonal line of a square, what new shapes did we make? (triangles)
    [Hold up two different sizes of triangles you cut out for today’s activity.]
  • Are both of these shapes a triangle? (yes)
EXPLAIN:

A triangle has three straight sides and three corners. Both of these shapes are triangles.

Today we are going to make a picture with shapes. I have different types of shapes we can use to make a picture.

ACT:

We can choose any shapes we’d like to make our picture. We may glue them together to make a picture. Let’s take a look at some things we can make with shapes.

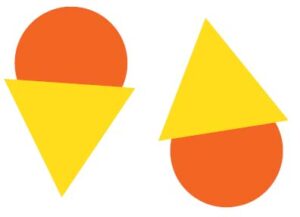
[Display a triangle and a circle. Form the ice cream cone and the clown with a hat as you describe each.]

We can use a triangle and a circle to make an ice cream cone or a clown with a hat.

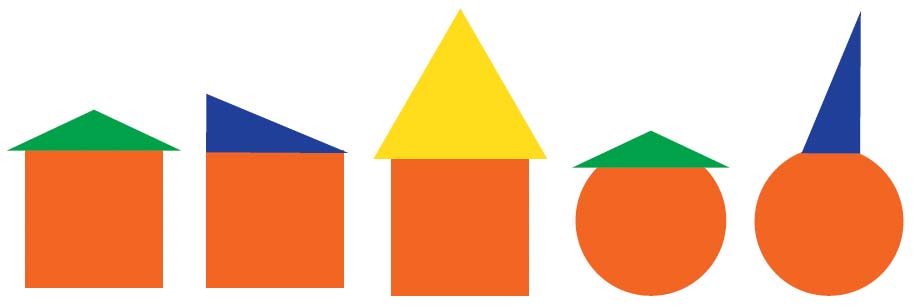
[Display a square and a triangle.]

We can make a house with a square and a triangle! We can make many different kinds of clowns or houses with different types of triangles.

[Display two examples of a clown with a hat and two examples of a house made with different types of triangles.]

When we make our pictures, we can glue our shapes on the construction paper any way we’d like. Our pictures will all be different!

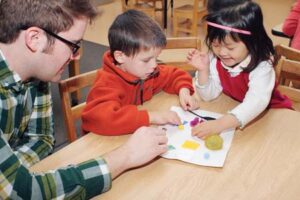
[Observe and interact with children as they create their shape pictures. Ask what shapes they used to create their pictures. Invite children to describe the shapes they used.]

RECAP:

Today each of us made a picture with shapes. We used different kinds of shapes to create our own picture.

[Hang children’s shape pictures in the room.]

Scaffolding tips

Scaffolding Tips

Extra support

  • In the opening review segment, if children seem unclear about how triangles were formed, demonstrate and describe cutting on the diagonal line. Also, if children seem unclear about how rectangles were made from a square, demonstrate and describe cutting a square across the middle.
  • When you display the two examples of a clown with a hat and two examples of a house made with different types of triangles, point out how the triangles in each are different (sides are different lengths). Emphasize that both are triangles.
  • Support children’s vocabulary knowledge by commenting on shape names and how they manipulated their shapes. Example: “You turned the triangle to make it tall.”

Enrichment

  • Invite children to use more than two shapes to make their picture. Encourage children to be creative in their work with the shapes.
Mathematics

Center Activity

Supply a flannel board and various basic shapes cut out of felt. Invite children to create a picture using the felt shapes.

Family Child Care

Family Child Care

Encourage children to describe their picture to their parents at pickup time.

Week 9:
Day 3

Getting Along With Others

Social-Emotional

Large Group

Skill and Goal

Relationship skills
Children will practice giving and receiving compliments.

Materials
Needed

  • Basket
  • Slips of paper with children’s names (see Be Prepared)

Key
Concepts

Review:

  • Compliment

Be Prepared: Carefully write each child’s name on individual slips of paper. Place the slips of paper in a basket.

BEGIN:

Yesterday we learned what it means to give someone a compliment. Who would like to remind us of the different ways we can give someone a compliment? (give a hug, give a thumbs-up, give a high five, say something nice)

EXPLAIN:

Today we will practice giving each other compliments by saying something nice. We will talk about how it makes us feel to give compliments. We also will talk about how it makes us feel to get compliments from someone.

I have your names on slips of paper in a basket. Each time I pull a person’s name from the basket, I will give that person a compliment. Then you will have a chance to give that same person a compliment, if you’d like.

We learned yesterday that a compliment can be about a way someone helped or something else someone did. A compliment lets others know we paid attention to something they did, and that we like what they did.

ACT:

[Pull a name from the basket. Show the name to the children and ask if they know whose name it is. Help by sounding out the name, if needed.]

I pulled out _____’s name. I will start by giving _____ a compliment.

[Offer a specific compliment to the child whose name is on the slip of paper. Examples: “You did a great job cleaning up the blocks this morning.” “I like how you used your walking feet when you came in from outdoor time this morning.” “You said some funny things when we talked about a book yesterday.”

  • After you give the child a compliment, ask the child: “How did it feel to get a compliment?”
  • Ask a volunteer to give the same child another compliment. Remind the child receiving the compliment to say “thank you,” if necessary.
  • Ask the child who gave the compliment: “How did it feel to give a compliment?”

Continue this pattern until each child has a chance to give and receive a compliment, and to describe how it felt to give and receive a compliment.]

RECAP:

Today we practiced giving and receiving compliments by saying something nice. Is it harder to give a compliment by saying something nice or by giving a high five? Why?

Scaffolding tips

Scaffolding Tips

Extra support

  • Some children may not wish to volunteer to give others a compliment. This is okay.
  • Some children may express that they feel embarrassed to receive a compliment. Point out that it is okay to have different kinds of feelings when receiving a compliment.

Enrichment

  • Ask children to think of a time when they received a compliment from someone outside of the classroom. How did it feel to get a compliment?
Social-Emotional

Center Activity

Provide the basket of names used in today’s activity. Encourage children to choose a name from the basket and give the child listed on the slip of paper a compliment. Then invite another child to choose a name and offer a compliment.

Family Child Care

Family Child Care

School-age children in your setting may enjoy making a compliment card for a family member. Also, encourage children to offer other children compliments throughout the day.

Week 9:
Day 3

Being a Scientist

Science

Large Group

Skill and Goal

Inquiry skills
Children will understand how to use their sense of touch to learn the texture of different items.

Materials
Needed

  • Construction paper—1 piece per child
  • Bottle glue
  • Small items of different textures for a collage (see activity)

Key
Concepts

New:

  • Touch
  • Collage
  • Texture

Also
Promotes

  • Creative Expression

BEGIN:

We are using our different senses to learn about things. What sense did we use yesterday with different things in a box? (smell)

EXPLAIN:

Today we are going to learn more about things by using our sense of touch. We feel something with a part of our body when we use our sense of touch.

We have skin all over our bodies. If something touches our skin, we can feel it.

ASK:
  • Can we feel something if someone touches our arm? Our skin is what helps us feel something.
  • How does it feel when we walk on rocks with our bare feet? (pokey, sharp) We can feel the rocks poking our feet.
EXPLAIN:

Today we are going to use our sense of touch to make a collage. A collage is a piece of art that is made with different kinds of things. Let’s say the word collage together: col-lage. We are going to use things that have different textures. Texture is how something feels when we touch it. A texture can be bumpy, smooth, soft, or hard. Before we begin our collage, let’s learn more about the things we are going to use.

ACT:

[Place items of different textures in a central location. Examples: aluminum foil, sandpaper, velvet, fake fur, feathers, cotton balls, tissue paper. Be sure items are small and can be glued to paper.

Pass around the various items, one at a time. Encourage children to feel and describe each item and to pass it along to others.]

You may choose any of the items you’d like to use for your collage. The more items you use, the more textures you will be able to feel on your collage.

[Children may create a collage individually or in small groups. As children glue each item to their paper, ask them to again feel and describe the texture of each item. Is it smooth, rough, fuzzy, soft, etc.? As children finish, place their collages in a safe place to dry and then display them in the room.]

RECAP:

Today we learned more about our sense of touch. Our sense of touch is an important tool we use to learn about something. We described how things felt and made a collage from things with different textures.

Scaffolding tips

Scaffolding Tips

Extra support

  • Draw attention to other experiences with the sense of touch. Examples: “Do your clothes ever feel scratchy?” “What did it feel like when we touch ice cubes?” (cold, hard)
  • Some children may not be familiar with some of the terms used to describe different textures. Say key words as children feel different textures. Example: “The sandpaper feels rough.”

Enrichment

  • Ask children to describe what it feels like when they take a bath. What does the water feel like? How about the bubbles? How does it feel when they accidentally sit on a toy in the bathtub?
  • Promote children’s comparisons of how different textures feel in their collage by asking questions such as: “What is the softest item in your collage?” “What is the roughest?” “What is the smoothest?”
Science

Center Activity

Fill the sensory table or a tub with shredded paper. Provide tongs, bowls, tweezers, and other items for exploration. Encourage children to use their senses as they explore the shredded paper.

Family Child Care

Family Child Care

Invite children to make a texture quilt. Provide flat items with different textures that can be cut into squares. Examples: aluminum foil, sandpaper, fabric, tissue paper. Invite school-age children to name the item and describe how it feels. Example: “This is sandpaper. It feels rough.” Invite children to glue the squares to a large poster board while encouraging them to place different textures next to each other.