Week 5:
Day 3

Understanding Words

Language / Literacy

Large Group

Skill and Goal

Oral language, Phonological awareness
Children will strengthen their comprehension of information presented in a book read aloud and increase the number of novel words they understand. Children will also strengthen their awareness of rhyming words.

Materials
Needed

  • *Twinkle, Twinkle, Little Star poster (from Week 4)
  • Book of your choice for this week’s repeated reading
  • Words We Understand chart from Day 1
    *Printables provided

Key
Concepts

New:

  • 4–6 words (see Be Prepared)

Review:

  • 1–2 words in book introduced on Day 1

Be Prepared: This is the second of three repeated readings of a book with children. Today’s session focuses on children’s comprehension of information presented in the book, especially connections to children’s experiences. The session also helps children understand more novel words. From the list of novel words you identified prior to your first reading of the book, select 4–6 words to define for children today. Remember, it is okay to select words that a few children may know if you anticipate most children do not understand the word’s meaning. See the Language/Literacy section of the ELM User Guide: 3–5 Years for additional information on how to select and define novel words.

BEGIN:

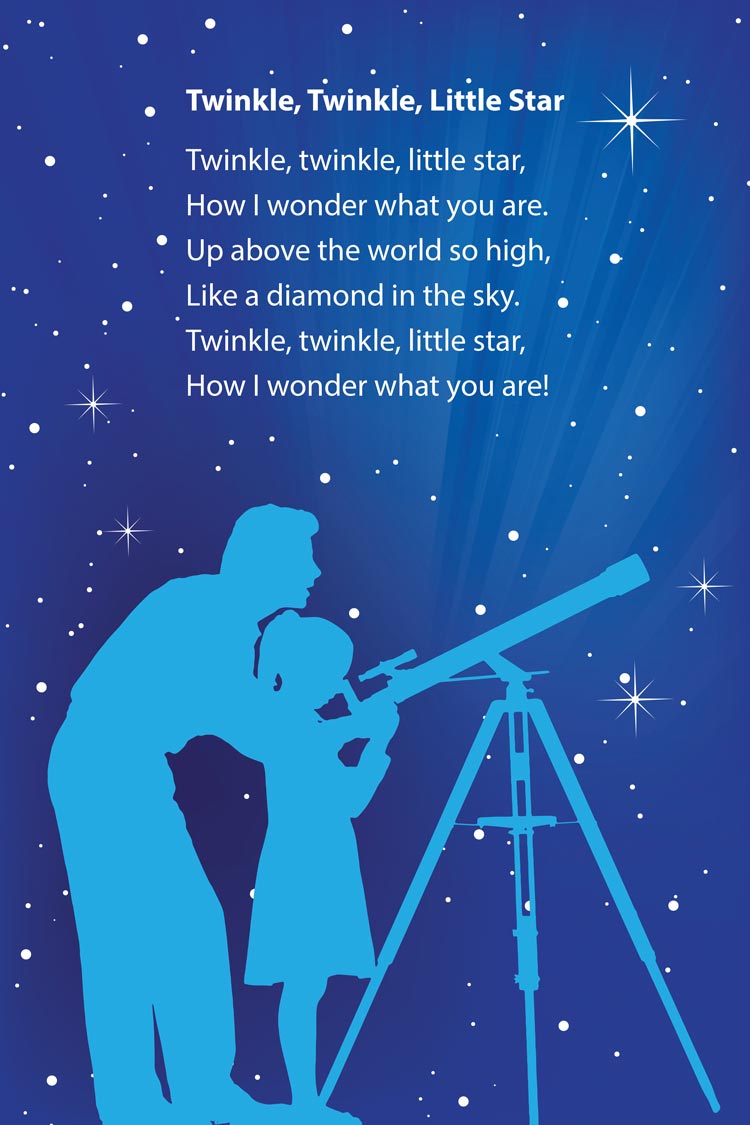
[Display the Twinkle, Twinkle, Little Star poster as you recite the “Twinkle, Twinkle, Little Star” nursery rhyme for children. Clap for each rhyming word: star, are, high, sky. Then invite children to join you in reciting the rhyme.]

Let’s say the “Twinkle, Twinkle, Little Star” nursery rhyme together and clap once for each rhyming word.

EXPLAIN:

Now let’s spend some time with our book.

[See Week 3, Day 3 of Language/Literacy for a description and examples of how to approach today’s book reading. Key aspects are summarized below:

  • Display book cover and say book title. Engage children in describing what they remember about the book:
    • What is our book about?
    • Who were the main characters in our book?
    • What happened first? What happened next?
  • Remind children that reading a book is a good way to learn new words. Point to and say words introduced on Day 1 that are listed on the Words We Understand chart. Invite children to talk about what they recall about each of the words. Remind children of the meaning of each novel word.
  • Point to where to begin to read on the first text page of the book. Pause during reading to briefly define words identified for today’s session. Use the following approach:
    • Read the sentence with the novel word. Repeat the novel word.
    • Repeat the sentence in which the word is used.
    • Define the novel word and connect the definition to the book.
  • After the book reading, engage children in a discussion of each novel word targeted for today with one or more of the following strategies (plus writing the word on the chart):
    • Ask children to describe a picture related to the word.
    • Define a word without naming it and ask children to identify the word.
    • Encourage children to think about a novel word in another context.
  • Encourage children to connect the book information to their own experiences. Below are some examples:
    • “Our book today was about worms. Have you ever seen or touched a worm? What was it like?”
    • “Our book today talked about roots. Roots are part of a plant that grow into the dirt. Have you ever seen the root of a plant? What was it like?”
    • “Today we talked about the word squeeze. We squeeze something by pressing things very close together. What kinds of things have you squeezed? How about a tube of toothpaste? How about a package or bottle of ketchup? Show us how you squeeze something.”]
Week 5:
Day 3

Working with Shapes

Mathematics

Large Group

Skill and Goal

Geometric and spatial knowledge
Children will represent different types of triangles.

Materials
Needed

  • *Large rectangle cutout
  • *3 different types of triangle shape cutouts (used in Day 2)
  • White paper—1 per child
  • Pencils—1 per child
    *Printables provided

Key
Concepts

Review:

  • Rectangle

BEGIN:

Today we will look at rectangles and triangles again. Remember, a rectangle has four straight sides and four corners, and all of the corners look like the corners in a door.

[Display a large rectangle cutout and compare the corners of the rectangle to the corners of a door. Describe how the corners of a door are similar to the corners of the rectangle.]

EXPLAIN:

Now let’s look at a triangle.

[Display a large triangle cutout. Trace the sides with your finger.]

ASK:

How many straight sides does a triangle have? (three)

EXPLAIN:

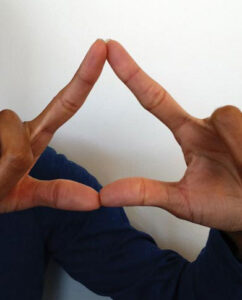
Triangles always have three straight sides and three corners. Let’s make a triangle with our hands.

[Demonstrate by connecting two thumbs on the bottom with pointer fingers forming the other two sides. See picture.]

We know that the corners of a triangle can be different sizes.

[Hold up the three different types of triangles used yesterday, one at a time. Compare the corners of the triangles to the corners children have made with their hands. Demonstrate how the corners of a triangle are different by comparing a corner that looks like the corner of a door to the corner of a triangle. With your finger, trace and describe the corners of the three different types of triangles to show the differences.]

Today we will practice drawing triangles. Let’s practice drawing a triangle with our fingers in the air.

[Encourage children to use their finger to draw a triangle in the air. Demonstrate with large hand/finger motion.]

I will put three different types of triangles on the board where we can see them. When we draw triangles, we need to remember how many sides they have and how many corners. Remember, the corners of a triangle can be different sizes.

ACT:

[Give each child a white piece of paper and pencil. Invite him/her to practice making different types of triangles. Observe and help as needed. Ask children to describe their triangles when they have finished.]

RECAP:

Today we practiced drawing different types of triangles with our fingers and on paper. We know that a triangle has three sides and three corners. Let’s hold up three fingers!

Scaffolding tips

Scaffolding Tips

Extra support

  • Some children may benefit from having copies of several different types of triangles on the table where they draw their own triangle.
  • As children draw their triangles, guide their hands as they draw, if necessary. Use hand-over-hand to help, as appropriate.

Enrichment

  • Invite children to draw rectangles and squares in addition to triangles.
Mathematics

Center Activity

Provide a drawn design or pre-made pattern mat that includes circles, squares, rectangles, and triangles. Invite children to match shapes (pattern blocks) to the outlines of each shape. As children match the shapes, ask them to name the shapes.

Family Child Care

Family Child Care

Give children additional experience with different kinds of triangles by inviting children to sort different triangle cutouts. Provide preschool-age children with cutouts of the three different kinds of triangles used in the activity and encourage them to sort the triangles into groups that are the same. Invite school-age children to explore triangles while making a simple paper airplane. Encourage children to point out the different-sized triangles as they fold the paper into an airplane.

Week 5:
Day 3

Getting Along With Others

Social-Emotional

Large Group

Skill and Goal

Relationship skills
Children will understand steps to take in solving a problem.

Materials
Needed

  • *Solving a Problem poster
    *Printables provided

Key
Concepts

New:

  • Problem
  • Solution
  • Fair

Review:

  • Self-control

Also
Promotes

  • Self-Regulation

Optional
Reading

  • Talk and Work It Out by Cheri J. Meiners

BEGIN:

Let’s talk about problems we might have.

We can have problems with most anything. I could have a problem if I wanted to play with a toy that someone else was playing with. I might have a problem if I worked really hard on a picture, and then someone put big marks on it. I might have a problem if I made a tall tower with blocks and someone knocked it over.

ASK:

Have you ever had a problem? What was your problem about?

EXPLAIN:

A problem is something that we are having difficulty with or having a hard time with. There are many kinds of problems.

[Display provided Solving a Problem poster. Point to text and pictures as you describe them.]

We can do things to solve a problem. Our poster will help us think about some ways to solve a problem.

First we have to decide what our problem is. Our poster says, “What is my problem?” Look at the child on the poster.

ASK:

[Point to first box on the poster.]

  • What is the child’s problem? (someone took toy away)
  • Let’s pretend someone took your toy. What is your problem? (your toy is gone)
EXPLAIN:

The next thing we do is think about some solutions.

Our poster says, “Think, think, think of some solutions.” Something that helps us solve a problem is called a solution.

Let’s look at the solutions the child on the poster is thinking about. Remember, the child shown on our poster has a problem because someone took the ball the child was playing with.

ASK:

[Point to each solution in second box as it is discussed.]

  • What solution do you think the child is thinking about in this picture? (getting angry)
  • What solution do you think the child is thinking about in this picture? (sharing)
EXPLAIN:

The child on our poster is thinking about two different ways to solve a problem. The child needs to decide which solution is best. Our poster asks, “What would happen if. . . .”

We can think about whether a solution would be safe. A solution should not hurt anyone or anything we play with.

We can think about whether a solution would be fair. Fair means everyone gets a chance to do something. It was not fair for someone to take the toy the child was playing with in our poster. The child did not have a chance to play with the ball when it was taken away.

ASK:

Would it be fair for the child in our poster to never let anyone else play with the ball? (no) Why not? (everyone should have a chance to play with the ball)

EXPLAIN:

The child in our poster is thinking about getting angry. Let’s talk about what might happen if the child got angry.

ASK:

[Point to each picture as it is discussed.]

Do you think it would be safe for the child to get angry at the child who took away the ball? (no) Why not? (someone might get hurt or feel bad)

EXPLAIN:

The child in our poster is also thinking about sharing the ball that was taken from him.

ASK:

Do you think it would be fair for the children to share the ball? (yes) Why would it be fair to share the ball? (everyone gets a chance to play with the ball)

EXPLAIN:

Earlier this week we learned how self-control helps us do the right thing. Remember, when we have self-control we think about things before we do anything. We are using self-control when we think about what might happen if we use our solutions.

The last thing we do in solving a problem is to try out our solution. Our poster says, “Give it a try!” The children shown in our poster can try sharing the ball.

RECAP:

Today we learned that a problem is something we are having difficulty or a hard time with. There are many kinds of problems. We learned some things to do that can help us solve a problem.

[Briefly review the steps on the poster.]

Scaffolding tips

Scaffolding Tips

Extra support

  • As children discuss solutions that would be fair and safe, help by demonstrating the solution, if necessary. Example: Children may want to solve the problem by taking back the toy. Demonstrate this solution with another adult and ask the other adult how he/she feels after the toy was taken from him/her.

Enrichment

  • After describing the two solutions the child in the poster is considering, ask children if there are other solutions the child could think about.
  • Ask children to describe problems they’ve previously had and how they solved them.
Social-Emotional

Center Activity

Invite several children to use people figures to act out the scenario described in the main activity. Provide the *Solving a Problem poster as a reminder to children about the sequence of what happened.
*Printables provided

Family Child Care

Family Child Care

Encourage children in your setting to use dolls or people figures to practice the steps on the *Solving a Problem poster. Invite school-age children to read through each step on the poster as preschool-age children show what to do with the dolls or people figures.
*Printables provided

Week 5:
Day 3

Creating Art

Creative Expression

Large Group

Skill and Goal

Skills that support creative expression
Children will understand that they can be artists who create art.

Materials
Needed

  • The Dot by Peter H. Reynolds
  • Paper
  • Paintbrushes
  • Paint

Key
Concepts

Review:

  • Artist

Also
Promotes

  • Language / Literacy
  • Physical / Health

Be Prepared: Today’s activity involves a book reading followed by children using paint and paintbrushes to make dots as art. If time and/or paint supplies are limited, offer the painting segment at a different time and/or form smaller groups of children for taking turns with the painting.

BEGIN:

We are learning about different types of art. Today we are going to learn how we can create art. We can be artists! Remember, an artist is a person who creates art, music, drama, or dance.

[Display book cover.]

Let’s look at the cover of this book.

ASK:

What do you think this book might be about?

EXPLAIN:

Our book is called The Dot. The author and illustrator of our book is Peter Reynolds. This story happens in a classroom that has an art class. We have a time for art in our classroom, too.

ACT:

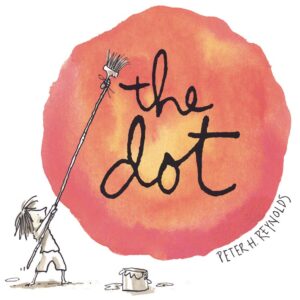
[Read the book text and use your own words to describe illustrations.

At the conclusion of the book reading, use questions, such as the following, to help children recall some information:

  • At the beginning of our book, Vashti told her teacher that she cannot draw. What did her teacher do? (asked Vashti to make a mark on a piece of paper and then sign the paper)
  • What did the teacher do with Vashti’s art? (put a frame around it and placed it on the wall)
  • Vashti came to art class and saw her picture hanging on the wall in a golden frame. What did Vashti start to do next? (she created a lot of art with dots)
  • What happened to all of the art work that Vashti created? (was hung in the school art show)]

Now let’s be artists and create art with dots just like Vashti!

[Provide paper, paintbrushes, and paint. You may also wish to provide cotton swabs and/or bingo markers for children to use in creating a painting with dots.

Draw attention to differences in children’s paintings. Example: “Pau is creating a painting with lots of little dots. Gavin is painting one big dot with lots of colors!”]

RECAP:

We learned today that we can be an artist who creates art. Vashti used simple dots to make her art. We made art with dots, too! Each of our pictures of dots looked different. Artists can create whatever they want to create.

Scaffolding tips

Scaffolding Tips

Extra support

  • Some children may be unfamiliar with the word “gazing” (used in the book). Explain that “gazing” means looking.
  • Offer comments and questions that help children understand they can be artists. Examples: “Did Vashti need a lot of practice to put a dot on the paper?” “Did you have a lot of practice in putting a dot on a paper?” “Is Vashti an artist?” “Are you an artist?”

Enrichment

  • Encourage children to describe their work. Example: “What can you tell me about the dots in your painting, Kadrick?”
Creative Expression

Center Activity

Extend the dot-making activity to the art center so children have more opportunity to create art. Encourage children to look at and describe differences in dot paintings and in children’s paintings posted in your classroom.

Family Child Care

Family Child Care

Encourage both preschool-age and school-age children in your setting to create an art show based on their paintings and drawings. Invite families to the art show.