Week 5:
Day 2

Understanding Sounds

Language / Literacy

Small Group

Skill and Goal

Phonological awareness
Children will identify rhyming words.

Materials
Needed

  • *Picture cards (see Be Prepared)
  • Flannel board
    *Printables provided

Key
Concepts

Review:

  • Rhyme

Be Prepared: Select the picture cards listed below. For easier use of the cards with children, glue a piece of Velcro® or felt to the back of each for placing on a flannel board. Use the following sets of picture cards:


bear-pear car-star dog-log
cat-hat hop-mop pig-wig
fan-pan tree-bee rug-bug
snake-cake bell-shell goat-boat


BEGIN:

Let’s say the “Humpty Dumpty” nursery rhyme together!

[Lead children in reciting “Humpty Dumpty” in unison. Emphasize the rhyming words.]

EXPLAIN:

We know words that rhyme sound alike at the end. Today we are going to look at some pictures of words and decide which words rhyme with each other. Let me show you.

ACT:

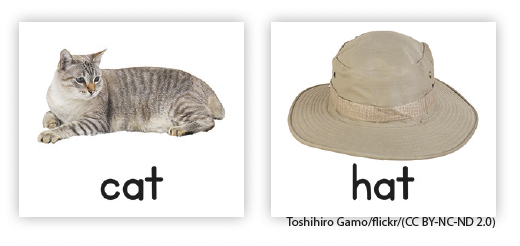
[Display rhyming picture cards cat and hat. Enunciate each word clearly.]

This is a cat. This is a hat. Cat, hat.

  • Do these words rhyme?
  • How do we know? (they sound the same at the end)

We are using our listening ears to listen for rhyming words!

[Display the cat and hat cards next to each other on the flannel board. Make sure the cat and hat cards are completely separate from the next two cards to be placed on the board.]

I will put the two rhyming cards next to each other. Let’s try two more cards.

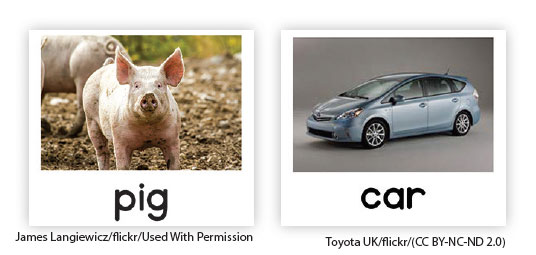
[Display picture cards pig and car. Enunciate each word clearly.]

This is a pig. This is a car. Pig, car.

  • Do these words rhyme?
  • How do we know? (they do not sound the same at the end)

[Remove the picture card car from the board.]

Let’s try another card with our pig card.

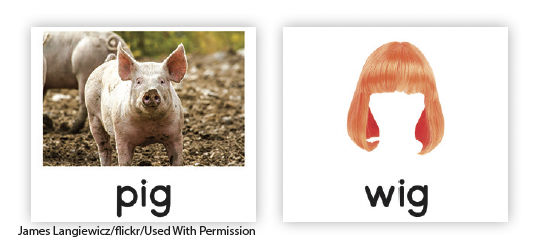
[Display rhyming picture cards pig and wig next to each other on the board. Enunciate each word clearly.]

This is a pig. This is a wig. Pig, wig.

  • Do these words rhyme?
  • How do we know? (they sound the same at the end)

[Display the pig and wig cards next to each other on the flannel board but separate from the cat and hat cards.

Continue displaying two picture cards at a time. Remember to enunciate each word clearly. Alternate between displaying two cards that rhyme and two cards that do not rhyme. When children determine that two picture cards do not rhyme, pair one with its rhyming picture and ask again if the two pictures rhyme. Place all rhyming pairs next to each other on the flannel board in clearly separate pairs so children can readily see what rhymes. Offer as many word comparisons as time and children’s interest permit.]

EXPLAIN:

Each of our picture cards is now matched with its rhyming partner on our flannel board. Let’s say each pair of rhyming words together.

ACT:

[Lead children in saying the words for each pair of cards in unison. Enunciate each word clearly.]

RECAP:

Today we looked at picture cards and decided which cards rhymed. We paired them with their rhyming partner on our flannel board.

Scaffolding tips

Scaffolding Tips

Extra support

  • If children have difficulty determining whether two picture cards rhyme, ask them to repeat the words while emphasizing the ending sound of each word. Point out that when words rhyme, the ending sounds are the same.

Enrichment

  • Ask children to think of a word that does not rhyme with a pair of words on their picture cards. Example: “Can you think of a word that does not rhyme with cat and hat?”

Center Activity

Provide *picture cards used in today’s activity and a flannel board. Encourage children to match cards that rhyme.
*Printables provided

Family Child Care

Family Child Care

Play Rhyme Challenge with preschool-age children. Challenge each child to say as many rhyming words as they can for a given word. Example: “Say as many rhyming words as you can for the word ‘hop.’”

School-age children will enjoy a game of Rhyme Go Fish! Place picture cards of things that rhyme in the middle of the group. This will be the “pond.” Invite each child to choose five cards. Encourage children to first check to see if they have any rhyming cards in their hands. If so, they may place the rhyming cards on the floor in front of them. The first player looks at his/her cards to see which rhymes he/she needs. The player then asks the person to his/her left “Do you have a card that rhymes with _____?” If the second player does have a card that rhymes with the named card, he/she hands the card to the first player and the first player places the pair of rhyming cards on the floor in front of him/her. If the second player does not have a card that rhymes with the named card, the first player is instructed to “Go Fish!” and pick a card from the “pond.” Play continues until a player has no cards in his/her hands.

Week 5:
Day 2

Working with Shapes

Mathematics

Small Group

Skill and Goal

Geometric and spatial knowledge
Children will understand characteristics of corners in rectangles and triangles.

Materials
Needed

  • *Large rectangle, triangle, and diamond cutouts
  • *2 different-sized rectangles and 3 different types of triangles (see Be Prepared)
  • 2 blocks
  • Straws (some short, some longer)
    *Printables provided

Key
Concepts

Review:

  • Rectangle

Be Prepared: The two different-sized rectangles should include the following: (1) a rectangle with a small base and tall sides and (2) a rectangle that is laying on its side and is long and skinny. The three different types of triangles should include the following: (1) a triangle with a small base and tall sides, (2) a triangle with a wide base and short sides, and (3) a triangle with equal sides and corners. See illustrations in the activity plan. Also, a diamond cutout is included in the activity for comparison purposes only. This activity does not introduce the name or characteristics of a diamond.

BEGIN:

Today we will look at rectangles and triangles again. What do we know about triangles? (three straight sides, three corners) What do we know about rectangles? (four straight sides, four corners)

EXPLAIN:

Let’s look carefully at the corners of a rectangle.

[Display large rectangle cutout. Point to its corners.]

The corners of a rectangle are all the same.

All rectangles have four corners that look the same. Squares also have four corners that look the same.

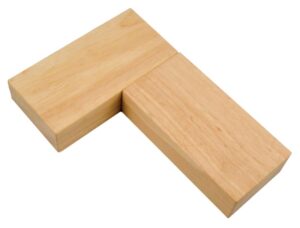
We can make the same kinds of corners with two blocks. Watch as I make a corner with these two blocks.

[Use two large blocks to demonstrate how to make a corner that would be found in a rectangle. Use your finger to outline the corner as you compare it to the corner of a rectangle cutout.]

ACT:

Let’s look at our door. Let’s find the corners of our door that look like the corners in a rectangle.

[Point to the corners of the door. Hold up the rectangle cutout next to each corner of the door to show how they are the same kinds of corners.

Display a diamond-shaped cutout.]

Is this a rectangle? Why not? (corners do not look like the corners found in a door) This shape does not have any corners that look like the corners found in a door. This shape (diamond) is not a rectangle.

EXPLAIN:

[Display a rectangle with a small base but tall sides, and a rectangle that is laying on its side and is long and skinny.]

Some rectangles are tall.

[Point to rectangle with small base and tall sides.]

Some rectangles are long.

[Point to rectangle that is laying on its side and is long and skinny.]

Some rectangles are small and some rectangles are big! All rectangles have four straight sides and four corners that look like the corners of a door.

[Display a triangle.]

Now let’s look at a triangle. I am going to point to the corners of a triangle. Here is one corner. Here is a second corner. Here is a third corner.

[Display three different types of triangles. Point to each corner.]

Triangles can have different types of corners. A triangle always has three straight sides and three corners.

[Point to the sides and corners of each triangle.]

The corners can be different sizes. Look at how the corners of these three triangles are different.

[Point to and describe one corner on each of the three triangles. Compare the triangle corners as you place them next to each other.]

Let’s look at a triangle and rectangle together.

[Hold up the rectangle cutout next to a triangle cutout to compare corners.]

ASK:

How are the corners of these two shapes different? (rectangle corners are like the corners of a door, triangle corners can be different sizes)

EXPLAIN:

Corners in a triangle can be different sizes. Let’s look more at some triangles and see how they are different.

ACT:

[Encourage children to look at, feel, and describe the sides and corners of three different types of triangles. Discuss how different types of triangles have different-sized sides and different corners.]

Let’s make some rectangles and triangles with straws. Watch as I show how to do this.

[Demonstrate how to make a rectangle and then a triangle with the straws. Provide children with straws and invite them to make rectangles and triangles. Make sure some of the straws are shorter and some are longer. As children make the shapes, ask them to describe their shape and tell whether it is a rectangle or a triangle.]

RECAP:

Today we looked at rectangles and triangles and talked about their different corners. We know that rectangles have corners that are the same and look like the corners in a door. Triangles can have corners that are different sizes.

Scaffolding tips

Scaffolding Tips

Extra support

  • Some children may benefit from having a rectangle cutout and a triangle cutout on the table where they work with straws.

Enrichment

  • Ask children, “Does a circle have corners?” “How do you know?”
  • Share with children that another word for corner is “angle.”
Mathematics

Center Activity

Provide a drawn design or premade pattern mat that contains a design using rectangles and triangles. Invite children to match shapes (pattern blocks) to the outlines of each drawn shape on the mat. As children match the shapes, ask them to describe each shape. What are the corners like? Are the corners of the shape all the same size?

Family Child Care

Family Child Care

Invite preschool-age children to look around your setting for corners that look like the corners found in a door. Invite school-age children to check the corners with the corner of a piece of paper.

Week 5:
Day 2

Using Self-Control

Self-Regulation

Large Group

Skill and Goal

Self-control
Children will understand how to use self-control.

Materials
Needed

  • Container of bubbles and wand
  • 2–3 musical instruments (see Be Prepared)

Key
Concepts

Review:

  • Self-control
  • Concentrate

Optional
Reading

  • No, David! by David Shannon

Be Prepared: This plan offers two activities (bubbles, musical instruments) for helping children understand and practice self-control. If time is limited, you may wish to omit the game using musical instruments, or offer this game at a different time. For the musical instruments activity, choose 2–3 instruments that don’t easily make noise when you touch them. Examples: drum, castanets, triangle, rhythm sticks, sand blocks.

BEGIN:

Yesterday we learned that self-control helps us to do the right thing. We listened to a story about a girl named Katie. Katie needed to learn to use self-control.

EXPLAIN:

Today we are going to practice using self-control. When we practice using self-control, we think before we do something and remind ourselves to do the right thing.

Please raise your hand if you like to play with bubbles! Bubbles can be a lot of fun. When I see bubbles, I like to pop them!

ASK:

Do you like to pop bubbles?

EXPLAIN:

Today we are going to play a game with bubbles. I am going to blow some bubbles. Let’s sit with our hands in our lap while I blow the bubbles.

ACT:

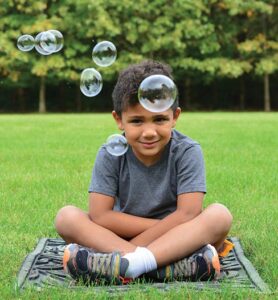
[Invite children to practice sitting with their hands in their lap.]

When I blow the bubbles, we will use self-control and keep our hands in our lap. You will see the bubbles floating around you. Please pay attention to the size of the bubbles and maybe the color that you see in the bubbles. Let’s try real hard to not pop any of the bubbles. I will let everyone know when it is time to pop the bubbles. Then we can stay seated and pop them!

[Gently blow bubbles around all of the children. Remind children to use self-control as they sit still. After you’ve blown bubbles around all of the children, and the children have been sitting still for at least one minute, blow more bubbles and invite children to pop the bubbles while seated.]

ASK:
  • Was it hard to use self-control when I started blowing bubbles?
  • Why?
EXPLAIN:

[If time permits.]

Let’s practice using self-control again. This time we are going to play a game using musical instruments. We will sit in a circle and pass around the musical instruments without making any noise! This will be hard, but we can do it if we are careful and use self-control.

ACT:

Please get in a circle and I will show you how to pass the instruments without making noise.

[Arrange children in a circle. Demonstrate how to pass an instrument very carefully without making noise. Discuss how you need to move slowly in order to keep the instrument quiet.]

Now we are going to use our self-control and pass the instruments around the circle without making noise. After we’ve passed them around quietly, we will get to play the instruments!

[Begin passing 2–3 instruments around the circle. As the instruments are passed, discuss how we need to remind ourselves to use self-control even though we may want to make noise with the instruments. When children have passed them around successfully, invite them to make noise with the instruments!]

RECAP:

Today we practiced using self-control. Using self-control can be hard, but we can do it if we think about what we should do instead of what we sometimes want to do. Self-control involves concentration. When we concentrate on something we pay close attention to it. What would happen in our classroom if we didn’t use self-control? (we wouldn’t do the right thing, we wouldn’t make good choices)

Scaffolding tips

Scaffolding Tips

Extra support

  • If a child happens to make a noise with an instrument being passed around, supportively remind him/her to be careful as the instruments are being handled. Encourage children to concentrate on passing the instrument carefully so it does not make a noise.

Enrichment

  • Ask children how they could practice self-control when waiting their turn for something. (do something else, sing a song, go to another area, etc.)
Self-Regulation

Center Activity

Provide a small container of bubbles and wand. Invite children to take turns blowing bubbles. Encourage other children to pop the bubbles in front of them while sitting. Children will practice self-control as they wait to have bubbles blown in their direction.

Family Child Care

Family Child Care

Practice self-control by playing Peanut Butter and Jelly. Invite children to sit on the floor in a large circle. The game is played with two balls. One ball will be the “peanut butter” and the other ball will be the “jelly.” The object of the game is to always toss the “peanut butter” ball and roll the “jelly” ball. To begin, the child holding the “peanut butter” ball gently tosses it to anyone in the circle and the child holding the “jelly” ball gently rolls it to anyone in the circle. Whoever receives the “peanut butter” ball must continue to gently toss it to someone else while the “jelly” ball should always be rolled. School-age children may enjoy adding challenge to the game as you add another ball to be passed from child to child or switch actions for the “peanut butter” and “jelly” balls.

Week 5:
Day 2

Creating Art

Creative Expression

Large Group

Skill and Goal

Knowledge of creative processes
Children will understand different types of art.

Materials
Needed

  • *5 pictures as shown
    *Printables provided

Key
Concepts

Review:

  • Artist
  • Art

BEGIN:

We are learning there are different ways to be an artist. Artists can create art, music, drama, or dance.

EXPLAIN:

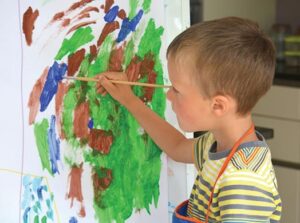
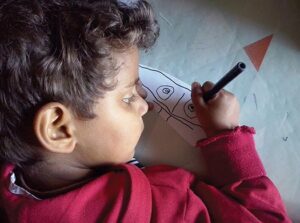
Today we are going to talk about different ways to create art. Remember, drawing or painting a picture is one way we can make art. Let’s talk about some pictures that show different types of art.

ACT:

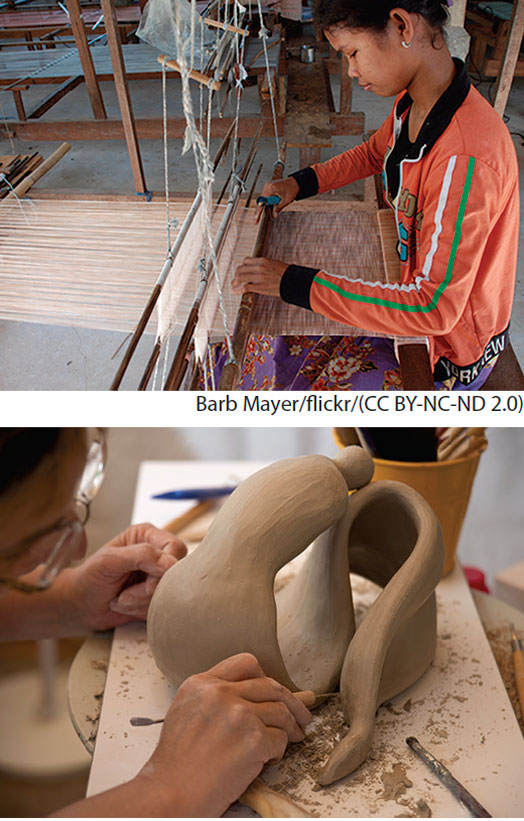
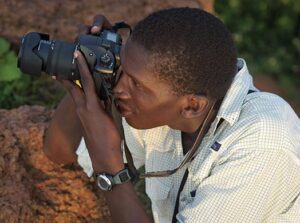
[Display and discuss each of the five pictures in the following order: painting, drawing, taking a photograph, weaving, sculpting. Use the following format for each picture, providing new words and descriptions as necessary (see Extra Support tips):]

  • What type of art is the artist creating?
  • Have you ever watched someone create art in this way?
  • How is the artist creating the art?
RECAP:

Today we learned more about what artists do. We talked about paintings, drawings, photographs, weavings, and sculptures. A lot of us (or many of us) have created some of the types of art we talked about.

Scaffolding tips

Scaffolding Tips

Extra support

  • Provide examples of different types of art discussed in the activity.
  • In the discussion of weaving, show and describe the picture of a loom in the To Be an Artist book read yesterday. Remind children that weaving is a way to create a colorful cloth. Weaving is also a way to make a basket.
  • In the discussion of sculpture, remind children that using play dough or clay is one way to do sculpture.
  • Encourage children to look around the classroom for examples of art, including paintings or drawings done by children in your classroom.

Enrichment

  • Invite a family member or center staff member who creates art to show and describe his/her work.
Creative Expression

Center Activity

Provide *pictures of different types of art for children to explore. Encourage children to look closely at the pictures and think about how each piece might have been made. Example: “What do you think was used to make this sculpture?”

*Printables provided

Family Child Care

Family Child Care

Invite families of both school-age and preschool-age children in your setting to share artwork from their home. Encourage children or family members to talk about the art. Some art may represent a family’s cultural background. Example: A child brings in a wooden plate that was carved in Poland. Talk with children about where Poland is located on a globe or map