Week 4:
Day 2

Understanding Sounds

Language / Literacy

Small Group

Skill and Goal

Phonological awareness
Children will understand the concept of rhyming words.

Materials
Needed

  • *Humpty Dumpty poster
    *Printables provided

Key
Concepts

New:

  • Rhyme
  • Nursery rhyme

Review:

  • Different

BEGIN:

We are learning about words. Today we are going to pay close attention to the sounds we hear in words.

EXPLAIN:

Some words sound different. Some words sound the same. I am going to say some words. Let’s talk about whether the words sound different or sound the same. Remember, when things are different they are not the same.

ACT:

[Enunciate clearly as you say: car, toy.]

Do these words sound different or do these words sound the same?

The words “car” and “toy” sound different.

I am going to say two more words. Listen carefully to each word.

[Enunciate clearly as you say: mud, play.]

Do these words sound different or do these words sound the same?

The words “mud” and “play” sound different.

EXPLAIN:

The words I just said sound different. Listen again: “car,” “toy,” “mud,” “play.” None of these words sound the same.

Now I am going to say some more words. Be sure to use your listening ears to hear what I say.

ACT:

[Enunciate clearly as you say: bat, cat.]

Do these words sound different or do these words sound the same?

The words “bat” and “cat” sound the same.

Now I am going to say two more words: “hat,” “sat.”

Do these words sound different or do they sound the same?

The words “hat” and “sat” sound the same.

Now I am going to say the words again. Listen carefully to the end of each word: “bat,” “cat,” “hat,” “sat.”

EXPLAIN:

Each of the words sounds the same at the end. I will say the words again: “bat,” “cat,” “hat,” “sat.” Let’s say the words together: “bat,” “cat,” “hat,” “sat.” These four words rhyme. When words rhyme, they sound alike at the end of the word.

ACT:

Listen carefully. I am going to say the sound we hear at the end of each word: at. Let’s say the sound “at” together. Now let’s say together the four rhyming words one more time: “bat,” “cat,” “hat,” “sat.”

EXPLAIN:

Rhyming words are part of nursery rhymes. A nursery rhyme is a short story or song that can be funny.

I am going to read a nursery rhyme about “Humpty Dumpty.” Maybe you have heard this nursery rhyme before.

ACT:

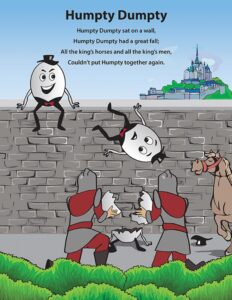
[As you read the nursery rhyme, say it slowly and emphasize its rhyming words. Display and describe the provided poster of the rhyme’s characters.]

Humpty Dumpty sat on a wall,
Humpty Dumpty had a great fall;
All the king’s horses,
And all the king’s men,
Couldn’t put Humpty together again.

Did you hear the rhyming words? What rhyming words did you hear? (wall, fall; men, again)

I will read the first part of our nursery rhyme again. Listen carefully for the rhyming words.

[Say the first two lines slowly and exaggerate its rhymes: “Humpty Dumpty sat on a wall. Humpty Dumpty had a great fall.”]

What are the two rhyming words in what I just read? (wall, fall)

Let’s say the words “wall” and “fall” together.

The words “wall” and “fall” sound the same. Both of these words end with “all.” Let’s say “all” together.

Now let’s say together the first part of the “Humpty Dumpty” nursery rhyme. I will read each line, and you can repeat the line after me. Let’s say the rhyming words a little louder. Remember, our rhyming words are “wall” and “fall.”

[Say “Humpty Dumpty sat on a wall” with a slightly louder voice for the word “wall,” and then encourage children to repeat the phrase. Then say “Humpty Dumpty had a great fall” with a slightly louder voice for the word “fall,” and then encourage children to repeat the phrase. Finally, lead children in saying together both lines, again with emphasis on “wall” and “fall.”]

Now I will read the next part of our nursery rhyme again. Listen carefully for the rhyming words.

[Say the second two lines slowly and exaggerate its rhymes: “All the king’s horses and all the king’s men couldn’t put Humpty together again.”]

What are the two rhyming words in what I just read? (men, again)

Let’s say the words “men” and “again” together.

The words “men” and “again” sound the same. Both of these words end with “en.” Let’s say “en” together.

Now let’s say together the second part of the “Humpty Dumpty” nursery rhyme. I will read each line one at a time, and you can repeat the line after me. Let’s say the rhyming words a little louder. Remember, our rhyming words are “men” and “again.”

[Say “All the king’s horses and all the king’s men” with a slightly louder voice for the word “men,” and then encourage children to repeat the phrase. Then say “Couldn’t put Humpty together again” with a slightly louder voice for the word “again,” and then encourage children to repeat the phrase. Finally, lead children in saying together both lines, again with emphasis on “men” and “again.”]

Let’s say one more rhyme that we know. The rhyme is “Five Little Monkeys.” I will say it first and raise my arm and hand when I say a rhyming word.

Five little monkeys jumping on the bed,
One fell off and bumped his head.
Mama called the doctor and the doctor said,
“No more monkeys jumping on the bed!”

ASK:

There are three words that rhyme in “Five Little Monkeys.” Who can tell us one of the rhyming words?

EXPLAIN:

The rhyming words are “bed,” “said,” and “head.” Let’s say those words together: “bed,” “said,” “head.”

ACT:

Now let’s say the rhyme together.

[Lead children in saying “Five Little Monkeys” in unison. Raise your arm and hand when a rhyming word is said. Emphasize the rhyming word with your voice.]

RECAP:

Today we learned about rhyming words. Words that rhyme sound alike at the end of the word. We also learned a nursery rhyme about “Humpty Dumpty.” We found the rhyming words. Let’s say together again one of the rhymes we did today. Do you want to say the “Humpty Dumpty” nursery rhyme or the “Five Little Monkeys” rhyme?

[Lead children in reciting “Humpty Dumpty” or “Five Little Monkeys,” giving emphasis to the rhyming words.]

Scaffolding tips

Scaffolding Tips

Extra support

  • Focus on the first two lines of the nursery rhyme if children are challenged in identifying the rhyming words.
  • Discuss the substance of the rhyme if children are interested. Discuss the king and why the horses and men couldn’t put Humpty together again. Ask children if they’ve ever broken something and couldn’t put it back together again to help them better understand Humpty’s situation.

Enrichment

  • Invite children to say which sounds rhyme in the title of “Humpty Dumpty.” Focus on the sounds that are the same when you say both words in the title (“ump” and “ty”).
  • Invite children to lead the nursery rhyme recited in the Recap.

Center Activity

Provide a nursery rhyme felt set and flannel board (if available). Encourage children to retell the nursery rhyme learned today while using the felt set. If a felt set is not available, provide any figures or manipulatives related to the nursery rhyme that children could use as props in retelling the rhyme.

Family Child Care

Family Child Care

Provide dress-up props, such as costumes, plastic eggs, and toy horses. Invite all children in your setting to enact the nursery rhyme as they recite it.

Week 4:
Day 2

Working with Shapes

Mathematics

Large Group

Skill and Goal

Geometric and spatial knowledge
Children will name and describe circles and squares. Children will understand that shapes can be in different sizes.

Materials
Needed

  • *Circle and square shape cutouts of two different sizes
    *Printables provided

Key
Concepts

New:

  • Corner

Review:

  • Circle
  • Square
  • Equal

BEGIN:

On Day 1 we learned about a circle, a triangle, and a square. Today we will learn more about circles and squares. I have a circle and a square. Can you tell us which shape is a circle? How do you know? (circles are round, curved edge) Let’s feel the outside of the circle.

[Pass around the circle and encourage children to feel the curved outline.]

EXPLAIN:

There are circles all around us. There are many circles in our room.

ASK:
  • Where are circles in our room? (trash can top, clock face, etc.)
  • How do we know it’s a circle? (curved line, no straight sides, round)
EXPLAIN:

Now let’s look at the other shape.

[Display a square.]

ASK:

What is the name of this shape?

ACT:

[Pass around the square and encourage children to feel the sides and corners.]

  • What can you tell us about the square?
  • How does it feel different than the circle?
EXPLAIN:

Let’s count together the number of sides on the square.

A square has four equal and straight sides. We know that equal means they are the same. All sides of a square are the same. A square also has four corners. A corner is where two sides come together.

[Display a square and point out how all sides of the square are equal. Point to a corner and show how two sides come together to form the corner.]

There are squares all around us. There are many squares in our room.

ASK:
  • Where are squares in our room? (tabletop, block face, etc.)
  • How do we know it’s a square? (straight lines, four equal sides, four corners)
ACT:

Let’s draw a circle in the air with our finger. Remember, a circle is round.

[Lead children in drawing a circle in the air. Use your arm so children can readily see your example.]

Now let’s make a square in the air with our finger.

[Lead children in drawing a square. Again, use your arm so children can readily see your example. Remember that if you do not position your back against the children, your arm/finger actions will be in the opposite direction of what most children will do.]

Remember, a square has four straight sides that are the same.

EXPLAIN:

Shapes come in all sizes.

[Display and point to two different-sized circles.]

This is a small circle. This is a larger circle. They are both circles. They are different sizes of circles.

ASK:

[Display two different-sized squares and compare them.]

  • Are a small square and a large square both squares? (yes)
  • How do we know? (they both have four straight sides, they both have four equal sides, they both have four corners, etc.)
EXPLAIN:

They are both squares, but different sizes.

RECAP:

Today we learned more about a circle and a square. We felt and described each of these shapes. Who can describe a circle? (curved line, round) Who can describe a square? (straight lines, four equal sides, four corners) We learned that circles and squares can be different sizes.

Scaffolding tips

Scaffolding Tips

Extra support

  • If children have difficulty finding circles or squares in the classroom, encourage them to take the shape with them to compare as they look.
  • If children need more description of the word “equal,” display two squares with equal sides. Place the squares back to back and explain how the sides of both squares are the same size. Then display a large square and a smaller square. Place them back to back and explain how the sides of both squares are different sizes. They are not equal.

Enrichment

  • Ask children to name foods they can think of that are in the shape of circles and squares.
Mathematics

Center Activity

Provide children with circle and square cutouts, glue, and paper. Invite children to make a shape collage. Invite children to describe what they’ve created.

Family Child Care

Family Child Care

Make it “Circle and Square” day for all children in your setting! Encourage preschool-age children to find circles and squares during play time, lunch, on their clothing, etc. Ask parents to help children pick out clothes with circles and squares on them. School-age children will enjoy sharing books about circles and squares with younger children. Encourage school-age children to describe the circles and squares as they share the books with younger children.

Week 4:
Day 2

Getting Along With Others

Social-Emotional

Large Group

Skill and Goal

Relationship skills
Children will understand how to cooperate with each other.

Materials
Needed

  • Chairs—1 per pair of children
  • Music and music player

Key
Concepts

New:

  • Cooperate

Review:

  • Take turns

BEGIN:

We are learning what it means to share. Who remembers some ways we can share something? (split something up, play with it together, take turns) Remember, when we take turns with something, we use it one at a time, or work together when using or playing with it.

EXPLAIN:

When people take turns, they are cooperating with each other. People cooperate when they work together.

There are many ways we cooperate with each other in our classroom.

ASK:
  • How do we cooperate (work together) during clean-up time? (we clean up different toys or areas)
  • How do we cooperate (work together) during center time? (play games together, share toys, take turns doing something)
EXPLAIN:

Today we are going to play a game called Musical Chairs. You may have played this game before. Today we will play the game in a way that will help us cooperate.

We will share a chair with another person when the music stops.

ASK:

What are some ways we could share a chair with someone?

EXPLAIN:

[Be sure the following two options are emphasized in a discussion of this question.]

  • We can help each other stay on the seat so one of us does not fall off.
  • Or, one of us could sit on the other person’s lap so we can both fit on the chair.
ASK:

Would we be cooperating if one of us sat in a chair but did not share the chair with someone?

ACT:

[Help children arrange chairs so there is one chair per pair of children facing outward in a circle. Ask children to sit with another child in a chair.]

EXPLAIN:

I am going to play the music as you walk around the circle. You need to find a chair when the music stops. You also need to share your chair with someone else.

ACT:

[Play music for several seconds, and then stop the music. Observe as children find and sit in a chair. Point out good cooperation. Example: “Jenny and Raque’ are cooperating! Jenny found a chair when the music stopped and helped Raque’ sit in the chair with her.” Continue several rounds as children share chairs with each other each time the music stops. Continue to describe examples of cooperation.]

RECAP:

Today we played Musical Chairs. How did the game help us learn about cooperation?

Scaffolding tips

Scaffolding Tips

Extra support

  • If children have difficulty sharing a chair with someone else, point out good cooperation in others. Encourage children to remember the different ways we can share.
  • If three children attempt to share a chair, actively help one of the children to share a chair with a child who has a chair to him/herself.

Enrichment

  • If children are comfortable sharing chairs with one another, try the game a different way. Begin with enough chairs for each child. Then as the music plays remove a chair and encourage the child who does not find a chair to share with another child. Continue removing chairs each time the music stops until all children are sharing a chair with another child.
Social-Emotional

Center Activity

Encourage children to cooperate in the block center. Give each child four blocks and invite children to build one structure together. As children build, point out that with only four blocks each child could build something small by him/herself, but with everyone cooperating and using their blocks together, they can build something much larger.

Family Child Care

Family Child Care

Create a tabletop or floor version of Musical Chairs by using index cards (or pieces of paper) to represent chairs and counters (or other small objects) to represent children. Arrange the “chairs” in a circle and help all children in your setting move the small objects around the circle while the music plays. School-age children may enjoy using the index cards and counters to play the version of the game described in the Enrichment tip.

Week 4:
Day 2

Being a Scientist

Science

Large Group

Skill and Goal

Inquiry skills
Children will strengthen their understanding of what it means to make a prediction.

Materials
Needed

Magnets (free-standing)— 1 per child or small group of children

Items used on Day 1:

  • Paper clip
  • Crayon
  • Cotton ball
  • Bolt
  • Small plastic object
  • Plastic key
  • Bobby pin

Key
Concepts

Review:

  • Attract
  • Prediction

BEGIN:

[Display items used on Day 1.]

Yesterday we observed that a magnet attracts some things but not some other things. Remember, when something attracts something else it pulls it closer. Let’s see if we can remember which items our magnet attracted and which items our magnet did not attract.

[Encourage children to help you arrange the items into two groups: items that were attracted to a magnet and items that were not attracted to a magnet.]

EXPLAIN:

Let’s look at the group of items that our magnet attracted.

ASK:
  • What is the same about each of these items? (they are all made of metal)
  • Are any of the items in our other group made of metal? (no)
EXPLAIN:

Each of the items our magnet attracted is made of a kind of metal.

Today we are going to find items in our classroom that a magnet will attract.

We can use what we learned from our Day 1 exploration with a magnet to make a prediction about what a magnet will attract. Remember, a prediction is an idea about what will happen.

ASK:
  • What kinds of items in our classroom might our magnet attract? (things made of metal)
  • Do you think our magnet will attract things that are not made of metal? (no)
  • Why? (on Day 1 only metal items were attracted to a magnet)
EXPLAIN:

We are making a prediction when we say that our magnet may attract items made of metal. Remember, we think about what might happen when we make a prediction.

We can find out if our predictions (our ideas) are correct by putting a magnet close to some things in our classroom. Our prediction is correct if our magnet attracts an item made of metal.

ASK:
  • What are some things in our classroom that you think a magnet will attract?
  • Why do you think the magnet will attract (item named by a child)? (made of metal)
ACT:

[Provide a magnet to each child, if possible, or to a small group of children to use together. Encourage children to move around the room to try out their prediction by placing a magnet next to items they believe the magnet will attract.]

RECAP:

Today we made a prediction. We predicted that a magnet will attract items made of metal. How did we figure out if our prediction was correct? (used the magnet to find items in the classroom that were attracted to it) What things did your magnet attract? Were all of the items that your magnet attracted made of metal?

Scaffolding tips

Scaffolding Tips

Extra support

  • In the discussion of what types of items a magnet may and may not attract, review both groups of items again, noting that the magnet attracted items made of metal and did not attract items not made of metal.

Enrichment

  • If children find a type of metal in the classroom that is not attracted by a magnet, explain that magnets only attract certain kinds of metals.
Science

Center Activity

Fill the sensory table or a tub with sand. Place several magnetic and non-magnetic items in the sand (paper clips, keys, plastic toys, blocks, bobby pins, toy cars, etc.). Invite children to use magnets to attract items in the sand. Invite children to first predict which items the magnets will attract. Encourage children to place items in two groups: things that magnets will attract and things magnets will not attract.

Family Child Care

Family Child Care

Preschool-age and school-age children in your setting will enjoy racing cars with magnets. Draw a simple racetrack on a large piece of tagboard. Cut out several cars drawn on tagboard. Put a large paper clip on each car. Tape the ends of the racetrack to the edges of two tables. This will suspend the racetrack in the air. Invite children to move a large magnet under the racetrack to move the cars. Discuss with children how the cars are attracted to the magnet below the racetrack.