Week 12:
Day 4

Understanding Letters

Language / Literacy

Small Group

Skill and Goal

Letter knowledge
Children will identify, name, and say the sound of letters B, C, O, and A.

Materials
Needed

  • Letter mats (B, C, O, A)—1 per child and staff
  • 1-inch letter manipulatives— cardstock, foam, or magnetic (see Be Prepared)
  • Small cups—1 per child (see Be Prepared)
    *Printables provided

Key
Concepts

Review:

  • Letter

Be Prepared: If possible, please use a small group for today’s activity so there is sufficient time for use of letter manipulatives. Place a set of letter manipulatives that contains letters B, C, O, and A in a small cup for each child. Be sure letters are formed in the same manner in the letter manipulatives and on the mat.

BEGIN:

On Day 2 we matched letters on letter cards to letters on our letter mats. Today we are going to match letters again.

What is a letter? (a special mark used to make words)

EXPLAIN:

Letter Mat[Display letter manipulatives.]

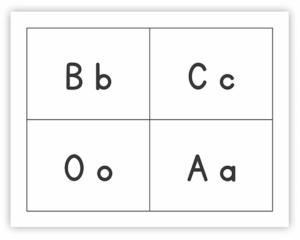
Each of us will use a letter mat and uppercase letters B, C, O, and A to do our activity.

[Pass out a letter mat and cup of letter manipulatives to each child.]

I will say the name of the first letter on our letter mat and then we will say the letter name together. Next I will say the sound the letter makes, and we will say the sound together. Finally, we will find the letter from our cup that matches the letter on our letter mat and place the letter on top of the letter on our letter mat.

Let’s look at the first letter on our letter mat.

ACT:

[Point to the letter B on the letter mat.]

This is the letter B. Let’s together say its name.

The letter B makes the sound /b/, like in the word “book.” Let’s together say the sound of letter B: /b/.

Now we want to find the letter B in our cup.

[Help children find the letter B manipulative, if necessary.]

Now let’s place the letter B on our letter mat.

[Place the letter B manipulative on top of the letter B on the letter mat.]

Let’s try another letter!

[Point to letter C on the letter mat. Say its name and ask children to together repeat its name. Next, say its sound, a word that begins with the same sound, and then ask children to together repeat its sound. Finally, encourage children to find the letter C manipulative and place it on the letter C on the letter mat. Continue until you have said each letter’s name and sound, and matched each letter on the letter mat in order.]

RECAP:

Today we learned more about letters B, C, O, and A. We matched letters from our cup to the same letter on our letter mat. We also said each letter name and sound.

Scaffolding tips

Scaffolding Tips

Extra support

  • If some children need assistance in finding the correct letter manipulative, describe the letter they are looking for. Example: “We are looking for letter B. It has a tall straight line down and two curved lines.”
  • If children need additional assistance in finding the correct letter manipulative, remind them of a child’s name that begins with the same letter. Example: “Remember, Aliya begins with the letter A.”

Enrichment

  • If children are familiar with letter names and sounds, invite them to take turns leading other children in saying each letter name and sound.
  • Invite children to say another word that begins with the letter after the letter manipulative is placed on the mat.

Center Activity

Provide trays filled with sand and *letter cards B, C, O, and A. Invite children to choose a letter card from the pile and then draw the letter chosen with their finger in the sand.
*Printables provided

Family Child Care

Family Child Care

Review letters with *letter picture cards and letter manipulatives. Provide letter picture cards that correspond to each letter on the letter mat. Example: Letter B picture cards include book, bear, bee, and bell. Mix up letter picture cards and invite a child to choose one. Encourage the child to say the name of the letter picture card. Then say, “A ___ begins with the sound /__/.” Invite the child to then find the letter manipulative that makes the same sound. Older children may enjoy making a list of other words that begin with the letters B, C, O, and A.
*Printables provided

Week 12:
Day 4

Counting Things

Mathematics

Small Group

Skill and Goal

Number knowledge
Children will strengthen their understanding of how to form a group of a given quantity.

Materials
Needed

  • Paper—1 per child
  • Marker
  • Unifix® cubes—10 per child
  • *Set of small dot cards 1–10
    *Printables provided

Key
Concepts

New:

  • High Ten

Review:

  • Trace

Optional
Reading

  • From the Garden: A Counting Book About Growing Food by Michael Dahl

BEGIN:

We know how to play the “High Five” game. Today we will play “High Ten”! Let’s all show 10 fingers! If we give someone a “High Ten,” we need to use both hands. Please give your neighbor a “High Ten.”

EXPLAIN:

We need to trace both of our hands on a piece of paper so we can play “High Ten.” Remember, trace means to draw the outline of something. We will count the fingers that we trace.

ACT:

Hands Traced with Blocks on Fingers
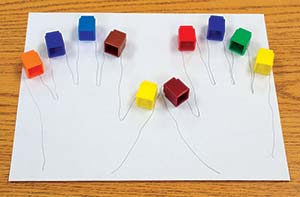
[Give each child a piece of paper. Help children trace each finger as part of two hands on the paper.]

ASK:

Now we have a drawing of both of our hands on our paper.

  • How many fingers are on our traced hands?
  • How do we know?
ACT:

I am going to give each of you 10 cubes. Count the cubes to be sure you have 10.

[Observe children as they count the cubes. Demonstrate how to touch each cube as you count, if appropriate.]

Do you have 10 cubes?

EXPLAIN:

10 Dot Cards
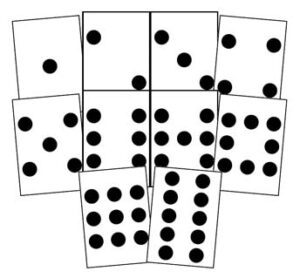
I have cards with different numbers of dots on each. I am going to mix up the cards and lay them on the table so we can’t see the number of dots on each card. You will each get a turn to pick a card.

When you pick up a card, count the number of dots on your card and tell everyone to give you a “High ____.” If your card has six dots, ask everyone to give you a “High Six.”

Then everyone will put a cube on each of the same number of fingers of their traced hand. For a “High Six” each of us would put a cube on six of our traced fingers.

ACT:

[Demonstrate by picking a card. Hold up the card and say, “Give me a High ___.” Show how to put one cube on each traced finger for the number of dots on the chosen card. Example: “If you drew a card with five dots, put a cube on each of five fingers of one traced hand.” Remove the cubes from your traced hand(s) at the end of your demonstration.]

Now let’s try it together, one at a time.

[Invite children to take turns choosing a card and asking the others to give them a “High ___.” Observe as children place a cube on each traced finger. When children have finished, encourage them to remove the cubes from their traced hand(s) and return the card to a different pile on the table.]

RECAP:

Today we played a counting game. We picked a card and counted the number of dots on the card. Then all of us put cubes on the same number of fingers of our traced hands. We know how to give a “High Ten”!

Scaffolding tips

Scaffolding Tips

Extra support

  • In the opening segment, provide a demonstration of “High Ten” if children seem uncertain about what to do.
  • If children are unsure of how many dots are on their card, point to each dot on their card or guide their finger to point to each dot as you count together.
  • The task of putting a cube on a specified number of fingers (based on number of dots on card) may be easier to do by adding one or both of the following steps after the number of dots is announced: (a) put one cube on each of the dots on the chosen card before moving the cubes to traced fingers, or (b) make a group of the specified number of cubes (separate from other cubes) and then put cubes on traced fingers.

Enrichment

  • Place your own traced hand next to a child’s traced hands. Explain that the three hands combined provide more than 10 fingers. Invite the child to give a “High Eleven” with his/her cubes.
Mathematics

Center Activity

Provide materials for the “High Ten” game played during today’s activity. Encourage children to play it together while taking turns.

Family Child Care

Family Child Care

As children play outdoors, practice making groups. Place a group of 2–10 items in front of you (rocks, sticks, leaves). Invite children to make a group of the same number of items. Continue with groups of different numbers of items. School-age children may enjoy helping make the initial groups for younger children to replicate.

Week 12:
Day 4

Exploring Where We Live

Social Studies

Large Group

Skill and Goal

Knowledge of physical environments
Children will strengthen their understanding of differences in home characteristics.

Materials
Needed

  • Children’s shoebox homes made during Week 11

Key
Concepts

Review:

  • Home

Also
Promotes

  • Language / Literacy

Optional
Reading

  • A House is a House for Me by Mary Ann Hoberman

BEGIN:

[There are two options for today’s activity involving shoebox homes made by children in Week 11.

Option One: Make the homes available for a brief play time. Offering small toy people figures might enrich the play. Children could visit each other’s homes or play at someone’s house.

Option Two: Encourage volunteer children to take turns describing the home they created alone or with other children (if larger boxes used). Remind children to be good listeners when someone is talking. Invite children to ask questions about a home described by another child. You may wish to support some children’s participation by describing the home a child(ren) made, encouraging the child(ren) to hold the box as you describe the home, and including some close-ended questions that promote the child(ren)’s verbal involvement.]

Social Studies

Center Activity

Fill the sand table or a tub with sand and some water. Provide items to help children build sandcastles. Explain that sandcastles can be a pretend home.

Family Child Care

Family Child Care

As children play with or describe their shoebox homes, younger children will enjoy playing with a dollhouse and toy people figures. Invite school-age children to draw the floor plan of one room in their house.

Week 12:
Day 4

Staying Healthy and Safe

Physical / Health

Large Group

Skill and Goal

Motor development
Children will understand the importance of muscles in our body.

Materials
Needed

  • From Head to Toe by Eric Carle
  • *1 picture as shown
    *Printables provided

Key
Concepts

New:

  • Muscles
  • Heart

Review:

  • Personal space

Be Prepared: The activity invites children to move parts of their bodies in ways similar to how children in a book move their bodies. In advance of the activity, make decisions about the guidance or modeling you will offer children about various motions, such as bending our knees, arching our back, and wiggling our toes.

BEGIN:

We are practicing different ways to move our bodies. Earlier this week we moved backward and forward, and we did some bending, stretching, jumping, hopping, and spinning.

EXPLAIN:

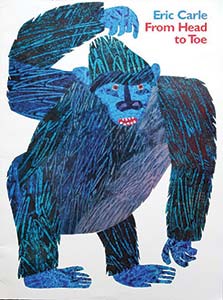
[Display book cover.]

This book shows children moving parts of their bodies, like some animals move their bodies. Let’s read the book and try to do some of the motions shown in the book. We need to spread out and use our personal space so we do not bump into others. Our book is called From Head to Toe. It was written by Eric Carle.

ACT:

[As you read the book, pause to encourage children to move their bodies like children in the book move their bodies. Offer suggestions and demonstrations, if necessary. Invite children to say together, “I can do it,” after they have attempted a motion.]

EXPLAIN:

We used muscles in our body to do all of the motions shown in our book. Muscles are parts of our body that move things. Some muscles are connected to bones in our body. The muscles move our bones. We used muscles connected to bones in our legs to bend and kick our legs and stomp our feet. We used muscles connected to bones in our arms to wave our arms and clap our hands.

[Point to the general location of body parts mentioned below.]

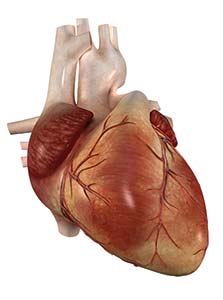
Our bodies have many different kinds of muscles. We use muscles in our mouth to chew food. Our tongue is a muscle. Muscles in our stomach move the things we eat and drink through our body. Our heart is a muscle.

[Display picture of heart.]

This is what our heart looks like. Our heart pumps blood to different parts of our body.

RECAP:

We practiced moving parts of our bodies like children in our book moved parts of their bodies. We moved parts of our body from our head to our toe. Do you think that is why our book is called From Head to Toe?

We used muscles in our body to move parts of our body. What would happen if our muscles were weak or would not work?

Scaffolding tips

Scaffolding Tips

Extra support

  • If children seem confused about the motion described at the beginning of the activity (bend, spin, hop), offer a concrete reminder by briefly demonstrating motions or showing the cube from the Day 3 activity in Creative Expression.

Enrichment

  • Invite children to add another animal movement at the end of the book. Encourage children to use words similar to the text in the book. Example: “I am a (name of animal) and I can (body motion). Can you do it? I can do it.”
Physical / Health

Center Activity

Provide movement books, such as From Head to Toe by Eric Carle, The Little Old Lady Who Was Not Afraid of Anything by Linda Williams, Silly Sally by Audrey Wood, or Oh! by Kevin Henkes. Encourage children to move like the characters in the book. Invite children to describe body movements they are doing.

Family Child Care

Family Child Care

Read From Head to Toe again and videotape children moving to the book. Children or their parents will enjoy watching their movements.