Week 12:
Day 2

Understanding Letters

Language / Literacy

Small Group

Skill and Goal

Letter knowledge
Children will identify, name, and say the sounds of letters B, C, O, and A.

Materials
Needed

  • *Letter mats (B, C, O, A)—1 per child
  • *Letter B card
  • *Letter C card
  • *Letter O card
  • *Letter A card
    *Printables provided

Key
Concepts

Review:

  • Letter

BEGIN:

Letter MatWe are learning about letters. We know that a letter is a special mark used to make words. We know about letters B, C, O, and A.

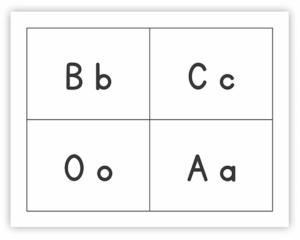
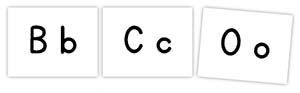
[Display letter cards B, C, O, and A. Point to and name each uppercase and lowercase letter. Example: “Remember, this is an uppercase A and this is a lowercase a.” After you name a letter, invite children to pop up if the letter is in their name.]

EXPLAIN:

Today we will use a letter mat to help us remember the letters we are learning.

[Display letter mat.]

Our letter mat contains the uppercase and lowercase letters we have learned so far. We will each use our own letter mat for this activity.

ACT:

[Pass out a letter mat to each child.]

I am going to mix up the letter cards and then show them to you one at a time. When we see a letter card, we will point to the same letter on our letter mat.

Large Letter A Card
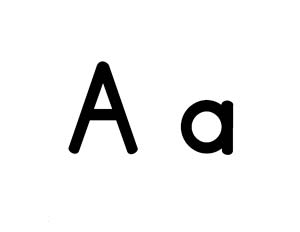
[Hold up letter card A.]

Let’s find this letter on our letter mat.

[Lead children in looking for, pointing to, and saying letter A on their letter mat. Explain how you found the letter A. Example: “This letter has two straight lines down and one straight line across. It looks just like the uppercase letter on our letter card.”]

The letter A says /a/. Let’s together say the letter sound: /a/.

Now let’s find another letter!

B, C and O Letter Cards[Hold up remaining letter cards, one at a time. Invite children to first point to the matching letter on their letter mat. Then ask children to repeat the letter name and the letter sound.]

RECAP:

Today we learned more about letters B, C, O, and A. We used our letter mats to find the letter that matched our letter card. Then we said the name and sound of the letter.

Scaffolding tips

Scaffolding Tips

Extra support

  • When you introduce the letter mat, point to and name each letter in the order letters appear on the mat.
  • If children need assistance finding the matching letter on their letter mat, describe the letter as you point to the letter card. Example: “We are looking for a letter with one straight line and two curved lines. Let’s find a letter with a straight line and two curved lines like this one.”

Enrichment

  • Encourage children to make each uppercase letter in the air with their finger.

Center Activity

Provide *letter cards B, C, O, A, and play dough. Encourage children to use the play dough to trace each letter. Extend the center activity by encouraging children to use the play dough to make the letters in their own name, if possible.
*Printables provided

Family Child Care

Family Child Care

Hang *letter cards B, C, O, and A in random order on a wall. Turn off lights and invite volunteer children to use a flashlight to find a given letter. Example: “Fatou, please use the flashlight to find the letter A on our wall.”
*Printables provided

Week 12:
Day 2

Counting Things

Mathematics

Small Group

Skill and Goal

Number knowledge
Children will understand how to form a group of a given quantity.

Materials
Needed

  • Your traced hand (see Be Prepared)
  • Paper—1 per child
  • Marker
  • Unifix® cubes—5 per child
  • *Set of small dot cards 1–5
    *Printables provided

Key
Concepts

New:

  • Trace

Review:

  • High Five

Be Prepared: Trace the fingers on one of your hands on a piece of paper to show as an example of what children are invited to do in the activity described below.

BEGIN:

Let’s all give someone a “High Five”!

EXPLAIN:

We know that a “High Five” is a way to give someone a compliment. It is called a “High Five” because we put our fingers on one hand high in the air. Our hand has five fingers.

ASK:
  • How could we give someone a “High Four”? (hold up four fingers and put hand up high) Let’s try it!
  • How could we give someone a “High Two”? (hold up two fingers and put hand up high) Let’s try it!
EXPLAIN:

Traced Hand with BlocksToday we will trace the fingers on one of our hands on a piece of paper. Then we will use the fingers we traced on the paper to practice counting. The word trace means we draw the outline of something. We are going to draw the outline of the fingers on one of our hands. We know that a shape has an outline. Our hand also has an outline. Drawing the outline of the fingers on our hand is called tracing.

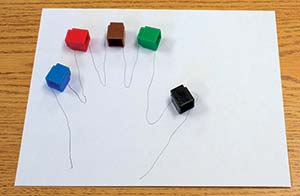
[Display and briefly describe your traced hand.]

ACT:

[Give each child a piece of paper. Help children trace each finger on one hand on the paper.]

ASK:

Now we have a drawing of our hand on our paper.

  • How many fingers are on our traced hand?
  • How do we know?
ACT:

I am going to give each of you five cubes. When I give you the cubes, touch and count each one to be sure you have five.

[Observe children as they count the cubes. Demonstrate how to touch each cube as you count, if appropriate.

Display cards with dots.]

EXPLAIN:

Dot Cards
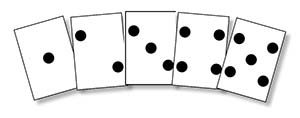
I have cards with different numbers of dots on them. I am going to mix up the cards and lay them on the table so we can’t see the number of dots on each card. You will each get a turn to pick a card.

When you pick up a card, count the number of dots on your card and tell everyone to give you a “High ____.” If your card has two dots, ask everyone to give you a “High Two.”

Then everyone will put a cube on each of the same number of fingers of their traced hand. For a “High Two” each of us would put a cube on two of our traced fingers.

ACT:

[Demonstrate by picking a card. Hold up the card and say, “Give me a High ___.” Show how to put one cube on each traced finger for the number of dots on the chosen card. Example: “If you drew a card with three dots, put a cube on each of three fingers of the traced hand.” Remove the cubes from your traced hand at the end of your demonstration.]

Now let’s try it together, one at a time.

[Invite children to take turns choosing a card and asking the others to give them a “High ___.” Observe as children place a cube on each traced finger. When children have finished, encourage them to remove the cubes from their traced hand and return the card to a different pile on the table.]

RECAP:

Today we played a counting game. We picked a card and counted the number of dots on the card. Then all of us put cubes on the same number of fingers of our traced hand. We know how to give a “High Five,” a “High Four,” a “High Three,” a “High Two,” and a “High One”!

Scaffolding tips

Scaffolding Tips

Extra support

  • In the opening segment, provide a demonstration of “High Five” (introduced in Social-Emotional Week 9, Day 2) if children seem uncertain about what to do.
  • If children are unsure of how many dots are on their card, point to each dot on their card or guide their finger to point to each dot as you count together.
  • The task of putting a cube on a specified number of fingers (based on number of dots on card) may be easier to do by adding one or both of the following steps after the number of dots is announced: (a) put one cube on each of the dots on the chosen card before moving the cubes to traced fingers, or (b) make a group of the specified number of cubes (separate from other cubes) and then put cubes on traced fingers.

Enrichment

  • Invite children to show a “High Ten” with their own hands.
Mathematics

Center Activity

In the housekeeping center, encourage children to “cook” lunch for friends. Invite the friends (lunch guests) to ask for a certain number of items for lunch. Example: “I would like four things for lunch.” Put the play food in a basket so children have opportunities to count out the number of items requested.

Family Child Care

Family Child Care

How Many Bugs in a Box book coverChildren in your setting will enjoy counting groups of insects as they listen to the book How Many Bugs in a Box? by David Carter. Invite school-age children to take turns reading pages in the book as younger children count aloud the groups of insects.

Week 12:
Day 2

Understanding Feelings

Social-Emotional

Large Group

Skill and Goal

Emotion knowledge
Children will understand what it means to feel angry and how to positively manage their anger.

Materials
Needed

  • The Way I Feel by Janan Cain
  • Turtle puppet
  • *Our Feelings poster
  • *2 pictures as shown (See Extra Support tip)
    *Printables provided

Key
Concepts

New:

  • Angry

Review:

  • Solution

Also
Promotes

  • Language / Literacy
  • Self-Regulation

Optional
Reading

  • When I Feel Angry by Cornelia Maude Spelman

BEGIN:

The Way I Feel Book CoverWe are learning about different kinds of emotions. Today we will talk about feeling angry.

[Read the page on feeling angry in The Way I Feel.]

ASK:

Have you ever felt angry?

EXPLAIN:

Everyone can feel angry sometimes. We usually feel bad inside when we feel angry. We may feel upset and want to shout or maybe cry. Another word for angry is mad. Sometimes people say they are mad about something.

Let’s all make an angry face!

ASK:

What are some things that might make us feel angry? (someone taking a toy, not getting something at the store that we’d like, etc.)

EXPLAIN:

We might feel angry if someone takes a toy away or if we don’t get a turn to play a game we want to play.

ACT:

Our Feelings PosterLet’s take a look at our poster and see if we can find the child who is feeling angry.

[Discuss facial features that children associate with feeling angry.]

EXPLAIN:

Angry GirlSometimes we want to do things we shouldn’t do when we feel angry. We might want to hit, throw something, or say mean things that could hurt someone’s feelings. Sometimes it’s hard to calm down and feel better when we are angry.

ASK:

Have you ever had a hard time calming down when you felt angry?

ACT:

Turtle PuppetToday we are going to learn a way that we can deal with anger. I have a friend who is going to tell us about it.

[Display a turtle puppet on your hand.]

This is Tucker. He’s a turtle. Sometimes Tucker gets angry just like us. He’s going to tell us what he does when he feels angry.

[Illustrate the following story in your own words by using the puppet. Be animated in order to engage children’s attention.]

Hi! My name is Tucker. I go to a program just like you! I like to play with friends at my program. Do you have friends you like to play with?

Sometimes I feel angry when I am playing with my friends. One time one of my friends grabbed the toy I was playing with. I was so mad that I hit him. My friend cried when I hit him. I know I shouldn’t have hit my friend but I was just so mad that I didn’t know what else to do! Has that ever happened to you?

I don’t want to hurt my friends when I get angry, so I learned a better way to handle myself when I feel mad. I learned a different way to “think like a turtle.” I want to tell you about it!

Now the first thing I do when I feel angry is STOP what I am doing! I make sure to keep my hands, my body, and my yelling to myself.

Then I tuck my head into my shell and take three big breaths. This helps me to calm down. Watch me do it!

[Demonstrate this with the puppet.]

When I am tucked inside my shell, I can think of a better way to deal with my anger than hitting. I might need to stay tucked into my shell for a while so that I can calm down and think! I need a quiet mind so I can think about solutions to my problem. Remember, a solution is a way to solve a problem. When I have come up with a solution to my problem, then I come out of my shell.

[Put down the puppet so children understand your voice is now your voice, not Tucker the Turtle talking.]

Let’s practice putting our head into our shell. Tucker will show us again how to go into our shell. First we stop what we are doing, then we tuck our head into our shell, and then we think about how to solve our problem. We can’t actually tuck our heads in a shell though, right? When we tuck our heads we can just put our heads down. We can take three deep breaths, and maybe give ourselves a hug as we think about a better way to solve our problem.

When we have come up with a good solution, then we can come out of our shells.

[Invite children to stand and join Tucker in practicing each step several times. Use the cues, “STOP,” “TUCK,” and “THINK” for each step.]

Tomorrow we will learn some solutions to our problems that we can think about when we are tucked inside our shell! There are better ways to handle our anger than hitting someone, yelling at someone, or throwing things!

RECAP:

Today we talked about feeling angry. Let’s all of us show an angry face!

Tucker the Turtle told us how we can think like a turtle and move our head into our shell when we feel angry. What did Tucker show us to do? (stop, tuck, think) Here is Tucker the Turtle. He can show us again!

[Use puppet to demonstrate the three steps as you label each.]

Being inside our shell gives us time to calm our mind and to think about ways to deal with feeling angry.

Scaffolding tips

Scaffolding Tips

Extra support

  • Turtle UntuckedTurtle TuckedIf children are unsure what to do with their bodies as you practice STOP, TUCK, and THINK, demonstrate as you say each action word.
  • If children seem unfamiliar with how a turtle can use its shell for protection, display and describe the two provided pictures of a turtle. Point out how the turtle can pull its head and legs into the shell, and not move parts of its body. This is like Tucker the Turtle saying the first thing he does when he feels angry is to STOP! The turtle’s shell is hard. The shell protects the turtle and gives the turtle a place to be calm.

Enrichment

  • Ask children to describe things they have done to feel better when they are angry.

Social-Emotional

Center Activity

Provide children with small blankets or pieces of cloth. Invite children to pretend to be Tucker the Turtle. Encourage children to use the blankets as their shell as they practice STOP, TUCK, and THINK like Tucker.

Family Child Care

Family Child Care

Set up a small area in your setting for children to visit when they need to calm down. Place pillows, books, and a turtle puppet or stuffed animal in the area. Encourage children to visit the area and practice the “turtle technique” when they are feeling angry or need to calm down.

Week 12:
Day 2

Exploring Living Things

Science

Large Group

Skill and Goal

Knowledge of living things
Children will understand that living things need air.

Materials
Needed

  • *3 pictures as shown
    *Printables provided

Key
Concepts

New:

  • Lungs

Review:

  • Living
  • Breathe

BEGIN:

We are learning about living things. We know that living things need food to grow and to do things.

  • What things did you drink and eat today to keep your body strong and healthy?
  • Did the chairs and tables in our classroom drink and eat anything today? Why not?
EXPLAIN:

Today we will talk about how all living things need air. We know that air comes into and goes out of our body when we breathe.

The air we breathe goes into our lungs. Lungs move the air we breathe into the blood that flows through our body. Lungs are right behind our chest.

[Point to your chest.]

When we breathe in, our lungs fill with air and get bigger. When we breathe out, the air goes out of our lungs. Our lungs get smaller.

ACT:

Let’s all stand as tall as we can. Please put your hand on your chest. Now let’s breathe in and out three times. Our hand will help us feel our lungs move when we breathe. Please take really deep breaths.

Did you feel your lungs move when you breathed in and out?

ASK:

We breathe through our nose and our mouth.

  • What else do we use our nose for? (smelling)
  • What else do we use our mouth for? (tasting, eating, chewing, talking, singing)
EXPLAIN:

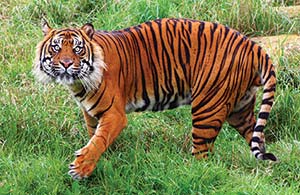
[Display picture of tiger.]

Many animals also have lungs that fill with air when they breathe. Here is a picture of a tiger. A tiger has lungs that fill with air when it breathes in.

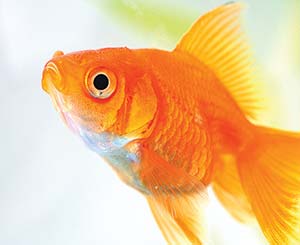
[Display picture of a fish and point to gills when described below.]

Fish breathe underwater through small openings on their sides. Fish do not have lungs.

Tiger
Paul Buxton/flickr/(CC BY-NC-ND 2.0)
Picture of Goldfish
Jonathan Cohen/flickr/(CC BY-NC 2.0)
ASK:

What would happen if we tried to breathe when our head is underwater? (water would get in our lungs)

EXPLAIN:
plant pores
George Shepherd/flickr/(CC BY-NC-SA 2.0)

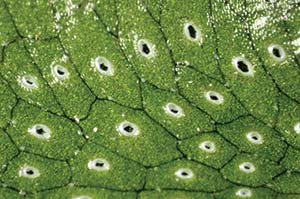
We know that plants are living things and that all living things need air. A plant breathes through tiny holes. The tiny holes are on the leaves and other parts of a plant.

We cannot see the holes in a plant because they are very, very small.

[Display picture of plant pores.]

This is a picture of part of a plant leaf. The person who took this picture used a tool to make part of the leaf look a lot bigger so we can see the small holes the plant uses to breathe.

RECAP:

Today we talked about how all living things need air. When we breathe in, our lungs fill with air and get bigger. When we breathe out, the air goes out of our lungs and our lungs get smaller. Do tigers breathe with lungs like we do? (yes) Do plants breathe with lungs like we do? (no)

Scaffolding tips

Scaffolding Tips

Extra support

  • To heighten children’s awareness of how air enters and leaves their body, invite children to breathe deeply with a hand over their mouth (to focus on nose) and then holding nose (to focus on mouth).
  • Briefly review the senses of smell and taste (Science Week 8) if children seem unfamiliar with this information.

Enrichment

  • Some children may be ready to learn or recall vocabulary related to today’s activity. Gills are the small holes on the side of a fish that a fish uses to breathe. Plant pores are the small holes in a plant that allow air to come into and go out of the plant. A microscope was used to make a part of a plant leaf look much bigger. A microscope is a tool that lets us see small things that our eyes cannot see by themselves.
Science

Center Activity

Set up a quiet area of the classroom with blankets or mats. Encourage children to lie on the floor and observe each other breathing. Children may also wish to place stuffed animals on their stomach and watch the animal move up and down as they breathe.

Family Child Care

Family Child Care

If you have pets in your home, observe them breathing. Discuss what the pet uses to breathe. (lungs, openings on the side of its body, or tiny holes in its body)