Week 8:
Day 5

Understanding Words

Language / Literacy

Large Group

Skill and Goal

Oral language, Letter knowledge
Children will interpret information presented in a book read aloud and increase the number of novel words they understand. Children will also identify and say the sound of the letter C.

Materials
Needed

  • *Letter C card
  • Book of your choice for this week’s repeated reading
  • Words We Understand chart from Days 1 and 3
    *Printables provided

Key
Concepts

New:

  • 2–3 words (see Be Prepared)

Review:

  • All words introduced on Days 1 and 3

Be Prepared: This is the third of three repeated readings of a book with children. Today’s session focuses on children’s interpretation (explanations, reasoning) of information presented in the book. The session also will help children understand more novel words. From the list of novel words you identified prior to your first reading of the book, select 2–3 words to define for children today. See the Language/Literacy section of the ELM User Guide: 3–5 Years for additional information on how to select and define novel words.

BEGIN:

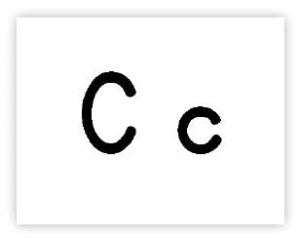
[Display letter C card.]

What is the name of this letter? What sound does the letter C make?

Letter C says /k/, just like in the word “creative.” /k/, /k/, creative. Let’s together say /k/, /k/, creative.

EXPLAIN:

Now let’s spend some time with our book.

[See Week 3, Day 5 of Language/Literacy for a description and examples of how to approach today’s book reading. Key aspects are summarized below:

  • Display book cover. Explain that we have read our book two times this week. Each time we read the book we learn something new. Point to and say title of book. Engage children in describing what they remember about the book:
    • What is our book about?
    • Who were the main characters in our book?
    • What happened first? What happened next?
  • Point to and say the names of author and illustrator. Point to where to begin reading.
  • During the reading, pause on pages that include a word defined in the prior two readings of the book. Ask or remind children what the word means. Also pause during the reading to define the 2–3 words identified for today’s session, using the following approach:
    • Read the sentence with the novel word. Identify the novel word.
    • Repeat the sentence in which the word is used.
    • Define the novel word and connect the definition to the book.
  • After the book reading, write the 2–3 words targeted for today on the chart and engage children in a discussion of each word, using one or more of the following strategies:
    • Ask children to describe a picture related to the word.
    • Define a word without naming it and ask children to identify the word.
    • Encourage children to think about a novel word or phrase in another context.
  • Explain that different types of things happened in our book. Facilitate a discussion of children’s interpretations of events and/or characters in the book, especially events or characters related to one or more words defined this week. See Week 3, Day 5 for examples.]
Week 8:
Day 5

Counting Things

Mathematics

Large Group

Skill and Goal

Number knowledge
Children will practice one-to-one counting and making equal groups.

Materials
Needed

  • 4 chairs
  • *3 animal spots cards from Day 3
  • *1 set of small dot cards 1–10
    *Printables provided

Key
Concepts

Review:

  • Equal

Optional
Reading

  • Over in the Meadow by Olive A. Wadsworth

BEGIN:
  • Where is a group of two things in our classroom?
  • How about a group of three things?
  • Where is a group of four things in our classroom?
EXPLAIN:

This week we are making equal groups. What are equal groups? (groups with the same amount of items)

We pretended to put people in a car to go on a trip. I made a group of people in my pretend car and you made a group to match mine. We made equal groups.

I am going to set up some chairs in a row. Let’s pretend the chairs are seats in a car. Let’s practice making equal groups by filling each chair. We need the same number of people as chairs.

ACT:

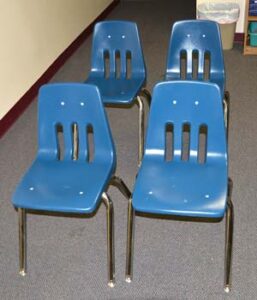
[Set out two rows of two chairs.]

  • This is our pretend car. How many chairs do we have? (four)
  • We want one person to sit in each of the chairs. How many people do we need to fill the seats in our pretend car? (four)

Let’s make a group of four people to sit in our pretend car!

[Count out four children and invite them to sit in the chairs. Explain that we now have equal groups; four seats and four people.]

EXPLAIN:

Yesterday we counted pennies. We used dot cards to know how many pennies to put in a group. When we chose a card, we counted the dots and made an equal group of pennies.

ACT:

Let’s practice counting with the dot cards again. This time instead of using pennies, we will use our fingers. When I hold up a dot card, let’s together count the dots and then we will hold up the same number of fingers.

RECAP:

This week we practiced counting and making equal groups. We know how to count out items that are the same amount as another group. When we do this, our groups are equal. Counting is fun!

Scaffolding tips

Scaffolding Tips

Extra support

  • If children have difficulty counting items, count slowly and invite them to point to the dots on the cards with you as you count out loud together.
  • If children require additional practice with counting, count spots on animal cards. Hold up three cards, one at a time, as children count the number of spots on each animal.

Enrichment

  • Invite children to match the number of dots on a card by assembling the same number of classroom peers in a group.
Mathematics

Center Activity

Provide Unifix® cubes and *small dot cards. Encourage children to choose a dot card and snap together the corresponding number of cubes. As children choose a card, ask them to count the dots out loud.
*Printables provided

Family Child Care

Family Child Care

Encourage all children in your setting to make equal groups outdoors. Make a group of 1–10 with items, such as sticks, rocks, and leaves. Encourage preschool-age children to make equal groups of items. Invite school-age children to work in pairs to make larger equal groups.

Week 8:
Day 5

Appreciating Our Families

Social Studies

Large Group

Skill and Goal

Family diversity
Children will understand how grandparents and grandchildren are the same and different.

Materials
Needed

  • *5 pictures as shown
    *Printables provided

Key
Concepts

Review:

  • Grandparent

Also
Promotes

  • Language / Literacy

Optional
Reading

  • Grandpa Green by Lane Smith

BEGIN:

We are learning about our grandparents or older family members. Remember, a grandparent is the parent of your mom or dad. We’ve talked about what makes them special and what we like to do with them.

EXPLAIN:

In some ways grandparents and older people in our families are the same as us, and in other ways they are different. Today we are going to look at some pictures of grandparents and children and think about how they are the same and different.

ACT:

[Display pictures of a grandparent and child, one at a time. Discuss with children how they are the same and different. Examples: “The grandpa has hair just like the boy. This is the same. The grandpa has a beard and the boy does not have a beard. This is different.”]

ASK:
  • How are you the same as your grandparent or an older person in your family?
  • How are you different?
EXPLAIN:

We can be the same and different as our grandparents in many ways. Let’s learn a fun fingerplay about grandparents. Please watch and listen closely as I show you.

ACT:

[Say the adjacent fingerplay slowly as you do the hand motions.]


These are Grandma’s glasses,
[make circles around eyes with fingers]

This is Grandma’s hat.
[use one hand and pretend to place hat on head]

This is the way she folds her hands, And puts them in her lap.
[fold hands in lap]

These are Grandpa’s glasses,
[make circles around eyes with fingers]

This is Grandpa’s hat.
[use two hands and pretend to place big hat on head]

This is the way he folds his arms, Just like that!
[fold arms across chest]


Now let’s try it together!

[Encourage children to say all or part of the fingerplay together as they do the hand motions.]

RECAP:

Grandparents and older people in our families are unique just like us. Today we talked about how they can be the same and different from us. We also learned a fun fingerplay about a grandma and grandpa. Let’s say and do the fingerplay one more time!

Scaffolding tips

Scaffolding Tips

Extra support

  • If necessary, provide hints for children as they look for things that are the same and different in the pictures. Example: “How is their hair the same? How is it different?”
  • Children will learn more about comparing the different stages of a person’s life cycle in Science during Week 19.

Enrichment

  • Share with children that a great-grandparent is the mother or father of their grandpa or grandma.
Social Studies

Center Activity

Provide *pictures from today’s activity. Encourage children to compare the pictures to each other. Example: “How is the picture of the boy and his grandfather the same or different from the girl and her grandmother?” Provide materials for children to make a special drawing or card for a grandparent or older person in their family.
*Printables provided

Family Child Care

Family Child Care

Children in your setting will enjoy sharing books about grandparents. Examples: What Grandmas Do Best, What Grandpas Do Best by Laura Numeroff and My Grandparents Love Me by Claire Freedman. Encourage school-age children to read aloud books to younger children or talk about pictures in a book. Preschool-age children may enjoy looking at the pictures and identifying things they like to do with their own grandparents or older family members.

Week 8:
Day 5

Moving Our Bodies

Physical / Health

Small Group

Skill and Goal

Motor development
Children will practice balancing their bodies in six different poses.

Materials
Needed

  • *6 pictures as shown
    *Printables provided

Key
Concepts

New:

  • Pose

Review:

  • Balance

Also
Promotes

  • Self-Regulation

Be Prepared: Place cards in a line or in a large circle on the floor of your activity space. Provide sufficient space for individual child movement at each card. Children rotate through six different balancing poses (cards). Designate an area for children to wait for a turn through the six poses (cards) if there are more than six children in your small group. Children also can wait in this area after trying each of the six poses.

BEGIN:

Yesterday we practiced balancing our bodies by using different parts of our body. Who remembers what it means to balance something? (to keep something steady)

EXPLAIN:

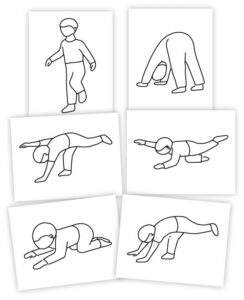
Today we will look at some drawings of how a child is balancing his/her body. We will practice balancing our body the way the child in each drawing is balancing his/her body. The child in the drawing is showing a pose. A pose is a way of holding our body.

[Point to cards on the floor.]

There is one drawing on each of the cards on the floor. We will move from drawing to drawing.

We may not be able to do some of the balance poses. Some poses are harder to do than other poses. But we can try. It is okay if some of the balance poses are too difficult for us to do.

ACT:

Let’s look at each of the drawings before we begin moving from card to card. We did each of these balance poses yesterday.

[Display each card and invite a volunteer child to demonstrate the balance pose shown on the card. Provide supportive guidance to the volunteer and describe how the child is trying to balance his/her body.]

Now we all get to try each balance pose.

[Guide children through the six cards. Explain that it is okay to make changes to a pose that will help them keep balanced. We are learning about balance by practicing. A brief amount of time is needed for each pose. Repeat the cycle if there is time and child interest.]

ASK:

[At the conclusion of the balancing efforts:]

  • Which balance pose was the easiest?
  • What made it easy?
RECAP:

Today we learned more about balancing our bodies by practicing different balance poses. Each pose used different parts of our body. We tried six different balance poses.

Scaffolding tips

Scaffolding Tips

Extra support

  • Encourage children to make changes in balancing poses they find too challenging. Example: In the pose that involves both knees and one elbow, use one hand and one elbow instead of balancing on one elbow only.
  • Some children may prefer to do balancing poses alongside a friend.

Enrichment

  • As a contrast to discussion of the “easiest” balancing pose to do, ask children which pose was the hardest to do and why it was the most challenging pose.
  • Children who offered ideas on body parts to use in balancing the prior day may wish to do a drawing of their suggestion.
Physical / Health

Center Activity

Draw several balancing poses with chalk on the pavement for children to try during outdoor time.

Family Child Care

Family Child Care

Invite a school-age child in your setting to help younger children try out the various balancing poses, using verbal guidance (not manipulation of another child’s body).