Week 11:
Day 5

Understanding Words

Language / Literacy

Large Group

Skill and Goal

Oral language, Letter knowledge
Children will understand basic information, including the meaning of several novel words, presented in a book read aloud. Children will also identify the name of the letter A.

Materials
Needed

  • *Letter A card
  • Book of your choice for this week’s repeated reading
  • Words We Understand chart from Days 1 and 3
    *Printables provided

Key
Concepts

New:

  • 2–3 words (see Be Prepared)

Review:

  • All words introduced on Days 1 and 3

Be Prepared: This is the third of three repeated readings of a book with children. Today’s session focuses on children’s interpretation (explanations, reasoning) of information presented in the book. The session also will help children understand more novel words. From the list of novel words you identified prior to your first reading of the book, select 2–3 words to define for children today. See the Language/Literacy section of the ELM User Guide: 3–5 Years for additional information on how to select and define novel words.

BEGIN:

[Display the letter A card.]

  • What is the name of this letter?
  • Pop up if you have the letter A in your name!
EXPLAIN:

Large Letter A CardNow let’s spend some time with our book.

[See Week 3, Day 5 of Language/Literacy for a description and examples of how to approach today’s book reading. Key aspects are summarized below:

  • Display book cover. Explain that we have read our book two times this week. Each time we read the book we learn something new. Point to and say title of book. Engage children in describing what they remember about the book: 
    • What is our book about?
    • Who were the main characters in our book?
    • What happened first? What happened next?
  • Point to and say the names of author and illustrator. Point to where to begin reading.
  • During the reading, pause on pages that include a word defined in the prior two readings of the book. Ask or remind children what the word means. Also pause during the reading to define the 2–3 words identified for today’s session, using the following approach: 
    • Read the sentence with the novel word. Identify the novel word. 
    • Repeat the sentence in which the word is used. 
    • Define the novel word and connect the definition to the book.
  • After the book reading, write the 2–3 words targeted for today on the chart and engage children in a discussion of each word, using one or more of the following strategies: 
    • Ask children to describe a picture related to the word. 
    • Define a word without naming it and ask children to identify the word. 
    • Encourage children to think about a novel word or phrase in another context. 
  • Explain that different types of things happened in our book. Facilitate a discussion of children’s interpretations of events and/or characters in the book, especially events or characters related to one or more words defined this week. See Week 3, Day 5 for examples.]
Week 11:
Day 5

Counting Things

Mathematics

Large Group

Skill and Goal

Number knowledge
Children will deepen their understanding of how to find the number of items in a group.

Materials
Needed

  • *Large star cards used on Day 1
  • 10 blocks (preferably the same size)
    *Printables provided

Key
Concepts

Review:

  • Last number counted

Optional
Reading

  • Anno’s Counting Book by Mitsumasa Anno

BEGIN:

This week we are practicing how to find out how many items are in a group.

EXPLAIN:

We practiced counting the number of stars on different cards. We know that when we count a group of items, the last number we count tells how many we have. Let’s practice with the cards again. I will hold up a card and you say how many stars are on the card.

ACT:

[Practice with several star cards. Display card and point to each star as children count in unison. Do not say the numbers unless children need this assistance. Once children have counted the stars correctly, ask, “How many stars are on the card? How do you know?” Emphasize that the last number counted is the number of stars on the card.]

EXPLAIN:

We also played a game with circles on the floor. I said a number and you stepped on/in the circles while counting to the number I said. You stopped counting when you got to the number I said.

ACT:

Girl Counting BlocksLet’s stomp five times.

How did we know when to stop stomping? (when we got to five)

Let’s clap our hands three times.

How did we know when to stop clapping? (when we got to three)

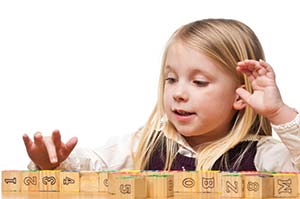
[Display a group of 2–10 blocks.]

Let’s count this group of blocks to see how many there are.

[Point to each block as children count out loud. Do not say the numbers unless children need this assistance.]

Now I’m going to change the number of blocks.

[Display a different group of 2–10 blocks.]

Let’s count this group of blocks to see how many are in the group.

I have a group of 10 blocks.

  • Who would like to count out a group of three from the 10 blocks?
    [Invite a volunteer child to count three blocks from the group of 10 blocks.]
  • Who would like to count out a group of seven from the 10 blocks?
    [Invite a different volunteer child to count seven blocks from the group of 10 blocks.]
RECAP:

Ten Butterflies SongThis week we learned more about counting. We know that when we count a group of items, the last number we count tells how many we have.

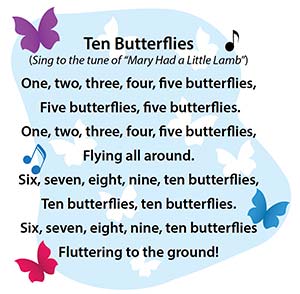
[If time permits, invite children to join you in singing the “Ten Butterflies” song.]

Scaffolding tips

Scaffolding Tips

Extra support

  • If children have trouble stomping (or clapping) the number of times you say, count out loud and stomp (or clap) slowly. Invite children to repeat your example by counting out loud each stomp (or clap).

Enrichment

  • Invite several children to take turns in determining and saying how many of the 10 blocks to count out.
Mathematics

Center Activity

Provide children with a board game to play. Many board games for preschool children help them learn how to count items. Examples include Hi Ho Cherry-O®, Chutes and Ladders®, Sorry®, and Count Your Chickens®.

Family Child Care

Family Child Care

Provide children with a snack that can be counted, such as crackers or cereal. Invite them to make groups of 1–10 with their snack.

Week 11:
Day 5

Exploring Where We Live

Social Studies

Large/Small Group

Skill and Goal

Knowledge of physical environments
Children will strengthen their understanding that homes are unique.

Materials
Needed

  • Children’s shoebox homes
  • Art materials provided on Day 4
  • *3 pictures as shown
    *Printables provided

Key
Concepts

Review:

  • Home

Looking Ahead: Take or secure photographs of the neighborhood in which your center is located or a neighborhood that will be familiar to many children. The pictures can be used as an alternative to ELM-provided pictures in Week 13, Day 5 to help children understand the concept of neighborhood. These pictures can also be used in Week 14 as an aid in creating small box versions of neighborhood places.

BEGIN:

Yesterday each of us began making a shoebox home. Who would like to tell us something you’ve included in your shoebox home? (door, windows, roof, etc.)

EXPLAIN:

Today we will continue working on our shoebox homes. If you finished your home yesterday, today you can add some more items to the outside of your home. You may want to add a tree or bushes or maybe a porch to the front of your home.

ASK:

What are some things you could add to your shoebox home? (curtains in the windows, a chimney, grass in the front, mailbox, flowers, etc.)

ACT:

[Provide materials available on Day 4. This activity will continue to require adult help.]

Shoe Box Houses

RECAP:

Our homes will be put on display in our classroom and next week we will share our shoebox homes!

[Put children’s names on their homes and display them in the room. The homes will be used again in Week 12.]

Scaffolding tips

Scaffolding Tips

Extra support

  • Help children with cutting and gluing as necessary.
  • Give suggestions for details children may like to add to their shoebox home, if necessary.

Enrichment

  • Encourage children who have finished to offer help to those still working. Children who have finished their homes can offer ideas and guidance on possible additions.
Social Studies

Center Activity

Provide materials used to make shoebox homes so children may continue to work on their home.

Family Child Care

Family Child Care

Take children outside to look at the details of your own home. What things do they see when they look at the front of your home? (flowerboxes, sidewalk, window in the front door, etc.) This may help children think of additional details to add to their shoebox home. Older children may enjoy making a home from clay or play dough as younger children make “homes” with sheets or blankets.

Week 11:
Day 5

Staying Healthy and Safe

Physical / Health

Large Group

Skill and Goal

Good health practices
Children will understand how to keep teeth healthy by brushing.

Materials
Needed

  • Toothbrush
  • *4 pictures as shown
    *Printables provided

Key
Concepts

New:

  • Cavity

Review:

  • Germs

Also
Promotes

  • Language / Literacy

Be Prepared: You may wish to arrange for a dental professional to visit your classroom today, or in the near future, to demonstrate how to brush teeth. In addition to receiving expert information, children will benefit from positive contact with a community helper devoted to good dental care. The activity plan offered below provides an overview of key parts of toothbrushing. It assumes adults (center staff or family members) place toothpaste on a young child’s brush.

BEGIN:

A child's teeth
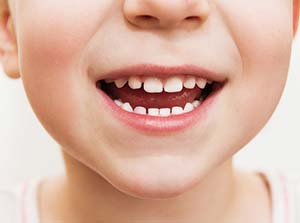
Do you like to eat? What important part of our body helps us eat? (teeth)

[Display picture of child’s teeth.]

Yesterday we talked about how our teeth help us eat. Today we will learn how to keep our teeth healthy.

EXPLAIN:

Our teeth get dirty when we eat. Some types of food stick to our teeth when we bite and chew. Sometimes parts of the food get stuck between our teeth. We cannot see all of the dirt that gets on our teeth. There are germs in our mouth and on our teeth. Remember, germs are very small things that can make our bodies sick. We cannot see germs.

ASK:
  • What do we do when part of our body or all of our body gets dirty? (wash it, take a shower or bath)
  • What do we do to keep our teeth clean? (brush them)
EXPLAIN:

Brushing Teeth Steps
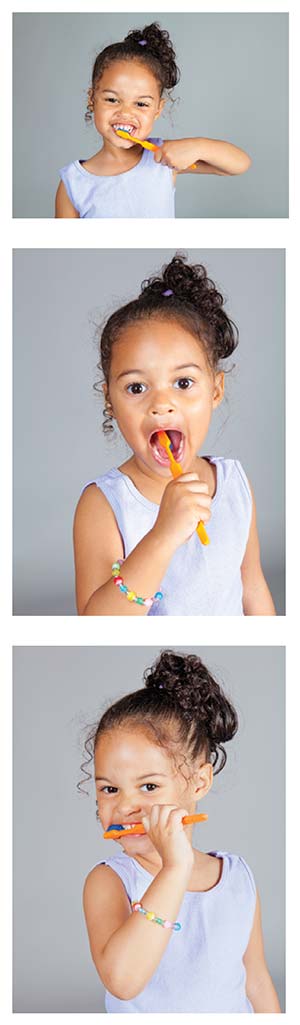
[Display toothbrush.]

We use a toothbrush to keep our teeth clean. There is a certain way to use a toothbrush.

[Display the pertinent picture when you describe each of the steps.]

  • We hold our toothbrush sideways against our teeth.
  • Then we move the brush gently on our teeth. We move the brush back and forth on our teeth. We do not push hard on our brush. We push gently on the brush. We brush all of the teeth in our mouth, not just the teeth in front.
  • We brush the tops of our teeth.
  • We brush the back side of our teeth.
  • We spit out the toothpaste.
ASK:

When do we brush our teeth in our classroom?

EXPLAIN:

We should brush our teeth after we eat. Brushing keeps our teeth healthy. If we do not get the dirt off our teeth, the germs on our teeth may make a little hole in a tooth. This little hole is called a cavity. A cavity will make a tooth weaker. Sometimes a cavity makes our tooth hurt. We go to a dentist to get a cavity filled.

Brushing our teeth is a routine. We know that a routine is the order in which we do things. We do things in a certain order when we sneeze. We do things in a certain order when we wash our hands. Today we talked about a routine we can use for brushing our teeth.

RECAP:

[Display the four pictures of toothbrushing in the wrong order.]

Are these pictures of how we brush our teeth in the correct order? (no) What pictures need to be moved so the routine of brushing our teeth is in the right order?

Scaffolding tips

Scaffolding Tips

Extra support

  • Invite children to use their finger to point to the areas of their mouth shown in the pictures of toothbrushing.
  • Encourage children to smile. Talk about the teeth they see in someone’s mouth. Explain there are teeth in the back of the mouth we do not see when someone smiles. These teeth need to be cleaned also.

Enrichment

  • Encourage children to think about foods that might make their teeth extra “dirty” or get caught between their teeth. Ask questions, such as: “Can you think of a fruit with seeds? If you eat the seeds, could any of these get caught in your teeth?”
  • Point to and describe the gums of a mouth. Explain that gums are the pink part of our mouth that holds our teeth. The gums cover a bone in our mouth. We might hurt the gums of our mouth if we push too hard on our toothbrush when we brush. We protect the gums of our teeth by brushing gently.
  • Explain there is a special thread we use to clean between our teeth. It is called dental floss. Dental floss helps us get rid of germs on our teeth we cannot see. Dental floss also helps us remove parts of food that get stuck between our teeth. Most young children need an adult to help them use dental floss on their teeth.
Physical / Health

Center Activity

Provide the *three pictures of steps in brushing our teeth. Encourage children to put the pictures in the correct order. Also, if you describe dental floss as part of the activity (see Enrichment tip), provide a few large Duplo® blocks, play dough, and some yarn for children to create a flossing simulation. Place small amounts of play dough in spaces between the “studs” of the Duplo®. Encourage children to use the yarn to remove the pieces of “food.”
*Printables provided

Family Child Care

Family Child Care

Consider taking children to a dental clinic for a visit that includes a talk with a dental hygienist about care of teeth.