Week 33:
Day 4

Understanding Letters

Language / Literacy

Large Group

Skill and Goal

Phonological awareness, Letter knowledge
Children will strengthen their knowledge of how to identify the final sound of familiar words. Children also will understand the name and sound of the letter K.

Materials
Needed

  • *Picture cards (see Be Prepared)
  • Chart paper
  • *Letter K card
  • *4 letter K picture cards
  • Chart from Day 2
  • Children’s letter journals
  • Writing tools—1 per child
  • List of children’s first names for display to children
    *Printables provided

Key
Concepts

Review:

  • Slanted

Be Prepared: Today’s activity again uses the groups of three picture cards organized for Day 2. Also organize additional groups of three picture cards listed below:

bib-web-hen

bus-walrus-hug

leaf-wolf-fig

fog-dig-bed

stick-lake-hip

ball-owl-sheep

fan-moon-jug

lamp-wasp-kiss

drum-worm-calf


BEGIN:

We are learning about the sound at the end of a word. Today we are going to play again the game we learned on Day 2.

EXPLAIN:

Remember, I will show you three picture cards. Two of the cards end with the same sound. One of the cards ends with a different sound. We are going to figure out which two cards end with the same sound. Let‘s try one first.

ACT:

[Display picture cards for bib, web, and hen. Point to each picture as you say its name while clearly enunciating the final sound of each word.]

I have pictures of a bib, web, and hen. Bib and web end with the /b/ sound. Hen ends with the /n/ sound.

I am going to write the words “bib” and “web” on this chart. The words “bib” and “web” end with the same sound.

Let’s say the words “bib” and “web” together.

[Encourage children to emphasize the final sounds as they say “bib” and “web.”]

Now let’s say together the word “hen.”

[Encourage children to emphasize the final sound as they say the word “hen.”]

I want to write the letter that makes the /b/ sound above the words “bib” and “web.” Which letter should I write above the words “bib” and “web”? (b)

[Continue playing the game with groups of three cards (see Be Prepared), using the same procedure. Give priority to cards used on Day 2 if it appears children would benefit from a review rather than practice with different words. Continue as time allows.]

EXPLAIN:

Large Letter K CardLet’s learn more about the letter K.

[Display letter K card.

If a child(ren) whose name begins with the letter K was identified on Day 2, invite the child(ren) to again pop up. Say the first name of the child(ren). Emphasize the sound of the letter K when you say the name.]

Maybe someone in our group has the letter k somewhere else in their name. The letter might be in the middle or at the end of their name. It will be a lowercase k, and it will look like this.

[Point to the lowercase k on the letter card.]

Pop up if you have the letter k somewhere else in your name (not at beginning).

[If a child has the letter k somewhere else in his/her name, point to the name and to the letter k on the list of children’s first names, so all children can see the name and the letter k.]

ASK:

What is our word that begins and ends with the letter K? (kick)

ACT:

The letter K says /k/, just like at the beginning and end of the word “kick.” /k/, /k/, kick. Let’s say that together: /k/, /k/, kick.

I have two pictures of things that begin with the letter K. I wonder what they could be?

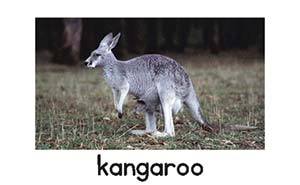
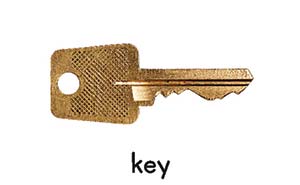
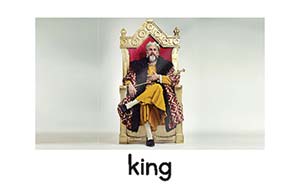
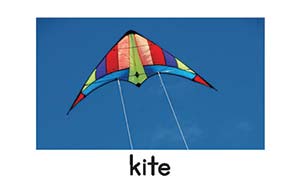
[Hold up one picture card and invite children to identify the animal/item in each picture. After children have an opportunity to guess or say the pictured animal/item, point to and say the word written at the bottom of the card. Example: “This word says key. The letter k is at the beginning of the word.” Repeat this procedure with a second picture card.]

Let’s think of some other words that begin with the letter K and write them on our chart. Remember, the letter K says /k/, /k/.

[Help children by suggesting other words that begin with k. Examples: kind, keep, kelp, and kid.

Invite one or more volunteer children to find the letter k in words on the chart. Children may point to the letter at the top of the chart and then find it in one of the words below.

Demonstrate and describe how to mark the uppercase letter K on your chart paper.]

We use three lines to make an uppercase K. We begin by making a straight line down and then a slanted line up and a slanted line down. Remember, a slanted line is a line that leans a bit to the side.

[Give each child his/her letter journal.]

Now we are going to write the letter K in our letter journal. Please write the uppercase (big) letter K in your journal. Write as much of the letter as you can.

RECAP:

Today we looked again at pictures of items and figured out which two of the three pictures had the same ending sound. We wrote the names of the items that had the same ending sound on our chart.

We also learned that the letter K says /k/, just like at the beginning and end of the word “kick.” We made the uppercase (big) letter K in our letter journal. Let’s say together the sound the letter K makes (/k/).

Scaffolding tips

Scaffolding Tips

Extra support

  • If children need additional support in determining the final sound of a word, clap as you say the final sound. Example: bib; clap when you say the /b/ sound.
  • Enunciate clearly the final sound of each word in each group of three pictures.
  • If children need additional support in determining which two pictures have the same final sound, exaggerate the pronunciation of the sounds. Examples: /n-n-n/ and /p/-/p/-/p/.
  • If a child indicates his/her name begins with a K, and another child’s name begins with a C, but they both have the same beginning sound (example: Kristen, Camille), explain that C and K sometimes make the same sound.
  • Use one or both of the remaining picture cards to help children understand and practice the sound of the target letter.

Enrichment

  • Invite children to find items in the classroom with the same final sound as a group of two picture cards.
  • Some children may be interested in your demonstrating and describing how to make a lowercase k. Example: “A lowercase k is made with a straight line down and then a short slanted line up and a short slanted line down.”

Center Activity

Provide *picture cards used in today’s activity. Encourage children to determine which cards in each group of three have the same final sound.
*Printables provided

Family Child Care

Family Child Care

Try another sorting activity. Provide children with a basket of familiar items. Invite children to sort the items by final sound. School-age children may enjoy drawing the items while making a book of final sounds.

Week 33:
Day 4

Counting Things

Mathematics

Small Group

Skill and Goal

Number knowledge
Children will add and subtract using buttons.

Materials
Needed

  • Large buttons—10 per child (see Be Prepared)
  • Die
  • *T-shirt template—1 per child
  • *Number list (see Extra Support tip)
    *Printables provided

Key
Concepts

Review:

  • Subtract
  • Add

Optional
Reading

  • Ten Flashing Fireflies by Philemon Sturges

Be Prepared: If there is some reasonable risk of children putting a large button in their mouth, use a safe alternative to large buttons for today’s activity. Examples: cubes, small blocks, counters.

BEGIN:

Pete the Cat and His Four Groovy Buttons book coverYesterday we read a book called Pete the Cat and His Four Groovy Buttons. At the beginning of the book, Pete had four buttons on his shirt. How many buttons did he have on his shirt at the end of the book? (none, zero)

[Encourage children to discuss what they remember about the book.]

EXPLAIN:

Today we will play a game with buttons. During our game we will subtract and add. We will use buttons on a pretend T-shirt, just like Pete the Cat!

ACT:

[Give each child a T-shirt template and 10 buttons. Invite children to place the buttons on their T-shirt.]

EXPLAIN:

Pete the Cat Game
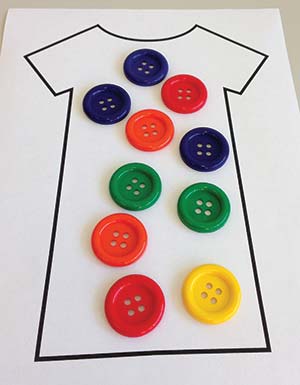
We will subtract buttons from our shirts as we play the game. We know that when we subtract, we take away things from a group. After we have subtracted all of our buttons, we will add buttons to our shirts. Remember, when we add items to a group, the group gets larger.

We will each take turns rolling a die. We will count the dots on the die, and then everyone will subtract the same number of buttons from their shirt. We will subtract buttons from our shirts each time someone rolls the die. We will begin adding our buttons to our shirt after all of our buttons have been subtracted from our shirt. I will go first to show you how to play.

ACT:

[Demonstrate how to roll the die and subtract the corresponding number of buttons. Invite children to help you count the number of buttons remaining on your T-shirt. Continue rolling the die until all 10 buttons have been subtracted. Example: A five may be rolled first, and then five buttons subtracted. A three may be rolled second, and then three buttons subtracted. If a two is not rolled the third time, end the round by removing the remaining buttons. This will ensure that each round goes quickly so that all children will have a chance to roll the die during the activity.

After all buttons have been subtracted from the T-shirt, demonstrate how to play the game as an addition game by adding buttons each time a number is rolled. Use counting on. Example: “I have five buttons on my T-shirt, I rolled a four on the die. Let’s use counting on to find out how many buttons I have all together: 5…6, 7, 8, 9. I now have nine buttons all together.”

If the exact number is not rolled to ensure 10 buttons on the T-shirt, the round is over.]

Now let’s play the game together.

[Play the game with children as you begin with subtraction. Invite children to take turns rolling the die. Count together the number of buttons remaining each time buttons are subtracted. After all buttons are subtracted from the T-shirt, play the addition version of the game. Play the game as long as time permits.]

RECAP:

Today we subtracted and added buttons to a pretend T-shirt. We rolled a die to see how many buttons to subtract or add.

Scaffolding tips

Scaffolding Tips

Extra support

  • As buttons are subtracted from the T-shirt, point to the number of buttons remaining on both the shirt and a number list. Explain that each time buttons are subtracted, the group of buttons gets smaller. On the number list, point to the number representing how many buttons were on the shirt before the die was rolled. Then point to the number that represents how many remained after buttons were taken away.

Enrichment

  • As children play the addition version of the game, ask how many more buttons they need in order to have 10 buttons all together.
Mathematics

Center Activity

Provide *T-shirt templates and a die. Encourage children to subtract and then add as they continue playing the game.
*Printables provided

Family Child Care

Family Child Care

Invite school-age child to read Pete the Cat and His Four Groovy Buttons as younger children subtract buttons from their *T-shirt template.
*Printables provided

Week 33:
Day 4

Understanding Time

Social Studies

Large Group

Skill and Goal

Concepts of time
Children will understand what it was like to move and build a house long ago.

Materials
Needed

  • My First Little House Books: A Little Prairie House by Laura Ingalls Wilder

Key
Concepts

New:

  • Prairie
  • Mustang
  • Haul

Also
Promotes

  • Language / Literacy

BEGIN:

This week we will learn about what it was like to live long ago. Long ago happened before our parents and grandparents were born.

  • Have you ever talked to someone about what it was like to live long ago?
  • What was it like?
EXPLAIN:

Today we will read a book about a little girl named Laura who moved with her family and built a house long ago.

[Display book cover.]

The title of our book is A Little Prairie House. The book was written by Laura Ingalls Wilder and illustrated by Renée Graef.

ASK:

What do you see on the cover of the book that might tell us something about the house built by Laura’s family? (it was built from logs, it is on a prairie)

EXPLAIN:

Our book uses some words we may not know. One word is prairie. A prairie is a large area of land with lots of grass and very few trees. Another word is mustang. A mustang is a kind of horse. The third word in our book is hauling. When we haul, we move something that is heavy.

Let’s read about Laura and her family.

ACT:

[Read the book as you point out and again define the novel words mentioned above. After reading the book, use questions, such as the following, to help children understand how families traveled and houses were built long ago:]

  • The family traveled in a wagon. The wagon was pulled by horses. Why do you think the family traveled this way? (there were no cars, the wagon could carry the things they needed to move, going by horse and wagon was faster than walking)
  • Laura’s dad was called Pa. What did Pa haul in the wagon? (logs)
  • What was built with the logs? (the house)
  • What do you think it would be like to live on a prairie with no neighbor living near you?
RECAP:

Today we learned what it was like for a family to move to a new place and build a house long ago. We talked about the words prairie, mustang, and hauling. Families traveled differently than we do now and built their houses differently than we do now.

Scaffolding tips

Scaffolding Tips

Extra support

  • Refer to the book pictures when asking questions about the book, if necessary.
  • If it seems the book is too long or complex, omit the last few pages about Mr. Edwards.

Enrichment

  • Invite children to talk about how homes are built now. Encourage children to compare homes built now to the house built by Laura’s family.
Social Studies

Center Activity

Invite children to use Lincoln Logs® to build a log house similar to the prairie house Laura’s family built. Provide the book used during the activity as a reference.

Family Child Care

Family Child Care

In the book, Laura and her sister Mary helped their mother wash the dishes used for breakfast. Provide a small dishpan with soapy water and washcloths. Invite children to help wash dishes from a meal.

Week 33:
Day 4

Staying Healthy and Safe

Physical / Health

Large Group

Skill and Goal

Good health practices
Children will understand how to protect their skin from the sun.

Materials
Needed

  • *1 picture as shown or examples of:
  • Floppy hat
  • Long-sleeved shirt
  • Umbrella
  • Sunglasses
  • Sunscreen lotion
    *Printables provided

Key
Concepts

New:

  • Sunburn
  • Sunscreen

Review:

  • Protect
  • Shade

Optional
Reading

  • A Day at the Beach by Anne and Harlow Rockwell

BEGIN:

Who likes to play outside? What do you like to play outside? Do you like to play outside more when it is raining, or when it is sunny?

EXPLAIN:

Most of us like to play outside when it is sunny. Playing when the sun is out makes us feel warm.

ASK:

What might happen to us if we played outside in the sun for a long time? (get tired, sunburn)

[If children do not mention sunburn, ask an additional question about what might happen to our skin.]

EXPLAIN:

Our skin turns red and is hot when it gets burned from the sun. This is called a sunburn.

ASK:
  • Has anyone ever had a sunburn?
  • How did it feel?
EXPLAIN:

Sunburns can hurt our skin. We can protect our skin from getting sunburned. Remember, when we protect something, we keep it from being harmed or hurt.

ASK:

What can we do to protect our skin from the sun?

EXPLAIN:

A picture of a child protected from the sun
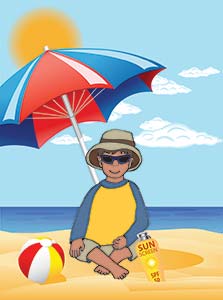
[Expand on responses to the above question to engage children in a discussion of the following ways to protect ourselves from the sun. Display and describe the appropriate item or provided picture as you talk about each.]

  • Hat—Hats can keep the sun off of our face and also protect the top of our heads. The top of our heads can get sunburned too.
  • Long sleeves—Long sleeves help cover our arms.
  • Shade—Shade provides shelter from the sun or light. The sun does not shine in the shade because something, like a tree or building, is blocking the sun. The sun usually does not reach our skin if we play in shade.
  • Sunglasses—Sunglasses provide shade for our eyes. It can be hard to see when sun is shining in our eyes. Sunglasses protect our eyes, and the skin around our eyes, from the sun.
  • Sunscreen—Sunscreen is a special lotion that we put on our skin to prevent sunburn. Sunscreen stops some of the sun from getting to our skin.
RECAP:

Today we learned that playing outside in the sun without protection can hurt our skin. We can get sunburned. We learned ways we can protect our skin from the sun. Who can remember a way we protect our skin from the sun? We are learning how to keep ourselves safe.

Scaffolding tips

Scaffolding Tips

Extra support

  • If it is sunny outside, take children outside briefly and encourage children to look closely at parts of their bodies where the sun is shining. Invite children to touch those body parts. Then go inside the classroom to compare what it is like when we get out of the sun.

Enrichment

  • Encourage children to share times when they have used sunscreen, or have worn hats, to protect themselves from the sun.
  • If there is a sun awning on your playground, talk with children about how it works. Engage children in a discussion of their experiences with the sun awning.
Physical / Health

Center Activity

In the housekeeping center, add sun protection items, such as big floppy hats (if allowed), sunglasses, and empty containers/tubes of sunscreen lotion.

Family Child Care

Family Child Care

When children are outside playing in the sun, encourage them to talk about how the sun feels on their skin. Encourage children to move to a shaded spot and then ask again how their skin feels. Their skin should feel cooler. Share the idea that the sun provides warmth and heats things up. It does the same on skin.