Week 28:
Day 4

Understanding Letters

Language / Literacy

Large Group

Skill and Goal

Phonological awareness, Letter knowledge
Children will blend the initial sound (onset) with the remaining sounds (rime) in one-syllable words. Children also will understand the name and sound of the letter L.

Materials
Needed

  • Chart paper
  • Marker
  • *Letter L card *
  • 4 letter L picture cards
  • Chart from Day 2
  • Children’s letter journals
  • Writing tools—1 per child
  • List of children’s first names for display to children
    *Printables provided

Key
Concepts

Review:

  • Beginning sound

BEGIN:

We are learning how to put together two different sounds to make a word. We know a beginning sound is the first sound we hear in a word. On Day 2 we put different beginning sounds with the rest of a word. We added the /f/ sound to the beginning of “ox.” What word does this make?We are learning how to put together two different sounds to make a word. We know a beginning sound is the first sound we hear in a word. On Day 2 we put different beginning sounds with the rest of a word. We added the /f/ sound to the beginning of “ox.” What word does this make?

EXPLAIN:

Today we will practice putting together two different sounds to make a word. Let’s start with this sound: an. Let’s say together the sound “an.”

ACT:

[Use the following steps to help children practice blending the sounds listed below, beginning with “an”:

  • say again the rime (an) and invite children to repeat the sound
  • say the initial sound (onset) of one of the words listed below the rime, and invite children to repeat the initial sound only (example: /p/)
  • blend the initial sound and the remaining sounds, emphasizing its two parts (example: p-an)
  • invite children to repeat the word (pan)

After helping children practice blending sounds with the “an” rime, introduce the “ill” rime and use the above steps to help children blend different beginning sounds (onsets) as shown below.]


Rimes an ill
p-an d-ill
c-an f-ill
f-an h-ill
m-an m-ill
D-an p-ill
r-an b-ill
t-an s-ill
t-ill
w-ill


EXPLAIN:

Large Letter L CardLet’s learn more about the letter L.

[Display letter L card.

If a child(ren) whose name begins with the letter L was identified on Day 2, invite the child(ren) to again pop up. Say the first name of the child(ren). Emphasize the sound of the letter L when you say the name.]

Maybe someone in our group has the letter l somewhere else in their name. The letter might be in the middle or at the end of their name. It will be a lowercase l, and it will look like this.

[Point to the lowercase l on the letter card.]

Pop up if you have the letter l somewhere else in your name (not at beginning).

[If a child has the letter l somewhere else in his/her name, point to the name and to the letter l on the list of children’s first names so all children can see the name and the letter l.]

ASK:

What is our word that begins with the letter L? (letters)

ACT:

The letter L says /l/, just like at the beginning of the word “letters.” /l/, /l/, letters. Let’s say that together: /l/, /l/, letters.

I have two pictures of things that begin with the letter L. I wonder what they could be?

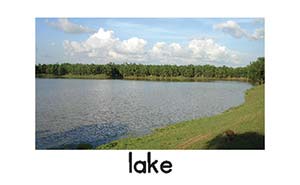
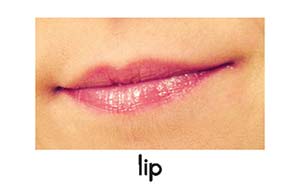
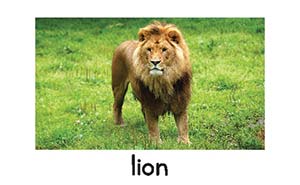
[Hold up one picture card and invite children to identify the animal/item in each picture. After children have an opportunity to guess or say the pictured animal/item, point to and say the word written at the bottom of the card. Example: “This word says lion. The letter l is at the beginning of the word.” Repeat this procedure with a second picture card.]

Let’s think of some other words that begin with the letter L and write them on our chart. Remember, the letter L says /l/, /l/.

[Help children by suggesting other words that begin with l. Examples: library, like, living, life.

Invite one or more volunteer children to find the letter l in words on the chart. Children may point to the letter at the top of the chart and then find it in one of the words below.

Demonstrate and describe how to mark the uppercase letter L on your chart paper.]

We use two lines to make an uppercase L. We begin by making a straight line down and then a line across.

[Give each child his/her letter journal.]

Now we are going to write the letter L in our letter journal. Please write the uppercase (big) letter L in your journal. Write as much of the letter as you can.

RECAP:

Today we practiced putting together two different sounds to make a word.

We also learned that the letter L says /l/, just like at the beginning of the word “letters.” We made the uppercase (big) letter L in our letter journal. Let’s say together the sound the letter L makes (/l/).

Scaffolding tips

Scaffolding Tips

Extra support

  • In the blending practice segment, repeat the steps for blending the sounds of a specific word before introducing a different set of sounds (new word). Example: Help children blend “p-an” several times before inviting them to blend “c-an.”
  • When you introduce “ill” as a rime, children may indicate this means feeling sick. Enthusiastically recognize they are “right,” and explain that we are adding different beginning sounds to the “ill” sound.
  • Use one or both of the remaining picture cards to help children understand and practice the sound of the target letter.

Enrichment

  • Say the following words, one at a time. Invite children to say the beginning sound and then the rest of the sounds in the word: horse (h-orse), fox (f-ox), rat (r-at), bat (b-at), bull (b-ull), cow (c-ow).
  • Some children may be interested in your demonstrating and describing how to make a lowercase l. Example: “A lowercase l is made with one straight line down.”

Center Activity

Provide letter magnets that show letters children have learned. Also provide strips of paper in the sensory table. Cover the letter magnets with the paper strips. Encourage children to name each letter as it is found.

Family Child Care

Family Child Care

Invite children to draw pictures of items as you add a beginning sound to a rime. Example: “Let’s think about the sound ‘at.’ I’m going to add the beginning sound /k/ to ‘at.’ What should we draw? (cat) If we add a beginning sound /h/ to ‘at’, what should we draw now?” (hat)

Week 28:
Day 4

Counting Things

Mathematics

Small Group

Skill and Goal

Number knowledge
Children will individually split a group of counters representing two different colors into two parts, and count the counters in the two parts without paying attention to their color.

Materials
Needed

  • Counters of 2 different colors—4 of each color per child
  • *Part-part-whole mats—1 per child
  • Various small counting items (see Enrichment tip)
    *Printables provided

Key
Concepts

Review:

  • Split

Also
Promotes

  • Self-Regulation

BEGIN:

We are learning how to split a whole group of items into two parts. We know that when we split something, we divide it into smaller parts.

EXPLAIN:

Today each of us will practice splitting a whole group of circles (counters). We will use our part-part-whole mats.

[Give each child a part-part-whole mat and five counters: three counters of one color and two counters of a second color.]

We each have five circles of two different colors. Let’s put our circles in the whole-section of our mat and then count our circles to make sure each of us has five.

ACT:

[Lead children in counting the number of counters as they point to each one. Say again the number five when you finish counting.]

Now we are going to split our whole group of five circles. Let’s put the three (color) circles in the first part-section of our mat and the two (color) circles in the second part-section of our mat.

[Provide sufficient time for children to move their counters. Help as appropriate.]

Let’s count all of our circles in our two part-sections to be sure we still have five circles. We will not pay attention to the different colors when we count our circles.

[Count on as you lead children in counting the two parts together.]

Now we are going to try it again a different way. Let’s again put our five circles in the whole-section of our mat.

[Provide sufficient time for children to move their counters. Help as appropriate.]

This time we will split our circles by putting one circle in the first part-section of our mat and four circles in the second part-section of our mat. We will not pay attention to the colors of our circles.

[Observe children as they split the counters into two parts. Help if appropriate. Then count on as you lead children in counting the two parts. Say again the number five when you finish counting.

Provide each child with eight counters: four of one color and four of a second color.]

Now we each have eight circles. Let’s put our circles in the whole-section of our mat and then count our circles to make sure we have eight.

[Lead children in counting their counters as they point to each one. Say again the number eight when you finish counting.]

Let’s split our group of circles. Please put three (color) circles in the first part-section of your mat. Then please put the rest of your circles in the second part-section of your mat.

[Provide sufficient time for children to move their counters. Help as appropriate.]

We had eight circles in the whole-section of our mat. Now the circles are in the part-sections of our mat. Three of our (color) circles are in one part-section of our mat.

  • How many circles do we have in the second part-section of our mat? (five)
  • How many circles do we have all together on our mat? (eight)

Let’s count our circles to make sure each of us has eight.

[Count on as you lead children in counting counters in the two part-sections together. Say again the number eight when you finish counting.]

RECAP:

Today we practiced splitting groups of circles.

  • Did we pay attention to the color of our circles when we counted? (no)
  • Was it hard to not pay attention to the color of your circles when you counted them?
Scaffolding tips

Scaffolding Tips

Extra support

  • Model counting on as you point to each counter in each part. Encourage children to follow your lead in pointing to each counter while counting together.
  • Omit the segment using eight counters if you anticipate it will be too challenging. Repeat the first segment where two counters are put in one part-section and three counters are put in the second part-section. This time, mix the colors in each part so each part-section has both colors of counters.
  • In the segment with eight counters, some children may be tempted to put counters of the same color in each of the two part-sections. Remind children we are putting five counters in the second part-section of the mat. One of the five counters in this part-section will be a different color than the other four counters.

Enrichment

  • Repeat segments of the activity with a whole group of 6–7 different small counting items. Examples: small blocks, cubes, counting bears. Encourage children to focus on the number of items rather than the characteristics of the items.
Mathematics

Center Activity

Supply *part-part-whole mats and various manipulatives. Invite children to practice splitting a whole group of different manipulatives and then counting both groups together by counting on.
*Printables provided

Family Child Care

Family Child Care

School-age children may enjoy helping younger children split different items during the day and then practice counting both groups together by counting on. Examples: different play food items, people and/or animal figures.

Week 28:
Day 4

Exploring Where We Live

Social Studies

Large Group

Skill and Goal

Knowledge of social environments
Children will understand the meaning and characteristics of the American flag.

Materials
Needed

  • American flag
  • F Is for Flag by Wendy Cheyette Lewison
  • Paper—1 per child
  • Crayons (red, white, blue)
    *Printables provided

Key
Concepts

New:

  • American flag
  • Respect

Optional
Reading

The American Flag by Tyler Monroe

BEGIN:

[Begin the activity by holding an American flag.]

What is this?

This is the American flag. Each country in the world has a flag. I am holding the flag for our country. Our country is the United States of America.

ASK:
  • What do you see on our flag? (colors, stripes, stars, etc.)
  • Where can we see the American flag in our community? (child development centers, schools, homes, post offices, etc.)
EXPLAIN:

F is for Flag book coverThe American flag stands for our country’s land and people. When we see this flag, we know that it stands for the United States.

[Hang the flag in a place that is visible to all children.]

We are going to read a book called F Is for Flag. Our book was written by Wendy Cheyette Lewison. This book will tell us some important things about the American flag.

ACT:

[As you read the book, pause to describe pictures. Point to the flag on each page. ]

EXPLAIN:

Many people salute the flag. One way we can show respect for our country is to salute our flag. Showing respect for something means we think highly of it.

ACT:

[Demonstrate how to salute the flag by placing your right hand over your heart. Invite children to salute the flag.]

EXPLAIN:

Children with American FlagPeople also can show respect for their country by flying their country’s flag. People fly a flag by putting it at the top of a pole or hanging it on a building, like a house, so the flag can move in the air.

[Point to 2–3 flags in the book being flown.

If there is insufficient time for the following activity, consider using it as an additional center activity.]

We are going to draw a picture of the American flag.

ASK:

What colors should we use to draw our flag?

ACT:

[Give each child a piece of paper. Be sure each child has red, white, and blue crayons. Children should not be expected to include the precise number of stars and stripes. Children also should not be expected to make an accurate rendition of the American flag. It is okay if younger children wish to make scribbles with the red, white, and blue crayons.]

RECAP:

Today we learned about the American flag. We read a book that described each part of the flag. We even made our own flags!

[Display children’s flags in the classroom.]

Scaffolding tips

Scaffolding Tips

Extra support

  • After reading the book, it may be helpful to point to and describe key characteristics of the flag displayed in your classroom (stars, stripes, colors).

Enrichment

  • Explain that we do not let the flag touch the floor or ground when it is carried. A flag touching the floor or ground shows disrespect.
Social Studies

Center Activity

Provide red, white, and blue play dough and play dough tools. Encourage children to make an American flag. It is okay if children mix colors when creating with play dough.

Family Child Care

Family Child Care

Show children the proper way to fold a flag. Supervise as they practice.

Week 28:
Day 4

Moving Our Bodies

Physical / Health

Small Group

Skill and Goal

Motor development
Children will roll their bodies.

Materials
Needed

  • Floor mats (see Be Prepared)

Key
Concepts

New:

  • Roll

Review:

  • Front
  • Back

Also
Promotes

  • Self-Regulation

Be Prepared: Today’s activity requires a larger safe space for children to learn or practice rolling. A grassy outside play area is preferred. If indoor space is used, floor mats are important for providing a cushion.

BEGIN:

We are learning different ways to move our bodies. Usually we use our legs, feet, and sometimes our hands to move our body from one place to another place. Today we are going to move our bodies without using our legs or our feet!

ASK:

How can we move from one place to another place without using our legs or our feet?

EXPLAIN:

Today we will move our bodies by rolling. We roll something by turning it over and over. We can roll our bodies by lying flat on the ground or floor, putting our legs close together and our arms to our sides, and turning our body over and over.

ASK:
  • Have you ever rolled your body on the ground or floor?
  • What was it like?
ACT:

[Invite a volunteer child to demonstrate as you describe rolling.]

Let’s talk about each part of rolling our bodies.

  • We lie on the floor or ground.
  • We put our legs together.
  • We put our arms at our sides or against our chest.
  • We turn our bodies over.
ASK:
  • What do our eyes see when we lie on our backs? (the sky, the ceiling)
  • What do our eyes see when we lie on the front of our body? (the floor, the ground)
ACT:

Let’s all practice rolling from the back of our body to the front of our body. First we lie on our back, and then we roll so we are lying on the front of our body. We will roll one time.

[Invite children to lie on the floor or ground. Provide sufficient spacing between children. Remind children to put their legs together and their arms at their sides or against their chest. Request that children roll one time, from their back to their front.]

Now let’s roll from our front to our back. Try to move your body in the same direction you used for moving from your back to your front.

[Remind children to keep their legs together and their arms by their sides or on their chest. (See Extra Support tips)]

Let’s roll twice. We will lie on our backs, roll to our front, and roll one more time to our backs. Let’s move our bodies in the same direction each time we roll.

[If time and space permit, invite children to do several consecutive body rolls. Take turns if space is limited.]

RECAP:

Today we moved our bodies from one place to another place without using our feet or our legs. We rolled our bodies on the ground. There are lots of ways we can move our bodies.

Scaffolding tips

Scaffolding Tips

Extra support

  • Emphasize the location of front and back by pointing to the front and back of your body (and the volunteer child’s front and back) when describing how to roll.
  • Positively acknowledge different ways in which children participate in the activity. Some children may not want to roll. When moving from front to back, some children may prefer to reverse their direction rather than continue moving in the direction they used for rolling from their back to their front.
  • If a child asks for help in rolling, gently put your hand on his/her hip to initiate a rolling movement.
  • Ask the volunteer child to demonstrate what it means to do two rolls in the same direction.
  • Place yourself near children who may need assistance in stopping a set of multiple rolls.
  • Point out that rolling is part of “Stop, Drop, Roll” if this fire safety procedure is practiced at your center.

Enrichment

  • Invite children to place their arms straight above their heads and roll with their arms out. Ask children about the difference between rolling with their arms at their sides and their arms above their head.
Physical / Health

Center Activity

If adult supervision is available, invite children to practice rolling. Children can take turns rolling in a smaller, well-identified space. If a small hill and adult supervision are available in your outdoor space, children may benefit from comparing their rolling experiences on flat ground to a slight incline in the ground.

Family Child Care

Family Child Care

If younger children in your setting want to join preschool-age children in rolling, encourage the younger children to use their hands and arms to help their bodies roll from front to back.