Week 18:
Day 4

Understanding Letters

Language / Literacy

Small Group

Skill and Goal

Phonological awareness, Letter knowledge
Children will identify the initial sound of familiar words. Children will also understand the name and sound of the letter H.

Materials
Needed

  • *Picture cards for letters S, P, E (see Be Prepared)
  • Sticky tack
  • Chart paper
  • *Letter H card
  • *4 letter H picture cards
  • Chart from Day 2
  • Children’s letter journals
  • Writing tools—1 per child
  • List of children’s first names for display to children
    *Printables provided

Key
Concepts

Review:

  • Beginning sound

Be Prepared: Secure letter picture cards for letters S, P, and E (used in weeks 14, 15, 17, respectively). You will need three picture cards per letter.

BEGIN:

We are learning more about the sounds of letters at the beginning of words. Remember, we call the first sound we hear the beginning sound of a word. Today we are going to play our letter sound game again.

EXPLAIN:

We will use pictures that begin with sounds we did not use on Day 2. After we’ve figured out the letter the pictures begin with, I will place the cards on a chart and write the letter above them.

Beginning Sound P Song

ACT:

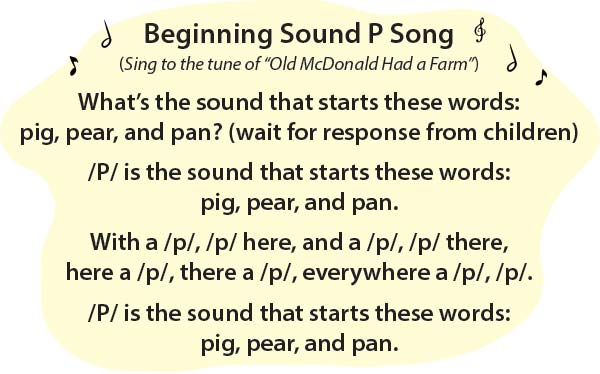
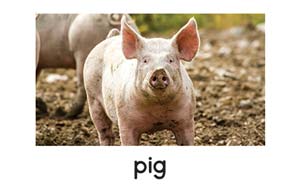
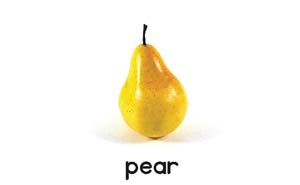
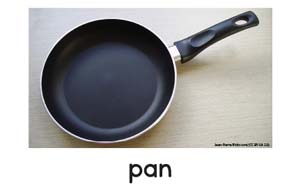
[Display three picture cards for the letter P (pig, pear, pan).

Place pictures together on a chart with sticky tack. Point to each picture as you say its name.]

Pig, pear, and pan all begin with the /p/ sound.

What letter makes the /p/ sound? (P)

[Write the letter P above the P picture cards.]

Let’s try some more!

[Continue playing the game using picture cards for letters S and E.]

James Langiewicz/flickr/Used With Permission
Joe King/flickr/(CC BY 2.0)
JPC24M/flickr/(CC BY-SA 2.0)
EXPLAIN:

Large Letter H CardLet’s learn more about the letter H.

[Display letter H card.

If a child(ren) whose name begins with the letter H was identified on Day 2, invite the child(ren) to again pop up. Say the first name of the child(ren). Emphasize the sound of the letter H when you say the name.]

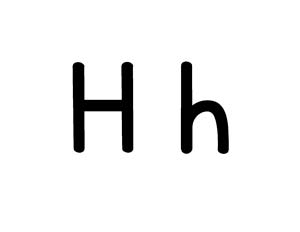
Maybe someone in our group has the letter h somewhere else in their name. The letter might be in the middle or at the end of their name. It will be a lowercase h and it will look like this.

[Point to the lowercase h on the letter card.]

Pop up if you have the letter h somewhere else in your name (not at beginning).

[If a child has the letter h somewhere else in his/her name, point to the name and to the letter h on the list of children’s first names so all children can see the name and the letter h.]

ASK:

What is our word that begins with the letter H? (home)

ACT:

The letter H says /h/, just like at the beginning of the word “home.” /h/, /h/, home. Let’s say that together: /h/, /h/, home.

I have two pictures of things that begin with the letter H. I wonder what they could be?

Hat, hair, hand, and hook card

[Hold up one picture card and invite children to identify the animal/item in each picture. After children have an opportunity to guess or say the pictured animal/item, point to and say the word written at the bottom of the card. Example: “This word says hat. The letter h is at the beginning of the word.” Repeat this procedure with a second picture card.]

Let’s think of some other words that begin with the letter H and write them on our chart. Remember, the letter H says /h/, /h/.

[Help children by suggesting other words that begin with h. Examples: hear, happy, hungry, horse.

Invite one or more volunteer children to find the letter h in words on the chart. Children may point to the letter at the top of the chart and then find it in one of the words below.

Demonstrate and describe how to mark the uppercase letter H on your chart paper.]

We use three lines to make an uppercase H. Two lines are straight and tall and the third line is short and goes across.

[Give each child his/her letter journal.]

Now we are going to write the letter H in our letter journal. Please write the uppercase (big) letter H in your journal. Write as much of the letter as you can.

RECAP:

Today we looked at pictures of items that began with the same sound. Then we sang our song we learned last week to help us guess the letter the pictures began with.

We also learned that the letter H says /h/, just like at the beginning of the word “home.” We made the uppercase (big) letter H in our letter journal. Let’s say together the sound the letter H makes (/h/).

Scaffolding tips

Scaffolding Tips

Extra support

  • Enunciate clearly each word when singing the song.
  • Hold up each letter card to remind children of what the letter looks like after they’ve figured out the letter that makes the sound.
  • Use one or both of the remaining picture cards to help children understand and practice the sound of the target letter.

Enrichment

  • Ask children to name other animals/items that begin with the same sound as a group of picture cards.
  • Some children may be interested in your demonstrating and describing how to make a lowercase h. Example: “A lowercase h is made with a straight line down and then a curved line.”

Center Activity

Provide *picture cards used in today’s activity. Encourage children to sort the cards by initial sound.
*Printables provided

Family Child Care

Family Child Care

Invite children to look around your home for items that begin with the same letter sound. Younger children may work better in pairs, while older children may wish to look for items independently.

Week 18:
Day 4

Counting Things

Mathematics

Small Group

Skill and Goal

Number knowledge
Children will understand how to determine if a number is more or less than a close or neighboring number.

Materials
Needed

  • *Number chart
  • *2 sets of small numeral cards 1–5 per pair of children
    *Printables provided

Key
Concepts

Review:

  • Equal

BEGIN:

[Arrange children in a circle.]

Let’s count the number of children in our small group as we go around the circle.

I will begin with one. The person next to me will say the next number, which is number two. Then the person next to him/her will say the next number.

[Continue as each child says the next number in the counting sequence. Stop after each child has said a number.]

We have __ children in our small group!

ACT:

Number Chart
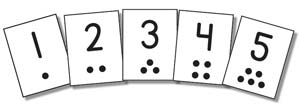
Today we will play a number game with cards. Each of us will have a partner and one set of cards with numbers 1–5. Each pair will mix up the two sets of cards to make one set. Then each pair will put the cards on the table between us so we cannot see the sides of the cards with numbers. Each person in the pair will choose one card.

After each of us chooses a card, we need to determine which card has a number that is more and which card has a number that is less. We can use our number chart to help us, if we need it. If each of us chooses a number that is the same, the numbers are equal. Remember, equal means they are the same.

[Pair children and place the set of cards between them. Observe as they play the game and determine who has the numeral that is more, and who has the numeral that is less. As children finish, mix up the cards. Play as long as time permits.]

RECAP:

Today we played a game with numbers. We worked with a partner to find the number that was more and the number that was less. Did any of you choose numbers that were equal?

Scaffolding tips

Scaffolding Tips

Extra support

  • Help children remember the number they are to say in counting the number of children in the small group. Examples: “What number comes next?” or “What number comes after number ___?”
  • As children play the game, help by pointing out the numerals on the number chart, if necessary.
  • Help children to better understand the use of the number chart by again demonstrating how the numbers increase in amount as you go down the line.
  • If children have difficulty determining which card is more or less, invite them to count the dots on each card and compare each amount. Example: “Lori, you have five dots on your card and Brennan has three dots on his card. Which card has more dots?”

Enrichment

  • Invite pairs of children to play with numeral cards 1–10, if they are able.
  • Give each child a numeral card 1–10 and invite them to line up in order of their number (use two lines if needed).
Mathematics

Center Activity

Supply *small numeral cards and a *number chart. Invite children to continue the game played during today’s activity.
*Printables provided

Family Child Care

Family Child Care

Encourage school-age children to practice counting by twos, fives, and tens as they pass a ball to one another.

Week 18:
Day 4

Exploring Where We Live

Social Studies

Large Group

Skill and Goal

Knowledge of social and physical environments
Children will understand some characteristics of small communities.

Materials
Needed

  • *2 pictures as shown
  • Paper
  • Drawing tools
    *Printables provided

Key
Concepts

New:

  • Town
  • Farm
  • Silo
  • Barn

Review:

  • City
  • Skyscraper

Also
Promotes

  • Creative Expression

BEGIN:

We are learning about communities. Last week we talked about large communities. They are called cities. We know that really big cities have tall buildings called skyscrapers.

EXPLAIN:
Small town
Jasperdo/flickr.com/(CC BY-NC-ND 2.0)

Today we are going to learn about small communities. A small community is often called a town. Fewer people live in a town than in a city. Towns have fewer houses and other buildings than cities.

[Display picture of buildings in a small community.]

Let’s look at this picture of stores and other buildings in a town.

ASK:

Are the buildings in this town as tall as skyscrapers in a city?

EXPLAIN:

A small community might also include farms. A farm is a piece of land used for growing plants or raising animals. Some people in a small community might live on a farm. People who live on a farm need a lot of land to grow their plants or raise animals.

[Display picture of a farm.]

ASK:

Have you ever been to a farm? What was it like?

EXPLAIN:
Farm
Tom Gill/flickr.com/(CC BY-NC-ND 2.0)

[Point to each item in the picture of a farm as you discuss it.]

Some farms have special types of buildings. The tall buildings that are curved at the top are called silos. A silo is used to store grain to feed animals. The red buildings in the picture are called barns. A barn is used for storing hay, grain, and farm equipment. Some farm animals live in a barn.

We are going to draw a picture of a building that can be found on a farm.

We can draw a barn or a silo or some other type of building you think would be on a farm. You can draw more than one building in your picture if you want to.

ACT:

[As children draw, encourage them to include details that might be related to a farm building, such as doors or windows.]

RECAP:

Today we learned that a small community is usually called a town. Some people who live in a small community may live on a farm. We drew a picture of a farm building(s).

[If time permits, lead children in singing “Old MacDonald Had a Farm.” You may wish to hang pictures of farm buildings on the wall.]

Scaffolding tips

Scaffolding Tips

Extra support

  • In the description of a town, remind children that the word fewer means a smaller number of something (Language/Literacy Week 6, Day 2).
  • In the description of a silo, explain that grain is a type of food. Animals eat grain. Farmers put food for animals in a silo just like we put food in a box or container. A silo is big because there may be many animals on a farm.
  • Provide the picture of a farm as a guide for children’s drawing efforts, if necessary.

Enrichment

  • Invite children to name some animals that could be found on a farm.
Social Studies

Center Activity

Provide play dough for children to create a farm. Add toy people to the center so children can extend their pretend play with their farm.

Family Child Care

Family Child Care

Older children in your setting may enjoy reading books about a farm to younger children. Examples: Big Red Barn by Margaret Wise Brown, Mrs. Wishy-Washy’s Farm by Joy Cowley. If possible, take children on a trip to a farm. Discuss buildings and other items found on a farm.

Week 18:
Day 4

Moving Our Bodies

Physical / Health

Small Group

Skill and Goal

Motor development
Children will use underarm movements to throw a beanbag away from their body.

Materials
Needed

  • Large ball
  • Beanbags or yarn balls—2 or 3 per child
  • Rope or string (see Be Prepared)

Key
Concepts

New:

  • Underarm throw
  • Opposite

Also
Promotes

  • Self-Regulation

Be Prepared: Identify an open wall for children to use in throwing beanbags or yarn balls. Use a rope, string, or some other means to designate a line for children to stand behind to practice throwing. Initially provide 5–7 feet between the line and the wall. Adjust the distance based on children’s throwing skills (see Enrichment tip). Encourage children to use the hand of their choice for throwing; development of a dominant hand may be in process. You may wish to arrange for another adult to help you with the activity.

BEGIN:

[Throw a large ball up into the air and catch it.]

We are learning and practicing how to throw a ball. Where have we thrown our balls? (up into the air)

EXPLAIN:

Today we will learn how to throw an item away from our bodies. We use our hands and arms differently when we throw something away from us compared to when we throw something up into the air.

We will practice throwing a beanbag (or yarn ball) away from ourselves. We will use an underarm throw. An underarm throw involves moving one of our arms backward and then forward.

Each of us will decide what arm we want to use for throwing. We will call this our throwing arm.

ACT:

Let’s all raise the arm and hand we want to throw with today.

Now let’s all use our other hand to point to our leg that is opposite our throwing arm. Opposite means someone or something that is across from us or on a different side. Our throwing arm is on one side of our body. Right now we want to point to our leg that is on the opposite (other) side of our body.

[Encourage children to hold up their throwing arm/hand while using their other hand to point to their opposite leg. See Extra support tip for other ways to promote understanding of opposite.]

Please watch and listen carefully to how we do an underarm throw.

[Describe the following movements as you or another adult demonstrate each. Position the demonstrator so children can watch the side (vs. back or front) of the demonstrator.

  • “Stand tall with both feet flat on the floor and toes and shoulders facing the direction you will throw; look forward and keep your eyes on where you want to throw your item.”
  • “Hold the beanbag in the palm of your throwing hand, with your throwing arm at the side of your body.”
  • “Move your throwing arm backward and put your opposite leg in front of you. Remember, our opposite leg is on the other side of our body.”
  • “Move your throwing arm forward and let go of the beanbag when it reaches the level of your chest.”

After your description and demonstration, lead children through the movements with one beanbag per child or invite children to pretend they are holding/throwing a beanbag. Encourage children to hold the following key movements so you can again describe each: “(1) feet flat on floor with shoulders, head, and eyes straight ahead; throwing hand holds beanbag at the side of your body; (2) throwing arm moves backward while opposite leg moves forward; (3) throwing arm moves forward and hand lets go of the beanbag when it reaches level of your chest.”]

EXPLAIN:

We will throw our beanbags at the wall. Remember, you decide which arm you want to use for throwing. Each of us will get two (or three) tries. After everyone has taken their turns throwing, we will safely pick up our beanbags and then practice some more underarm throwing.

ACT:

[Provide enough space between children so their movements do not interfere with each other. Provide verbal guidance as appropriate. Provide clear direction for all children to stop throwing beanbags before all children retrieve their beanbags. Provide clear direction for when to resume practice throwing. Continue as time and child interest permit. See Enrichment tip.]

RECAP:

Today we practiced underarm throwing. How does our throwing arm move when we use underarm throwing? (backward and then forward) What do we do with our opposite leg when we move our throwing arm backward? (opposite leg moves forward at same time throwing arm moves backward) Tomorrow we will talk about how our legs help us do underarm throwing.

Scaffolding tips

Scaffolding Tips

Extra support

  • Emphasize the difference between throwing an item away (in front of us) and throwing an item up (above us). Our arm does not go above or near our head when we do an underarm throw.
  • Help children identify their throwing arm by explaining that the hand we use to throw something is usually the hand we use for drawing, holding a utensil, brushing our teeth, etc.
  • To help children remember the concept of opposite, you may wish to tie a bright ribbon on the shoe of a child’s opposite leg (and on their throwing arm, if appropriate). Some other options for promoting the concept of opposite include: invite two volunteer children to stand across from each other as you explain the children are standing opposite of each other; ask children to point to the side of the room that is opposite of where you are currently standing; invite children to briefly describe what is on the opposite (other) side of the street from where they live.
  • Some children may be familiar with the phrase “tick tock” when doing an underarm throw. “Tick” is the backward movement, “tock” is the forward movement of the throwing arm.
  • It may be helpful to explain that our body is moving like scissors when we move our throwing arm backward and at the same time move our opposite leg forward.

Enrichment

  • When children move their throwing arm forward, it is fine if children also move forward the leg that corresponds to their throwing arm. It also is fine if children move forward their opposite arm when moving their throwing arm backward.
  • Increase the distance children throw the beanbag by moving the rope (or other marker) further from the wall. Explain that we move our throwing arm faster to get the beanbag to go further away from us.
  • Invite children to use their other arm to throw the ball and describe how it feels compared to use of their preferred throwing arm.
Physical / Health

Center Activity

Provide indoor or outdoor space for children to continue to practicing underarm throwing with items used in the main activity. Remind children of specific movements involved in underarm throwing, as appropriate.

Family Child Care

Family Child Care

Consider forming pairs of children in which a school-age child catches the beanbag (or yarn ball) thrown by a preschool-age child. Another option is for pairs of children to practice underarm throwing on an outdoor flat surface, with children using chalk to draw a circle or place an X where a beanbag lands. Different colors of chalk could be used to designate children.