Week 3:
Day 3

Understanding Words

Language / Literacy

Large Group

Skill and Goal

Oral language
Children will strengthen their comprehension of information presented in a book read aloud and increase the number of novel words they understand.

Materials
Needed

  • Book of your choice for this week’s repeated reading
  • Words We Understand chart from Day 1
  • Marker

Key
Concepts

New:

  • 4–6 words (see Be Prepared)

Review:

  • Understand
  • 1–2 words in book introduced on Day 1

Be Prepared: This is the second of three repeated readings of a book with children. Today’s session focuses on children’s comprehension of information presented in the book, especially connections to children’s experiences. The session also helps children understand more novel words. From the list of novel words you identified prior to your first reading of the book, select 4–6 words to define for children today. Remember, it is okay to select words that a few children may know if you anticipate most children do not understand the word’s meaning. See the Language/Literacy section of the ELM User Guide: 3–5 Years for additional information on how to select and define novel words.

BEGIN:

[Display book cover.]

This is the book we read on Day 1. The title of our book is _____. Let’s talk about what we remember about the book.

ASK:
  • What is our book about?
  • Who were the main characters in our book?
  • What happened first? What happened next?
EXPLAIN:

We are going to read our book again. We will stop to talk about what some of the words mean. We know that reading a book is a good way to learn new words. On Day 1 we talked about some words in our book. The words are written on our chart. Remember, the title of our chart is Words We Understand.

[Point to chart and to each of the novel words defined on Day 1.]

ASK:

Does anyone remember one of the words we talked about on Day 1?

[Remind children of the meaning of each novel word defined on Day 1.]

ACT:

[Point to where to begin to read on the first text page of the book.]

We are going to begin reading here. This is the first word inside our book.

[Pause during reading to briefly define words identified for today’s session using the following approach:

  • Read the sentence with the novel word. Identify the novel word.
  • Repeat the sentence in which the word is used.
  • Then define the novel word and connect the definition to the book. Example: “We just heard the word ‘wiggly.’ Did everyone hear it? ‘Earthworms are fat and wiggly like my fingers and toes.’ The worms in our book wiggle. Wiggle means to move around a lot.”
  • If there is a text pattern in the book, invite children to fill in phrases or repeat a refrain or chant as part of the book reading.]
EXPLAIN:

Words We Understand Chart
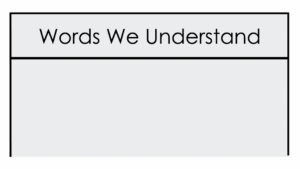
We learned ___ new words while reading our book today. I am going to write each word on our chart. Let’s talk about what we understand or know about each word. When we understand something, we know what it means or how it works.

[Promote understanding of each word by engaging children in one or more of the following ways as you write novel words on the chart:

  • Ask children to describe a picture related to the word. Example: “We are learning what it means to be curious. Hedgie was curious. What is Hedgie doing in this picture that shows he is curious?” (poking nose inside stocking to look inside)
  • Define a word without naming it and ask children to identify the word. Example: “What is the name of a worker who takes care of plants in a garden?” (gardener)
  • Encourage children to think about a novel word in another context. Example: “In our book, the mitten stretched. It got a lot bigger. What other things might stretch? Can you stretch? Show us!”]
ASK:

Our book was about _____. Are there other ways you know about _____?

[Facilitate discussion of book connections to children’s experiences. Examples:

  • “Our book today was about worms. Have you ever seen or touched a worm? What was it like?”
  • “Our book today talked about roots. Roots are part of a plant that grow into the dirt. Have you ever seen the root of a plant? What was it like?”
  • “Today we talked about the word squeeze. We squeeze something by pressing things very close together. What kinds of things have you squeezed? How about a tube of toothpaste? How about a package or bottle of ketchup? Show us how you squeeze something.”]
RECAP:

We learned more words today when we read _____. Let’s look at our chart to remember the words we are learning to understand.

[Say and point to each word on the chart. Invite children to say one thing they know about the word.]

Scaffolding tips

Scaffolding Tips

Extra support

  • If a novel word pertains to an object or picture available in your classroom or center, display the object or picture as an additional source of help to children in understanding a word. Example: Squeeze a tube of toothpaste as part of discussing the word squeeze.

Enrichment

  • Select several pictures in the book related to a novel word or a key part of the book. Invite children to describe how the picture tells us something about the book.

Center Activity

In the library center, provide additional books by the author of today’s book. Invite children to look at and enjoy the books.

Family Child Care

Family Child Care

Encourage school-age children to help you read an age-appropriate book to preschool-age children in your setting. Ask preschool-age children to describe some pictures in the book, point to items in pictures as they are mentioned in the book, and point to the place where you begin reading.

Week 3:
Day 3

Counting Things

Mathematics

Large Group

Skill and Goal

Number knowledge
Children will understand how to make groups of 1–4 items while connecting number words to the quantities they represent. Children also will understand the concept of more.

Materials
Needed

  • Identical counters—4 per child
  • 5 identical counters for adult
  • Paper (for Extra support tip)
  • Writing tool (for Extra support tip)

Key
Concepts

New:

  • Group of four
  • More

Review:

  • Group of two
  • Group of three

BEGIN:

Today we will practice looking at groups of 1, 2, 3, and 4 and telling how many circles (counters) are in each group. A group of four has four things.

[Place two identical counters in front of you.]

ASK:
  • How many circles are in this group? (two)
  • Did you count them, or did you just know when you looked at them?

[Repeat this activity using 1–4 counters in each group. Do this several times as children tell how many are in each group. After children have identified the number of items in each group, remind children that a group of ___ has ___ things.]

EXPLAIN:

Now we are going to try something new with groups of 1, 2, 3, and 4.

[Give each child four identical counters.]

I will make a group of 1, 2, 3, or 4 again. This time, let’s imagine our circles are a child’s cookies. Let’s pretend that once upon a time there was a child who had two cookies.

I will make a group of two cookies.

ASK:
  • How many cookies are in my group?
  • How do you know? (counted them, knew when I looked at them)
EXPLAIN:

Pretend you are the child with two cookies and you make a group of two cookies.

ASK:

How many cookies are in our groups? (two)

ACT:

Now let’s pretend there once was a child who had three cookies. I am going to make a group of three cookies.

Pretend you are the child with three cookies and you make a group of three cookies.

Let’s pretend one more time about our cookies. There once was a child who had four cookies. I am going to make a group of four cookies.

Now you pretend you are the child with four cookies and you make a group of four cookies.

How many cookies are in our groups? (four)

[Form two groups of counters in front of you. Put one counter in the first group and put four counters in the second group. Point to each group as you reference it.]

Here is a group of one pretend cookie.

Here is a group of four pretend cookies.

Which group has more cookies?

EXPLAIN:

When something has more, it has a larger or bigger number of something. The group of four has more cookies than the group of one.

ACT:

[Form another two groups of counters in front of you. Put two counters in the first group and put three counters in the second group. Point to each group as you reference it.]

Here is a group of two pretend cookies.

Here is a group of three pretend cookies.

Which group has more cookies?

EXPLAIN:

Our group of three pretend cookies is larger (or bigger) than the group of two pretend cookies. The group of three has more pretend cookies than the group of two.

RECAP:

Today we practiced making groups of 1, 2, 3, and 4. You made groups of cookies like the groups of cookies I made.

[Hold up four fingers.]

How many fingers are in our group? (four)

Scaffolding tips

Scaffolding Tips

Extra support

  • If children have difficulty matching your group of 2, 3, or 4, count while you point to each pretend cookie in your group and/or form a group with one fewer pretend cookie.
  • Here is another option for supporting children who have difficulty making their own groups of 1–4: Each time you say a group number, draw that many dots on a paper and invite children to put a counter on each dot.

Enrichment

  • If children have mastered making groups of 1–4, ask them to make larger groups up to six.
Mathematics

Center Activity

Provide cards with 1–3 dots drawn on each. There should be one card for each amount. Invite children to place the corresponding number of clothespins on the card. As children work, cover the dots on a card and uncover them for a couple of seconds before covering them again. Can children remember the amount on the card without counting?

Family Child Care

Family Child Care

School-age children will enjoy making up a story similar to the child with pretend cookies using common identical household items such as beads or beans (a collection that is the same color, size, and kind). Encourage preschool-age children to determine how many items are in each group and which group has more.

Week 3:
Day 3

Getting Along With Others

Social-Emotional

Large Group

Skill and Goal

Relationship skills
Children will understand different ways to share an item.

Materials
Needed

  • Handful of play dough
  • Puzzle
  • 10 blocks
  • Doll

Key
Concepts

New:

  • Take turns

Review:

  • Share

Optional
Reading

  • Share and Take Turns by Cheri J. Meiners

BEGIN:

What does it mean to share? (use or enjoy something with others)

[Follow-up prompts if needed: Have you ever shared something? How did it work?]

EXPLAIN:

Last week we talked about asking others to play. Sometimes we share something when we play with others, like a toy or a book.

There are different ways to share something. We might split up the item we want to share. We might also play with it together. Another way we can share is to take turns with something. Each person does something one at a time when we take turns.

Let’s pretend we are playing with a big ball of play dough and someone asks to play with the play dough too.

ASK:

How could we share the play dough with someone else? (split it up, play with it together, take turns with it)

EXPLAIN:

Let’s practice different ways of sharing something with someone.

ACT:

[Invite a volunteer to help you illustrate how to share by splitting an item. Pretend you are sitting next to a friend (volunteer child) and you would like to use some of the friend’s play dough. Demonstrate an appropriate way to ask to play with some of the item. Example: “Can I use some of your play dough? If we split it in half, we can share the play dough.”]

  • When we split up an item, we can play with part of it while someone plays with another part of it.

[Demonstrate how to split the play dough in half. Play with half as the volunteer plays with the other half. Continue for several seconds and then invite a different volunteer to help you illustrate another way to share.

Ask the volunteer to pretend to play with a puzzle. Approach the volunteer playing with the puzzle and ask to share the puzzle. Example: “May I play with your puzzle, too? I really like this puzzle. We can play with it together.”]

  • When we play with something together, we both play with it at the same time.

[Demonstrate how to play with the puzzle together. Continue for several seconds and then invite a different volunteer to help you illustrate playing together with a different item.]

  • We can take turns when we play with something together. We could take turns putting pieces in a puzzle. We can take turns making something like a block tower.

[With the volunteer child, demonstrate how to build a block tower by taking turns putting blocks on top of each stack. Describe the process for children. Example: “First (volunteer child) add a block. Then I add a block. Then (volunteer child) takes another turn adding a block. We are building a block tower by taking turns.”

Display doll.]

We each play with something one at a time when we take turns. We can share by taking turns with this doll. When we want to share something by taking turns, we can say to someone, “Can we take turns with the doll? We can share by each playing with it for a little bit. You could play with the doll for five minutes, then I could play with the doll for five minutes.”

ASK:

Who can think of ways we can share things in our classroom?

[Encourage children to think of ways to share in the classroom. Discuss different ideas or situations children mention, and how they might share.]

RECAP:

Today we talked about different ways to share something. Who remembers some ways we can share something with someone else? (split the item, play with it together, take turns with it) How could we share a game? (play with it together, take turns) How could we share a group of toy animals? (split them up, play with them together, take turns)

Scaffolding tips

Scaffolding Tips

Extra support

  • As children think of ways to share in the classroom, help with prompts if necessary. Example: “If you and a friend wanted to play with the same doll, how could you share?”

Enrichment

  • Help children understand it can be difficult to share an item with a larger number of children. After demonstrating how to split up play dough, give a tiny amount of play dough to each of a large number of children. Explain that sometimes things are hard to split up or not very much fun when each child gets a small amount.
Social-Emotional

Center Activity

Provide limited art supplies. Examples: paper, paint brush, pair of scissors, glue stick, marker, crayon, etc. Intentionally provide one or two less than what would be needed for each child to have one of each. Example: Provide 2–3 glue sticks for a group of four children. Ask children to create anything they’d like with the supplies given. As children create, observe and interact as they decide how to take turns with the items available. Help children think of ways to take turns with the supplies, if necessary. Examples: Ask if you can have a turn, take deep breaths while you wait, use a different item.

Family Child Care

Family Child Care

Practice sharing by making a snack together. Invite all children in your setting to take turns while working together. Pair school-age children and preschool-age children as they practice taking turns and splitting up tasks. Discuss the different ways they are sharing as they work together.

Week 3:
Day 3

Being a Scientist

Science

Large Group

Skill and Goal

Inquiry skills
Children will strengthen their understanding of how to learn about something by trying to change it.

Materials
Needed

  • Ice cubes
  • Prepared chart or paper
  • 2 bowls
  • Lamp (if indoors)

Key
Concepts

New:

  • Experiment
  • Shade
  • Prediction

Review:

  • Compare
  • Observe
  • Record
  • Describe

Also
Promotes

  • Language / Literacy

Be Prepared: Today’s activity takes place outside and uses sunlight. If sun is not shining or inclement weather or other factors prevent you from going outside, adjust the activity for an indoor setting. Organize a simple, two-column chart as pictured on next page. Including a picture of sun (or a lamp) and a picture of something that provides shade will help children understand what is being compared in the two columns of the chart.

BEGIN:

On Day 2 we learned about ice by trying to change our ice cubes.

  • How did we try to change our ice cubes? (poured water on one bowl of ice)
  • We compared the ice cubes in our two bowls after we poured water in one of our bowls. What does it mean to compare things? (figure out what is the same and what is different)
  • Did the ice cubes in our two bowls do the same thing after we poured water in only one bowl? (no, the ice cubes in water melted faster than the ice cubes that were not in water)
EXPLAIN:

We did an experiment when we poured water in one bowl of ice but did not pour water in our other bowl of ice. When we do an experiment, we try to change something so we can better understand it. Remember, scientists sometimes try to change something.

Today we are going to observe what happens when we put some ice cubes in the sun and some other ice cubes in the shade. We will do a different experiment with ice!

ASK:

Who remembers what it means to observe something? (to look carefully at it)

EXPLAIN:

Shade is a place that is covered from the sun or light. The sun does not shine directly on us when we are in the shade.

We will compare what happens to our ice cubes in the sun and our ice cubes in the shade. This is an experiment.

Let’s think about what might happen to the ice cubes. When we think about what might happen we are making a prediction.

ASK:
  • What do you think might happen to the ice cubes in the sun? (melt quickly, get warm)
  • What do you think might happen to the ice cubes in the shade? (stay frozen longer)
ACT:

[Take children to an outdoor area that provides both sun and shade.]

We are going to put one bowl of ice cubes in the sun, and put another bowl of ice cubes in the shade. Let’s be scientists by observing what happens to the ice!

[Set a bowl with two ice cubes in a sunny area. Use a lamp if this activity is done indoors. Set another bowl with two ice cubes in a shaded area.

Invite children to stand in the sunny area and describe what it feels like. If a lamp is used indoors, invite children to place a hand under the lamp but only if this can be done safely. Adapt the following questions for an indoor activity.]

  • What does it feel like in the sun? (warm, hot)
  • Now, let’s move to the shaded area. What does it feel like in this shaded area?

Now we will observe and describe what is happening to our ice cubes. I will record what we describe on a chart. Remember, when we record something we write it down.

[Display chart and point to its key parts as you describe each.]

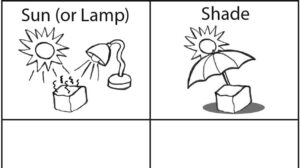
Please look closely at our chart. One side of our chart has a picture of the sun (or a lamp). The other side of our chart has a picture of (item that provides shade). The (item that provides shade) stops the sun from shining on the ice.

[After several minutes, ask children to observe and describe the ice cubes in the sun and then move to the shade. Use one- or two-word entries as you record their descriptions on the chart. Point to and read each word as you write it. If necessary, draw children’s attention to the water in the bowl placed in the sun. Add the word “water” to the chart.]

Let’s describe what is happening to the ice cubes. Remember, when we describe we tell about something.

  • What is happening to the ice cubes in the sun? Why?
  • What is happening to the ice cubes in the shade? Why?
  • Let’s put both bowls side by side so we can compare the ice cubes in each bowl. Do the ice cubes in our two bowls look the same or different? Why?
EXPLAIN:

Our ice cubes melted faster in the sun than in the shade because it is warmer in the sun. The shade stopped the sun from shining on the ice cubes.

ASK:

What happened to the ice cubes in the sun when they started to melt? (turned to water)

RECAP:

Today we did another experiment with ice cubes. We learned about ice by trying to change it. We put some ice in the sun (or under a lamp) and some ice in the shade. Our ice cubes in the sun melted faster than our ice cubes in the shade because ice is made of frozen water that melts when it is warm. The shade stopped the sun from shining on the ice.

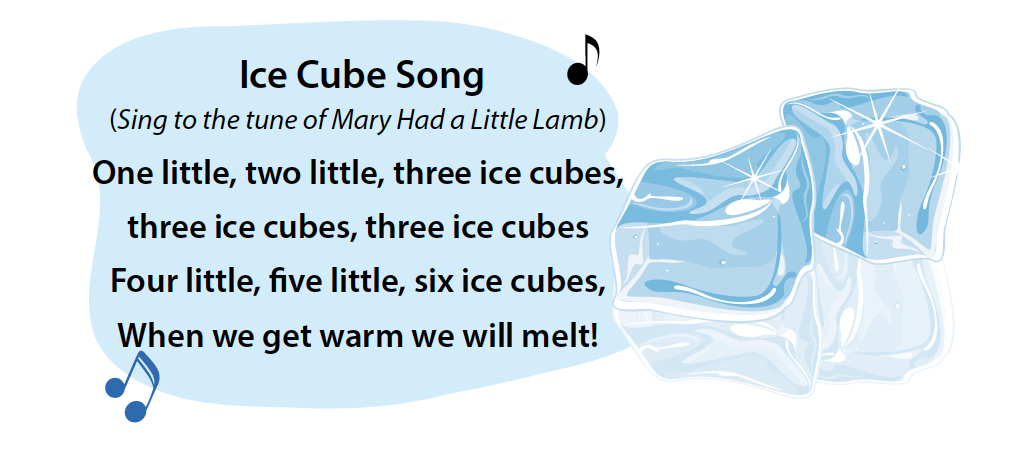
[If time permits, teach the following song sung to the tune of Mary Had a Little Lamb:]

Scaffolding tips

Scaffolding Tips

Extra support

  • If children seem confused about the idea of shade stopping the sun from shining on something, safely place your hand between the lamp (turned on) and ice that is beneath the lamp. Explain that your hand stops the lamp from shining directly on the ice.
  • Children may enjoy pretending to be an ice cube while singing the optional song.
  • Point out where shade can be found outside. Shade is a place where the sun is not shining on the playground.

Enrichment

  • Introduce the term “temperature” if children show interest in warmer and cooler differences. Temperature tells us how warm or how cold something is.
  • Ask children what they think would happen if they took the ice cubes outside on a cooler day? What about a warmer day?
Science

Center Activity

Fill the water table or a tub with bowls of ice. Supply bowls of warm water and bowls of cold water as well. Encourage children to use spoons and cups to pour warm and cold water on the ice cubes. Periodically provide more ice and warm and cold water as needed.

Family Child Care

Family Child Care

Encourage all children in your setting to think of ways to make ice cubes melt. Try out some of their ideas. Examples: wrapping them in a towel, an adult placing them in the oven, holding them in a warm hand. Encourage children to compare different ideas by how quickly the ice cubes melt. Take photos of each idea and use the photos to make a group book. Invite preschool-age children to draw additional illustrations of ice cubes in the book and invite school-age children to write about each idea.