Week 32:
Day 2

Understanding Letters

Language / Literacy

Small Group

Skill and Goal

Letter knowledge
Children will identify, name, and say the sounds of letters D, L, N, and G.

Materials
Needed

  • *Letter mats (D, L, N, G)—1 per child
  • *Letter D card
  • *Letter L card
  • *Letter N card
  • *Letter G card
    *Printables provided

Key
Concepts

Review:

  • Letter

BEGIN:

We are learning about letters. We know that a letter is a special mark used to make words. In the past few weeks we have learned about letters D, L, N, and G.

[Display letter cards D, L, N, and G. Point to and name each uppercase and lowercase letter. Example: “Remember, this is an uppercase D, and this is a lowercase d.” After you name a letter, invite children to pop up if the letter is in their name.]

EXPLAIN:

Letter Mat D, L, N, GToday we will use a letter mat to help us remember the letters we are learning.

[Display letter mat.]

Our letter mat contains the uppercase and lowercase letters we have learned so far. We will each use our own letter mat for this activity.

ACT:

[Pass out a letter mat to each child.]

I am going to mix up the letter cards and then show them to you one at a time. When we see a letter card, we will point to the same letter on our letter mat.

[Hold up letter D card.]

Let’s find this letter on our letter mat.

[Lead children in looking for, pointing to, and saying letter D on their letter mat. Explain how you found the letter D. Example: “This letter has a straight line down and then a curved line. It looks just like the uppercase letter on our letter card.”]

The letter D says /d/. Let’s together say the letter sound: /d/.

Now let’s find another letter!

[Hold up remaining letter cards, one at a time. Invite children to first point to the matching letter on their letter mat. Then ask children to repeat the letter name and the letter sound.]

RECAP:

Today we learned more about letters D, L, N, and G. We used our letter mats to find the letter that matched our letter card. Then we said the name and sound of the letter.

Scaffolding tips

Scaffolding Tips

Extra support

  • When you introduce the letter mat, point to and name each letter in the order letters appear on the mat.
  • If children need assistance finding the matching letter on their letter mat, describe the letter as you point to the letter card. Example: “We are looking for a letter with a tall straight line and a line across the bottom. Can you find a letter with a tall straight line and a line across the bottom like this one?”

Enrichment

  • Ask children to describe how they know the letter they point to on their mat is the same letter as the uppercase letter on the letter card. Example: “This letter has a straight line up, a straight line down, and another straight line up, just like the uppercase letter on the letter card.”

Center Activity

Provide two sets of *small letter cards D, L, N, and G. Invite children to mix up cards and place them face down. Encourage children to play a memory game by taking turns to turn over two cards to see if they are a match.
*Printables provided

Family Child Care

Family Child Care

Hang *letter cards D, L, N, and G in random order on a wall. Dim or turn off lights and ask children to use a flashlight to find a letter you say. Example: “Lee, can you use the flashlight to find the letter N on our wall?”
*Printables provided

Week 32:
Day 2

Counting Things

Mathematics

Small Group

Skill and Goal

Number knowledge
Children will practice adding two groups of counters (spots) by counting on with a peer.

Materials
Needed

  • Counters—12 per pair of children
  • *Ladybug picture—1 per pair of children
  • Dice—1 die per pair of children
  • *Number list (see Extra Support tip)
    *Printables provided

Key
Concepts

Review:

  • Add
  • Count on

Optional
Reading

  • Ten Little Ladybugs by Melanie Gerth

BEGIN:

Yesterday we practiced counting two groups of coins together to see how many coins there were all together. Today we will put spots on two parts of a ladybug picture. Then we will count our two groups of spots.

EXPLAIN:

Math Ladybug PrintableEach of us will work with a partner.

[Arrange children in pairs.]

Each pair will work with a ladybug picture.

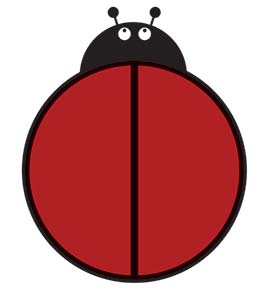
[Display ladybug picture. Point to line and sides as you describe them.]

The ladybug has a line down the middle of its back. The line gives the ladybug two sides.

Most ladybugs have spots, so we will add spots to our ladybugs. We are going to use a die to determine how many spots to put on our ladybugs. We will use circles (counters) as the spots.

The first person will roll the die to see how many spots to put on his or her side of the ladybug. Then the first person will put spots on his or her side of the ladybug. Then the second person will roll the die and put circles on his or her side of the ladybug. Remember, the die will tell how many spots to put on our side of the ladybug.

After each of you put spots on your side of the ladybug, please count the number of spots you have all together. We can use counting on when we count. I will remind you how to do it.

ACT:

[Roll the die and put the corresponding number of spots on one side of the ladybug. Invite a volunteer child to roll the die a second time. Invite the child to put the corresponding number of spots on his/her side of the ladybug. Ask children which side has the most spots (circles). Ask the volunteer child how many spots are on the side with the larger number of spots. Begin with the side with the largest number, and count on to the other side. Example: “There are three spots on the side with the larger number of spots. So let’s start with 3: 3, 4, 5.”]

ASK:

How many spots do we have all together?

EXPLAIN:

We added the spots on one side of the ladybug to the spots on the other side of the ladybug.

ACT:

[Observe pairs of children as they roll the die and add spots to their ladybugs. Encourage pairs to figure out which side has the larger number of spots and to use counting on. Encourage the pairs of children to count out loud together. Continue as long as time allows.]

RECAP:

Today we practiced adding together two groups of spots on a ladybug picture. We used counting on to add together the two groups of spots.

Scaffolding tips

Scaffolding Tips

Extra support

  • Use a *number list to help children count on. Point to the number on the number list that corresponds to the number of items in the first group. Then point to each number on the number list as you count on to add the second group of items.
  • Make sure each counter is placed directly on the ladybug picture—not stacked on another counter.

Enrichment

  • Children may be ready to learn that another word for adding is addition.
  • Invite children to add three groups of items. Place a small group of counters outside the ladybug. Ask children to add the third group by counting on from the total of the two groups inside the ladybug. Example: After adding both groups of counters inside the ladybug, the total is eight counters all together. Start at number eight and count on to add the group of counters outside the ladybug.
Mathematics

Center Activity

Provide *ladybug pictures, counters, and dice used during today’s activity. Encourage children to continue practicing addition.
*Printables provided

Family Child Care

Family Child Care

Use a hoop with a string through the middle to practice addition outdoors. Encourage children to find two groups of items and practice addition as they count on. Example: four rocks and three leaves.

Week 32:
Day 2

Being Responsible

Social-Emotional

Large Group

Skill and Goal

Personal responsibility
Children will understand the concept of a goal.

Materials
Needed

  • *4 pictures as shown
  • *Our Feelings poster (see Extra Support tip)
    *Printables provided

Key
Concepts

New:

  • Goal

Review:

  • Practice
  • Frustrated

BEGIN:

Have you ever wanted to do something and worked really hard to do it? Tell us about it.

EXPLAIN:

Today we are going to talk about goals. A goal is something we want to do. Many times we need to work hard to be able to do something.

[Discuss some of the specific things children described at the beginning of the activity. Explain that these are goals.]

We can have different types of goals. Maybe one of our goals is to remember to wash our hands after we sneeze. Or maybe one of our goals is to learn how to dance or play some type of sports game.

Let’s look at some pictures of children working hard on their goals.

[Display, one at a time, pictures of children engaged in goals.]

  • The girl in this picture is learning how to write her name. Her goal is to write each letter of her name so that another person can read her name.
  • The boy in this picture is learning how to walk across a balance beam. His goal is to stay balanced as he walks from one end of the balance beam to the other.
  • The boy in this picture is holding a bat. He is near a tee with a ball on top of it. What goal do you think he is working on? (hit a ball)
  • The girl in this picture is wiggling her foot into a shoe. What goal do you think she is working on? (put on her shoes by herself )

Some goals may be easier than other goals. It may be easier for us to remember to always wash our hands after we sneeze than to learn to walk across a balance beam.

ASK:

Are there some things that are harder for you to learn to do than other things? Tell us about them.

EXPLAIN:

Sometimes we feel frustrated when our goal is hard to do. Remember, we can feel frustrated when we can’t do something that we try really hard to do. We might feel frustrated when we swing a bat to hit a ball, but miss the ball.

A few weeks ago we talked about things we can do when we feel frustrated.

ASK:

What are some things we can do if we get frustrated when working on a goal? (try something easier, take a break and try again later)

RECAP:

Today we learned that a goal is something we work very hard to be able to do. It helps to practice and get someone else to help us when we work on a goal.

Scaffolding tips

Scaffolding Tips

Extra support

  • In the discussion of feeling frustrated when working on a goal, children may benefit from your pointing to and discussing the picture of a child who appears frustrated on the *Our Feelings poster.

Enrichment

  • Ask children to think of how they can help others work on their goals. Example: “Emily wants to remember to always wipe her shoes on the mat when she comes in from recess. How can we help Emily with her goal?” (remind her)
Social-Emotional

Center Activity

Provide a variety of manipulatives. Encourage each child to set a goal she/he can work on using the manipulatives. Examples: building a tower with 10 blocks, completing a puzzle. Invite children to work on their goal.

Family Child Care

Family Child Care

Encourage children to think of a goal that someone in their family can help them work on. Invite children to tell their family member about their goal at pickup time.

Week 32:
Day 2

Exploring Habitats

Science

Large Group

Skill and Goal

Knowledge of habitats
Children will understand basic characteristics of a polar bear.

Materials
Needed

  • Globe
  • *2 pictures as shown (1 shown in Extra Support tip)
  • Black paper—1 per child
  • Drawing tools
    *Printables provided

Key
Concepts

New:

  • Polar bear

Review:

  • Polar region
  • North Pole
  • Characteristic

Optional
Reading

  • Polar Bears by Gail Gibbons
  • National Geographic Readers: Polar Bears by Laura Marsh

BEGIN:

This week we are learning about the polar regions habitat. Yesterday we learned about a polar region called the North Pole.

ASK:

What do you remember about the North Pole? (very cold, windy, lots of snow and ice)

ACT:

Let’s find the North Pole on our globe.

EXPLAIN:

Today we will learn about an animal that lives in the North Pole. Let’s see if we can guess the animal we will learn about today. I will give you some hints.

This animal is very large and white. It has lots of fur to keep it warm.

ASK:

Can you guess what animal it is?

EXPLAIN:

It is a polar bear! A polar bear is a big white animal that lives in the North Pole. Big and white are some of the characteristics of a polar bear. Remember, a characteristic is something special about a living thing or a thing that is not living.

ASK:

Have you ever seen a polar bear at a zoo or on T.V.? Tell us about it.

EXPLAIN:

A polar bear standing in the snowLet’s look at a picture of a polar bear.

[Display picture of a polar bear.]

A polar bear’s white fur helps it blend in with the snow. Blending in with the snow helps the polar bear go hunting for food. The animal a polar bear is hunting may not see the polar bear because it looks like the snow.

The white fur also keeps baby polar bears safe. Other animals that may want to eat the baby polar bears may not see the polar bears because they blend in with the snow.

Today we are going to draw a picture of a polar bear. We will use black paper to draw our polar bear.

ASK:
  • What color crayon should we use to draw our polar bear? (white)
  • Why do you think we will use black paper to draw our polar bear? (so we can see our white crayon)
ACT:

[Give each child a piece of black paper and drawing tools. Invite children to draw a polar bear. Provide children with the picture of a polar bear to use as a reference. Children are not expected to draw a polar bear that looks like the picture. Hang children’s drawings in the room.]

RECAP:

I am a Polar BearToday we learned that polar bears live in the cold North Pole. What is one thing that keeps a polar bear warm? (fur) We also drew a picture of a polar bear.

[If time permits, teach the adjacent song.]

Scaffolding tips

Scaffolding Tips

Extra support

  • Two polar bear cubs in the snow
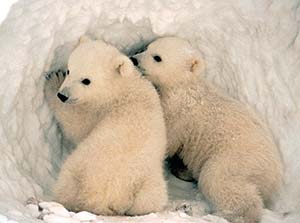
Display and describe a picture of baby polar bears when discussing how the white fur helps a polar bear blend in with the snow.
  • Some children may recall the polar bear featured in Bill Martin Jr. and Eric Carle’s book “Polar Bear, Polar Bear, What Do You Hear?”

Enrichment

  • Ask children why we can’t use white paper to draw a polar bear. (the white crayon would blend in with the white paper)
Science

Center Activity

Provide books about polar bears for children to look at and enjoy. Examples: Polar Bears by Gail Gibbons, National Geographic Readers: Polar Bears by Laura Marsh. You may also wish to create a pretend habitat for polar bears and encourage children to pretend they are polar bears in the North Pole.

Family Child Care

Family Child Care

Provide a polar bear stuffed animal or toy polar bear and additional stuffed animals and/or toy animals. Hang a white sheet or large piece of white paper on a wall and encourage children to play and pretend the animals are hunting.