Week 47:
Day 1

Understanding Words

Language / Literacy

Large Group

Skill and Goal

Oral language
Children will understand basic information, including the meaning of several novel words, presented in a book read aloud.

Materials
Needed

  • Book of your choice for this week’s repeated reading
  • Chart paper
  • Marker

Key
Concepts

New:

  • 3–4 words (see Be Prepared)

Words We Understand ChartBe Prepared: This is the first of two repeated readings of a book with children. Today’s reading focuses on children’s understanding of basic information presented in the book. In advance of the session, identify all novel words you intend to define for children during the two readings of the book. Select 3–4 important words to define for children today, especially words that are essential to understanding the book. See the Language/Literacy section of the ELM Curriculum User Guide: 3–5 Years for additional information. Write the following at the top of the chart paper: Words We Understand. See Language/Literacy Week 2, Day 1 for guidance on the first-time reading of a book with children.

Open the session by reminding children that books help us learn new words. Point to the chart, read its title, and write several words from your list of novel words for children to learn (see Be Prepared). Say each new word and talk with children about what the word means.

Display the front cover of the book and read the book title and names of the author(s) and illustrator. Invite children into the book by asking questions such as, “What do we see on the cover of the book?” “What might this book be about?”

Read the book without inviting talk until you have finished reading. Point to and describe illustrations directly related to the text. During and/or after the book reading, explain characters, words, or events that might be challenging for children to understand. See Week 46, Day 1 for examples.

Support children’s understanding of novel words used in the book. For each word on your Words We Understand chart, ask children what the word means and help children recall how the word was used in the book. See Week 46, Day 1 for examples.

Close the book-reading session by asking questions that will help children remember the main characters and the major events of the book. Examples:

  • What was our book about?
  • Who were the main characters of the book?
  • What happened first? What happened next?
  • What happened at the end of the book?

Incorporate children’s responses into a short summary of the book. See Week 46, Day 1 for an example.

Scaffolding tips

Scaffolding Tips

Extra support

  • Display and encourage children to describe book illustrations that directly pertain to discussion of a novel word.

Enrichment

  • Ask questions that start with “Why do you think . . .” or “How did you know . . .” to promote deeper thinking.
Week 47:
Day 1

Making Patterns

Mathematics

Small Group

Skill and Goal

Pattern knowledge
Children will strengthen their understanding of a pattern.

Materials
Needed

  • (see Be Prepared)
  • 8 counters
  • 8 crayons
  • 8 pieces of paper
  • 8 shapes
  • 8 animal figures
  • 8 play utensils

Key
Concepts

Review:

  • Pattern

Option 1:

Offer the Week 14, Day 1 activity to review patterns.

Option 2:

Engage pairs of children in making a simple (ABAB) pattern.

Be Prepared: Select two different types of each set of items. Examples: For the eight shapes, select four squares and four rectangles. For the eight animal figures, select four cats and four dogs.

Open the session by reminding children that a pattern is something that repeats itself. Explain that a simple pattern uses two things that repeat themselves. Point to and describe an item in the room that represents a pattern. Example: a striped shirt with two colors.

Arrange children in a circle. Invite pairs of children, one pair at a time, to use one of the sets of items listed in Materials Needed to create a simple pattern. Begin by presenting a set of items, encouraging children in the pair to describe the items, and then inviting the pair to make a simple pattern that the pair describes (while pointing) for other children. Example: “We have train counters and car counters. Our pattern is train, car, train, car, train, car.” Increase challenge by adding a third type of item to each set. Example: nine pieces of paper, three of different colors. This supports an ABCABC pattern.

Week 47:
Day 1

Paying Attention

Self-Regulation

Small Group

Skill and Goal

Concentrate
Children will use their sense of touch to identify characteristics of an item held behind their back.

Materials
Needed

  • Small item—1 per child (toy food item, doll, marker, beanbag, toy animal figure, etc.)

Key
Concepts

Review:

  • Concentrate

Also
Promotes

  • Science

BEGIN:

[Arrange children sitting in a circle.]

Let’s play a game we’ve played before called What’s Behind My Back? We will use our sense of touch to play the game.

ASK:

What do we use to find out what something feels like? (hands, skin)

EXPLAIN:

Girl with hands behind backEach of you will have a small item to hold. You will hold your item behind your back. Putting your item behind your back means you cannot see it. You can only feel your item. When I place the item in your hands, do not look at it. Please do not look at your neighbor’s item.

We will concentrate on what the item in our hands feels like. We know that when we concentrate, we pay close attention to something. We will each have a turn to describe our item. We can say whether our item is smooth, rough, hard, soft, small, large, round, short, or long. We can use whatever words will help us figure out what is in our hands. If we know what is in our hands, we need to work hard to not tell others. We want to describe what the item feels like and let others guess what it is!

After each of us describes our item, we will find out if anyone can guess what it is. I will go first.

ACT:

[Secretly put an item behind your back and describe how it feels. Use simple descriptors. After you have described your item, encourage children to guess what it is. After children have guessed, display the item. If children were correct, ask how they knew. What words were helpful in figuring out what was behind your back? If children did not accurately guess the item, ask what was hard about figuring out what was behind your back.

After brief discussion of experiences in identifying the item in your hand, ask all children to close their eyes and put their hands behind their backs. Walk around the outer circle of children (who are facing inward) and carefully place an item behind the back of each child. Place the item in a child’s hands, if possible (some children may use their hands to cover their eyes).

Give each child a turn, going in the order of circle placement. Remind children to not look at their item. Remind children to describe their item and try hard to not say what it is—if they know!]

RECAP:

Today we played a game we’ve played before called What’s Behind My Back? We used our sense of touch to concentrate on an item behind our back. What was the hardest part of our game? (telling about our item without saying what it was, finding words to describe our item, waiting for our turn, not peeking)

Scaffolding tips

Scaffolding Tips

Extra support

  • Remind children to not say the name of their item if they know what it is. It is their job to describe their item. It is the job of other children to guess the item. But if a child blurts out the name, positively acknowledge that it is hard to concentrate on two things at the same time: what our items feels like and what we say about our item.
  • If you anticipate it will be too challenging for children to wait for their turn without looking at or telling about their item, distribute the items one at a time (when it is a child’s turn to feel and describe).
  • If children need help with describing their item, ask questions to help them focus on certain characteristics. Example: “Is your item hard or soft?”
  • Children may wish to peek at their “hidden” item. Remind children to not say the name of their item. The goal is for children to describe how the item feels.

Enrichment

  • If children readily guess an item after characteristics are described, encourage them to try to figure out an item after only two characteristics are described.
Self-Regulation

Center Activity

Provide a brown paper bag, and various items to put in the bag, to extend today’s activity. Invite children to describe an item in the bag as others try to guess what it is.

Family Child Care

Family Child Care

Try this game outside with items found in the play area. Invite children to describe items, such as a stick or leaf.

Week 47:
Day 1

Exploring Living Things

Science

Large/Small Group

Skill and Goal

Knowledge of living things, Knowledge of life cycles
Children will understand how dinosaurs were the same and different in what they ate, how they moved, and their body coverings. Children also will understand basic stages of a dinosaur’s life cycle.

Materials
Needed

  • *4 pictures as shown
  • ABCs of Yoga for Kids by Teresa Anne Power (see Extra Support tip)
    *Printables provided

Key
Concepts

Review:

  • Same
  • Different

Also
Promotes

  • Self-Regulation

Be Prepared: The opening activity assumes children have had experiences with yoga poses offered in ELM’s Self-Regulation activities. If yoga experience is limited, use different arm and hand positions to provide practice with the concepts of same and different. Examples: hand on head, hand and arm behind back, hand touching toes, hand touching ear.

BEGIN:

Today we will talk about how dinosaurs were the same and different. Let’s first do some yoga poses to help us remember what it means to be the same and what it means to be different.

ASK:
  • What does it mean for things to be the same? (alike)
  • What does it mean for things to be different? (not alike)
ACT:

I am going to show a yoga pose. Please try to do the same yoga pose.

[Say the name and demonstrate a yoga pose that is familiar to most children. Example: a tree. It is not necessary for children to perfectly follow your pose.

Say and demonstrate a second pose for children to follow if you think more experience with the concept of “same” would be helpful.]

I am going to show another yoga pose. This time, please do a yoga pose that is different from the pose I am showing. You can do any yoga pose that you want. Please try hard to not do the pose I am doing. We will do different yoga poses.

[Say the name and demonstrate a yoga pose while encouraging children to do a different pose of their choice.]

ASK:
  • Were all dinosaurs the same? (no)
  • We know that dinosaurs were different from each other. Let’s think about living things for a moment. What do all living things need to stay alive? (food, water, air)
EXPLAIN:

dinosoar drinking water
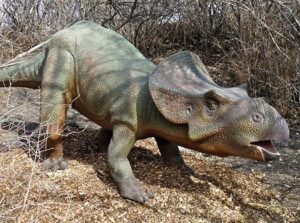
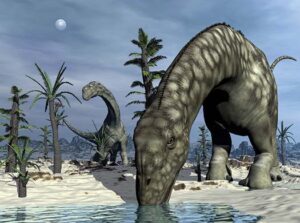
Dinosaurs were living things. They were alike in needing water to stay alive. Here is a picture of a dinosaur drinking water.

[Display picture of dinosaur drinking water.]

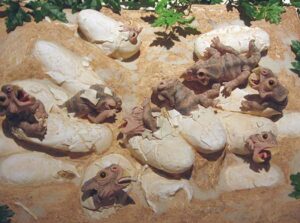
We know that all dinosaurs started their lives in eggs.

[Display picture of dinosaur eggs.]

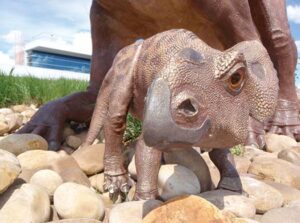
All dinosaurs grew quickly after they hatched from an egg. Here are pictures of dinosaurs hatching from their eggs, a baby dinosaur, and an adult dinosaur.

dinosaurs hatching[Display and describe eggs, baby dinosaur, and adult dinosaur pictures.]

Young dinosaurs became adult dinosaurs and laid eggs. Then a new dinosaur would hatch from the egg and start growing.

We know that all living things grow and can make others like themselves.

ASK:

baby dinosaur
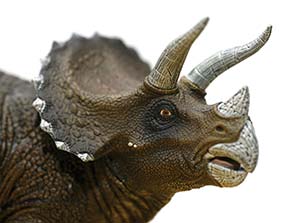
How were dinosaurs different from each other? (size, what they ate, some had feathers, whether they used two or four legs to get around)

EXPLAIN:

Protoceratops
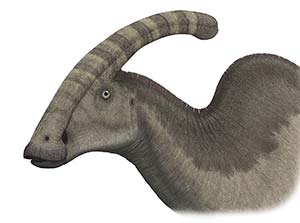
All dinosaurs ate food, but dinosaurs were different in what they ate. We know that some dinosaurs ate meat only. Other dinosaurs ate plants only. And some dinosaurs ate both meat and plants.

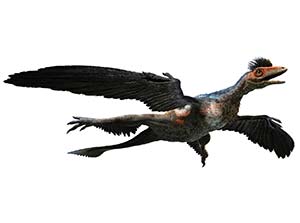
Some dinosaurs were covered with feathers that helped them keep warm. Most dinosaurs did not have feathers.

We know that dinosaurs were different in how they got around. Some used two legs. Other dinosaurs used four legs. Some dinosaurs had wings that helped them glide through the air.

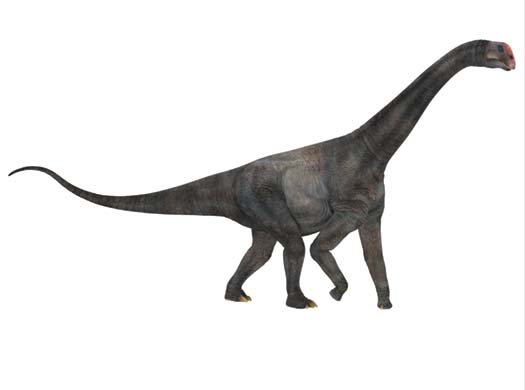
Some dinosaurs were very big. Other dinosaurs were smaller.

RECAP:

Dinosaurs were the same and different from each other. Dinosaurs ate food, drank water, hatched from eggs, and grew. These are ways that dinosaurs were the same. What are some ways dinosaurs were different from one another? (size, what they ate, some had feathers, whether they used two or four legs to get around)

Scaffolding tips

Scaffolding Tips

Extra support

  • The ABCs of Yoga for Kids
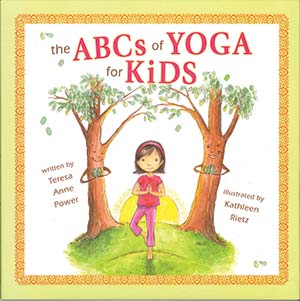
If children seem uncertain about a “different” pose to do, suggest that they do the pose done at the beginning of the session (when poses were to be the same as yours) or look at the ABCs of Yoga for Kids book for ideas.
  • It is fine if children do a yoga pose done by another child. Emphasize how your pose is different than the poses done by others.
  • Display and discuss the picture of the Microraptor dinosaur (Week 46, Day 1) to show feathers and wings.
  • Children may benefit from a brief review of characteristics of living things (Week 12).

Enrichment

  • Invite children to lead the opening same/different activity by demonstrating a yoga pose(s).
  • Invite children to think of other animals that eat meat only or plants only or both meat and plants.
Science

Center Activity

Provide two sets of *dinosaur matching cards. Place cards upside down on a table. Invite children, one at a time, to turn over two cards at a time. Invite the child to describe differences in the dinosaurs if the pictures do not match. Encourage the child to place dinosaur matching cards together in a pile in front of him/her. When all cards have been matched with a pair, invite the child to sort pairs of dinosaur matching cards into piles based on dinosaur characteristics of interest to the child.

Family Child Care

Family Child Care

School-age children may wish to suggest poses to include in the opening activity or “model” how the pose is done.