Week 23:
Day 1

Understanding Words

Language / Literacy

Large Group

Skill and Goal

Oral language, Letter knowledge
Children will understand basic information, including the meaning of several novel words, presented in a book read aloud. Children will also identify the names of the letters E and H.

Materials
Needed

  • *Letter E card
  • *Letter H card
  • Book of your choice for this week’s repeated reading
  • Chart paper
  • Marker
    *Printables provided

Key
Concepts

New:

  • 1–2 words (see Be Prepared)

Be Prepared: This is the first of three repeated readings of a book with children. Today’s reading focuses on children’s understanding of basic information presented in the book. In advance of the session, identify all novel words in the book you intend to define for children across three days of reading the book. Select one or two important words to define for children today, especially words that are essential to understanding the book. See the Language/Literacy section of the ELM User Guide: 3–5 Years for additional information. Write the following at the top of the chart paper: Words We Understand.

BEGIN:

Large Letter H CardLarge Letter E Card
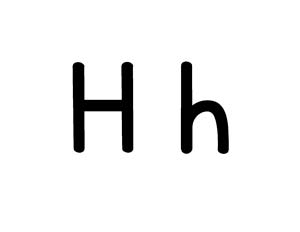
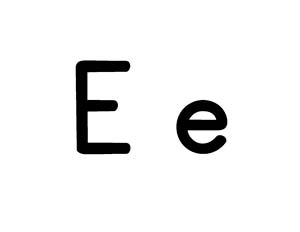
[Display the letter E card and the letter H card.]

  • What are the names of these letters?
  • Pop up if you have the letter E in your name!
  • Pop up if you have the letter H in your name!
EXPLAIN:

Now let’s read a book!

[See Week 3, Day 1 of Language/Literacy for a description and examples of how to approach today’s book reading. Key aspects are summarized below:

  • Display book cover and encourage children to discuss what the book might be about.
  • Explain that reading a book is a good way to learn new words. We will talk about some words each time we read the book this week. Remind children of the Words We Understand chart.
  • Read title of book as you point to each word. Point to and say the names of the author and illustrator.
  • Introduce and provide child-friendly descriptions of two novel words included in today’s book. Write words on the chart as you point to and say each again.
  • Point to the first text word and explain this is where we begin reading the book. Read the book verbatim. Pause to discuss words, events, or characters that seem confusing to children. Point to and describe illustrations directly related to book text.
  • After reading the book, engage children in recalling main parts of the book and novel words emphasized today:
    • What is our book about?
    • Who were the main characters?
    • What happened first? What happened next?
  • Engage children in a brief discussion of novel words emphasized today. Display and discuss book pictures that pertain to each word.
    • What does each word mean?
    • How was each word used in today’s book?]
Week 23:
Day 1

Counting Things

Mathematics

Large Group

Skill and Goal

Number knowledge
Children will strengthen their understanding that each numeral on a number list is one more than the numeral before it.

Materials
Needed

  • *Large numeral cards 1–10
  • 55 Unifix® cubes of the same color
    *Printables provided

Key
Concepts

Review:

  • Number list

Optional
Reading

  • Ten Red Apples by Pat Hutchins

BEGIN:

Let’s count our 10 fingers. We can pretend our fingers are caterpillars. Each time we count a finger, let’s make it wiggle like a caterpillar!

[Lead the children in counting and wiggling each of their 10 fingers.]

EXPLAIN:

[Line up large numeral cards in order from 1–10 as you say each numeral.]

Let’s look at our number cards. They are lined up like numbers on a number list. Remember, a number list is a list of numbers from 1–10. We know that when we see our numbers lined up in order, we can find the number after another number. If a number comes right after another number, it is the next number on the number list.

Let’s try to find the number after another number. Remember, the number that comes right after another number is one more than the first number.

ACT:

[Point to the numeral you mention in the following questions:]

  • What number comes after number four?
  • What number comes after number eight?
EXPLAIN:

Let’s look at our numbers again. This time we are going to stack cubes in front of each number. Let’s stack the number of cubes that the number on our card says.

ASK:
  • How many cubes do we put in front of number one? (one)
  • How about number two?
ACT:

[Stack cubes in front of each numeral. Encourage children to count the cubes and invite volunteer children to stack them. Count again each cube as it is stacked. The intent is for children to see how each stack increases as you move down the line from 1–10.]

EXPLAIN:

Our stacks get bigger as we move from 1 to 10 on our number line. Each number is one more than the number before it. Each stack has one more cube than the stack before it.

ASK:
  • There is one cube in front of our number one card. If we add one more cube, how many cubes do we have? (two cubes; two is one more than one)
  • How many cubes will we have if we add one more cube to our stack of two cubes? (three cubes; three is one more than two)
RECAP:

When we move down the line from 1–10, each number after another number is one more. Let’s count our 10 fingers again and wiggle them like caterpillars as we count!

Scaffolding tips

Scaffolding Tips

Extra support

  • Make sure stacks of cubes are close to each other in front of their respective numeral.
  • When you ask the “one more” questions, remove the numeral cards if they make it hard for the children to focus on the cubes. Another option is to add a cube and lead children in counting the cubes.

Enrichment

  • Ask children to answer the question, “What is two more than one?” If children correctly answer the question, ask several more similar questions. If children seem uncertain about how to answer the question, show them a number list and point to the number one. Help children count two more than one.
Mathematics

Center Activity

Provide *small numeral cards from 1–10 and Unifix® cubes. Invite children to stack the number of cubes that corresponds to the numeral on the card and place the stack under each numeral card.
*Printables provided

Family Child Care

Family Child Care

Invite children to use pieces of yarn as caterpillars to practice finding the number that is one more. Example: Give each child a set of five “caterpillars” and ask how many caterpillars they would have if they had one more. Continue with different groups of “caterpillars.” Invite school-age children to write a story about caterpillars. Encourage children to include the concept of “one more” in their story. Example: Three caterpillars were playing and one more caterpillar joined them. Encourage school-age children to share their story with younger children as younger children use their “caterpillars” to act out the story.

Week 23:
Day 1

Paying Attention

Self-Regulation

Large Group

Skill and Goal

Concentrate
Children will strengthen their understanding of how to use yoga to concentrate on their breathing and bodies.

Materials
Needed

  • Squeeze balls —1 per child
  • The ABCs of Yoga for Kids by Teresa Power
  • Yoga mats—1 per child (see Be Prepared)

Key
Concepts

Review:

  • Concentrate
  • Yoga
  • Pose

Be Prepared: Today’s activity will involve children trying two yoga poses. If possible, provide children with yoga mats.

BEGIN:

Let’s have some quiet time together so we can concentrate on our breathing and body. This will help our mind to calm down and help us with our self-control.

ASK:

What does it mean to concentrate? (to pay close attention to something)

EXPLAIN:

Today each of us will use a squeeze ball again to concentrate on our breathing and body. We will pretend the ball is an orange in our hand.

ACT:

[Give each child a squeeze ball.

Spread out children so each child has personal space. Ask children to sit and place their squeeze ball between their legs. When all children are arranged, turn out the lights in the classroom.]

Let’s begin by concentrating on our breathing. As we breathe in and out, let’s put our hand on our stomach to feel how it moves as we breathe. Let’s practice breathing while feeling our stomach move in and out.

Let’s take a deep breath.

In, 1, 2, 3, out, 1, 2, 3.

If you want you can close your eyes to help you relax.

Breathe in through your nose and out through your mouth.

In, 1, 2, 3, out, 1, 2, 3.

In, 1, 2, 3, out, 1, 2, 3.

When you breathe in, bring the air all the way down into your stomach.

In, 1, 2, 3, out, 1, 2, 3.

Your hand on your stomach should move up and down as you breathe.

In, 1, 2, 3, out, 1, 2, 3.

Keep breathing in slowly and breathing out slowly.

Feel your body starting to relax. Your eyes are feeling heavier and heavier as you keep breathing all the way into your stomach.

In, 1, 2, 3, out, 1, 2, 3.

Now we are going to focus on our hands and arms. Pick up your squeeze ball and hold it in your hand. Let’s pretend the squeeze ball is an orange. Pretend you are going to squeeze the orange to make orange juice. Tighten your fist as much as possible. Pretend you are squeezing the orange as hard as you can. Okay, there’s no more juice left in the orange. Relax your hands and place your squeeze ball between your legs.

Wow! Here comes a beautiful butterfly. He’s coming over to you. He’s flying around your head. Oh! He landed on your nose. Don’t touch our imaginary butterfly with your hands, because we might hurt him. Instead try to get the butterfly to move off of your nose by scrunching up your nose and face.

Squeeze your face up and move your nose around. Wrinkle your face up really hard. Now, relax. Our imaginary butterfly flew away. Feel the muscles in your face relax.

Now just relax and focus on how your body feels. Your face was tight, but now it’s relaxed. Your fists were tight, but now your hands feel open and free. Your stomach is now relaxed. Your whole body feels relaxed.

Now we will let go of our thoughts about how our body feels. Let’s pretend we are putting our thoughts on a big cloud in the sky. Let’s imagine we are watching our thoughts float away on a big cloud so our mind is quiet. Now we can think about our breathing again. Let’s breathe together again while we feel our stomachs go in and out.

[Gather children’s squeeze balls and place them to the side.]

EXPLAIN:

Let’s use some of our quiet time to practice some yoga. Remember, when people do yoga they concentrate on their breathing while stretching their bodies into different poses.

Let’s do the yoga poses we learned several weeks ago. We know that a pose is a way of holding our body. Here are the two yoga poses we have done.

ACT:

The ABCs of Yoga for Kids
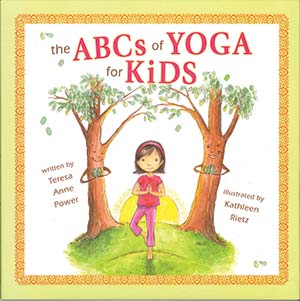
[Display photos in the book of yoga poses done in Week 14, Day 1. Invite children to try each pose. Demonstrate each. Encourage children to take three deep breaths as they hold each pose.]

Now let’s look at the pictures of other poses in our book about yoga. We will try some different yoga poses in the book and concentrate on our breathing while we do them.

[Choose two poses from the book to demonstrate to children. Read sections of the book that focus on the two poses. Discuss how the child’s body is posed in each picture. Example: “This is called the cow pose. How does the boy’s body look like a cow?”

Show children the picture of the first chosen pose from the book. Demonstrate the pose and then invite children to try it. Remind children to take three deep breaths as they hold the pose. Repeat the pose with three deep breaths. Follow the steps listed above with the second pose selected from the book.]

RECAP:

We are learning to calm our minds and use good self-control by concentrating on our breathing and our bodies. We did some yoga poses. Yoga helps us concentrate on our breathing while stretching our bodies. Which yoga pose helped you the most in calming your mind?

Scaffolding tips

Scaffolding Tips

Extra support

  • If children have difficulty with the yoga poses you demonstrate, help by gently placing their bodies in the desired position.

Enrichment

  • If children are comfortably holding a pose while taking three deep breaths, invite them to take more deep breaths (up to five, if they wish).
  • Invite children to demonstrate a pose in the book. Encourage others to try the pose also.
Self-Regulation

Center Activity

Place one or two yoga mats in an area of the room plus pictures (from the book) of the two yoga poses practiced in today’s activity. Also encourage children to practice poses done previously (Week 11, Day 1 and Week 14, Day 1). If you do not have access to yoga mats, use a blanket. Play quiet, peaceful music and invite children to practice the poses.

Family Child Care

Family Child Care

Invite children in your setting to do partner yoga. Encourage one child to do a yoga pose and the other child to mimic the pose of the first child. Encourage children to take turns being the first to do a yoga pose. Provide The ABCs of Yoga for Kids by Teresa Power for children to use as a reference.

Week 23:
Day 1

Exploring Life Cycles

Science

Large Group

Skill and Goal

Knowledge of life cycles
Children will understand basic characteristics of a bean plant’s life cycle.

Materials
Needed

  • *4 pictures as shown
    *Printables provided

Key
Concepts

New:

  • Seedling
  • Bean pods

Review:

  • Plant

Also
Promotes

  • Physical / Health

Optional
Reading

  • One Bean by Anne Rockwell

BEGIN:

We have learned about the life cycles of dogs, cats, chickens, penguins, frogs, and butterflies. All of these are animals.

EXPLAIN:

Today we will learn about the life cycle of a bean plant. We know that a plant is a living thing that grows in soil or water.

ASK:
  • Have you ever helped your family grow beans?
  • What did you (or your family) do?
EXPLAIN:

[Display pictures of the four stages in order, pointing to each picture as you describe the stage it shows.]

  • A plant begins its life as a seed. The seed grows roots when it is planted. The roots get nutrients and water from the soil. Then a small plant begins to grow. It is called a seedling.
  • A seedling is a young plant. It is the second stage of a plant’s life cycle. The seedling needs light (sun), water, and nutrients to grow. The seedling grows flowers when it gets bigger.
  • The flowers are the third stage. The flowers become bean pods.
  • Bean pods are the last stage of a bean plant’s life cycle. The bean pods hold seeds that can be eaten. Beans are healthy foods. Bean seeds also can be planted so new bean plants can grow. The life cycle begins again when bean seeds are planted. The bean pods can be used to help make different kinds of medicines.
  • It takes about two or three months for a bean seed to go through each stage of its life cycle.

Let’s mix up our pictures of a bean plant life cycle. We will see if we can put the stages in the correct order.

ACT:

[Put the four pictures in a wrong order. Engage children in a discussion of the random order. Promote children’s understandings of each stage. Examples: “Our first picture shows a seedling. Is this the first stage of a bean’s life cycle? Why not? What happens first? Where do we put our picture of a seedling? Why?”]

RECAP:

Today we learned about the four stages in the life cycle of a bean plant. Have you ever eaten beans? What happens if a bean seed is planted? (grows more beans)

Scaffolding tips

Scaffolding Tips

Extra support

  • Children may benefit from a brief review of information and pictures presented in prior activity plans on plants (Science Weeks 12 and 15).

Enrichment

  • Ask children to think of other living things that grow from seeds. (flowers, fruits, vegetables)
Science

Center Activity

Supply *bean life cycle sequencing cards. Encourage children to put them in the correct sequence.
*Printables provided

Family Child Care

Family Child Care

Pair older children with younger children as they draw pictures of each stage of the life cycle of a bean plant in their science journals. Encourage pairs to discuss each stage.